Feeling much better today, not fully 100% but well enough to get a lot done on the truck. I want and took the throwout bearing out of the Quarter Master Inc. unit (QMI for short). The bearing has a service hole in it so you can put a red tube from a spray can in the hole and spray solvent. I used BrakeClean spray to rinse it out and then I packed lithium synthetic grease in and out of the bearing. It spins like near new and the cleaning saved me from buying another spendy bearing.
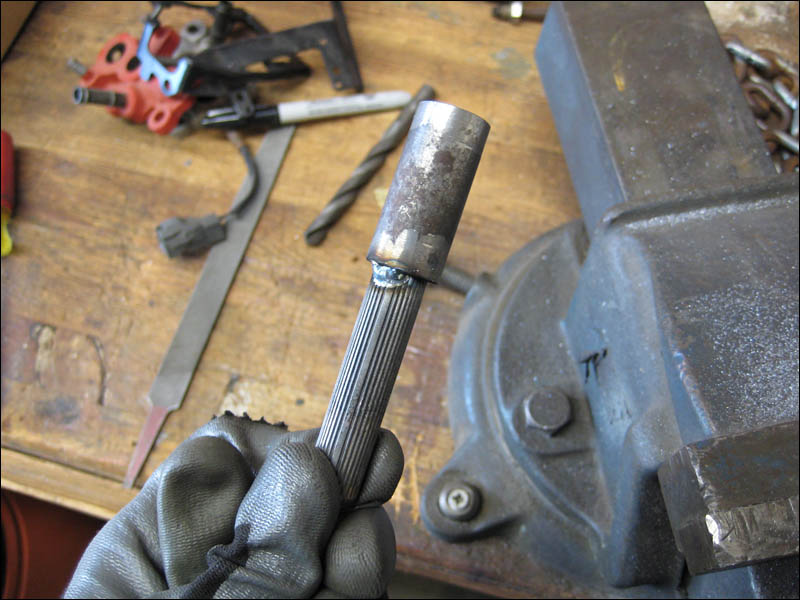
Then I went to work to button up the steering shaft. I'm not going to use more than one universal joint like some others have suggested to circumvent the header. They are really expensive and not the proper way to take care of the fitment issues. I extended the shaft a bit to compensate for the body lift as I mentioned before. Here I shaved it down and welded a section of tube to it for an extension.
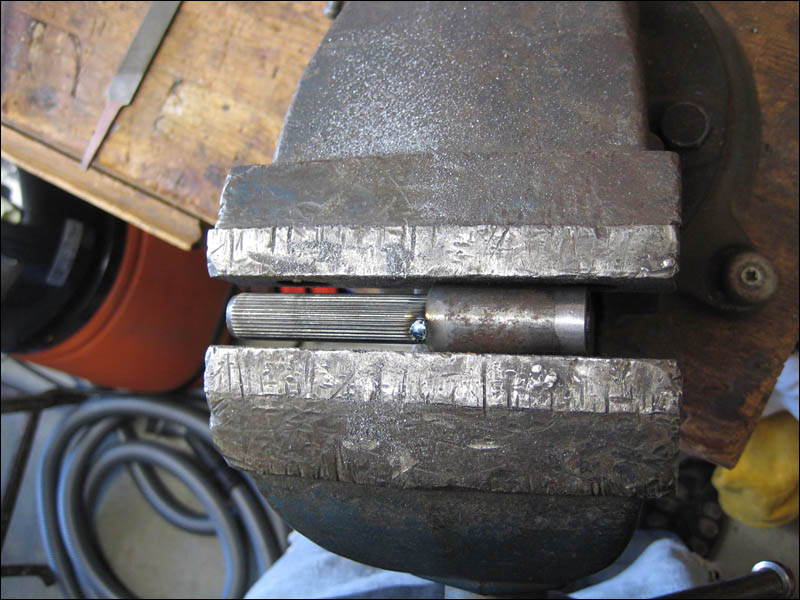
As you can see it's hard to make certain that the shaft is centered in the extension just by looking at it. So I put it in the vise so that I could have a better reference point to check the alignment. The picture simply shows a better line to align the shaft before I welded it. I used a screwdriver to wedge in there to adjust the shaft straight.
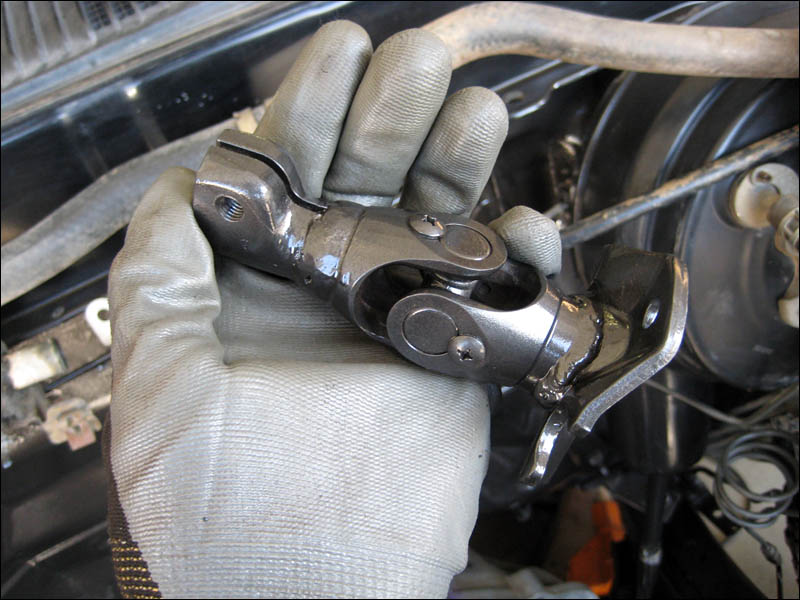
So then I cleaned and prepped the universal extension and connecting piece for the steering. Everything welded up just fine. I just tacked the shaft extension on the top side so that I could drive it to test if the steering wheel goes straight. The steering wheel connects with a spline but it's not fine enough to make slight adjustments to the steering wheel position. By testing out the alignment before fully welding it I can get it exact.
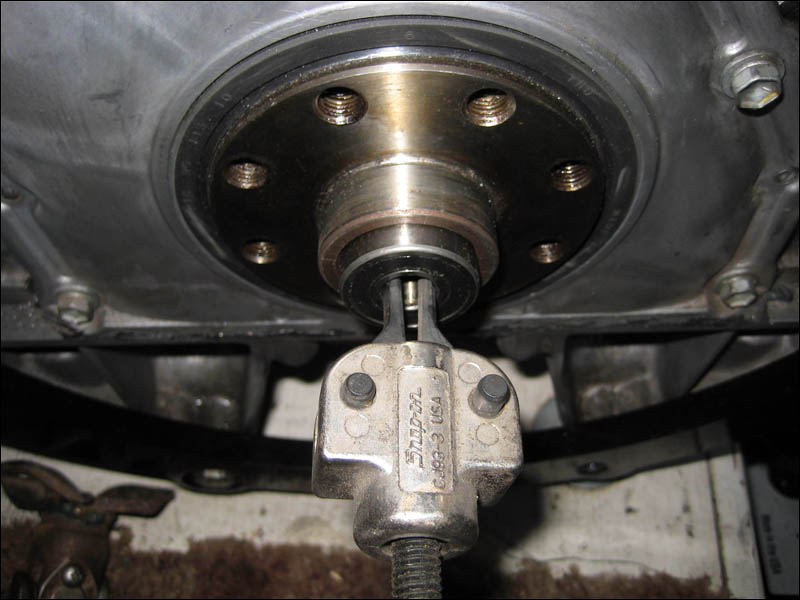
Now for the pilot bearing. I was very happy to find that the pilot bearing straight from my 3RZ engine fits right into the 1UZ! How cool is that? I was lucky enough to locate a Snap-On brand bearing puller and it worked very quickly. The bearing popped right in and I could move on.
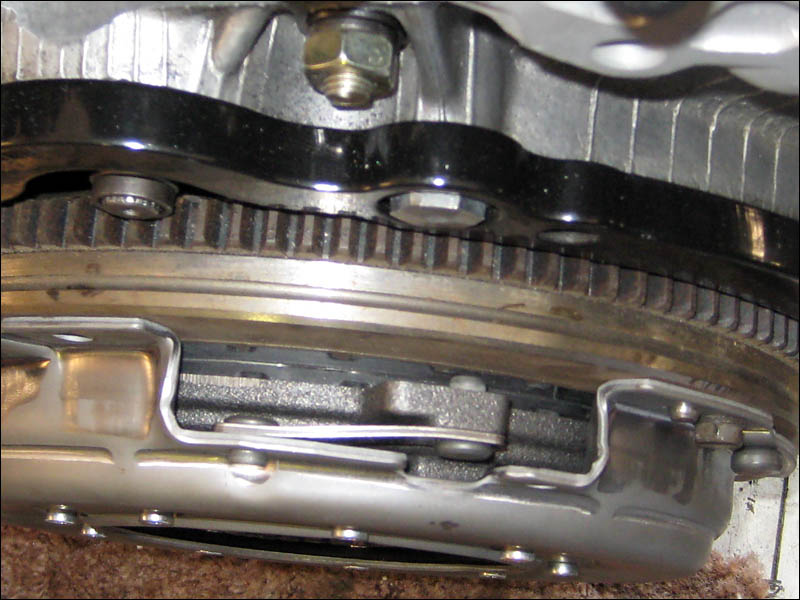
Moving on to the flywheel and clutch here is a picture of things fitted together. The ring gear is recessed behind my adapter just a little so this gives me the impression that I will have to machine down the bellhousing so that the transmission shaft will reach the pilot bearing appropriately.
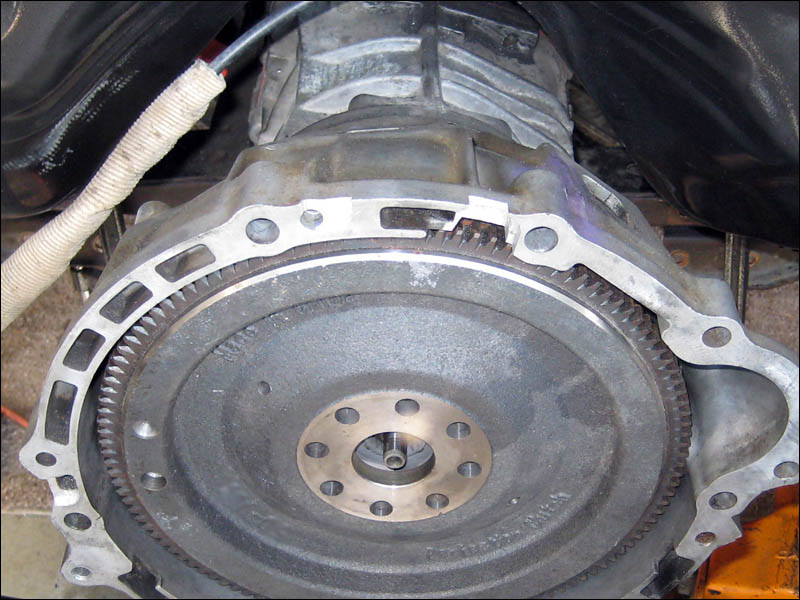
I jumped in the engine bay of the Tacoma with the flywheel/ clutch assembly to install on the transmission shaft. I put the QMI throwout in there and then the assembly. This clearly shows that the starter gear will be recessed which means the bellhousing will have to be shortened to match. I won't be able to just machine the engine side of the bellhousing. Seeing the difference in depth, I'll have to remove some material from the transmission side of the bellhousing as well.
Comparing the 4 cyl engine and the 8 I see that the 4 cyl flywheel protrudes out slightly further than the 8. Great that means even more material I'll need to remove from the bellhousing. Although I will just have to get close, I'll still be putting the housing on the mill tomorrow and spending some quality time.
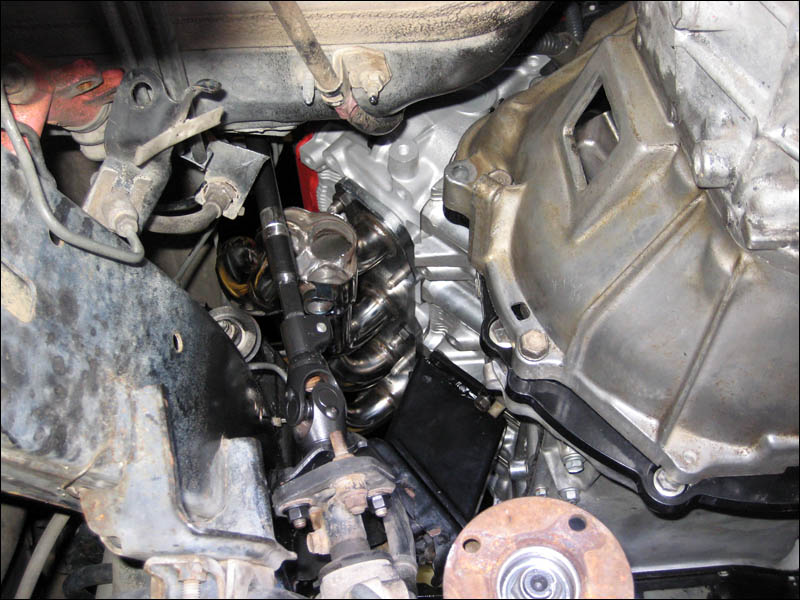
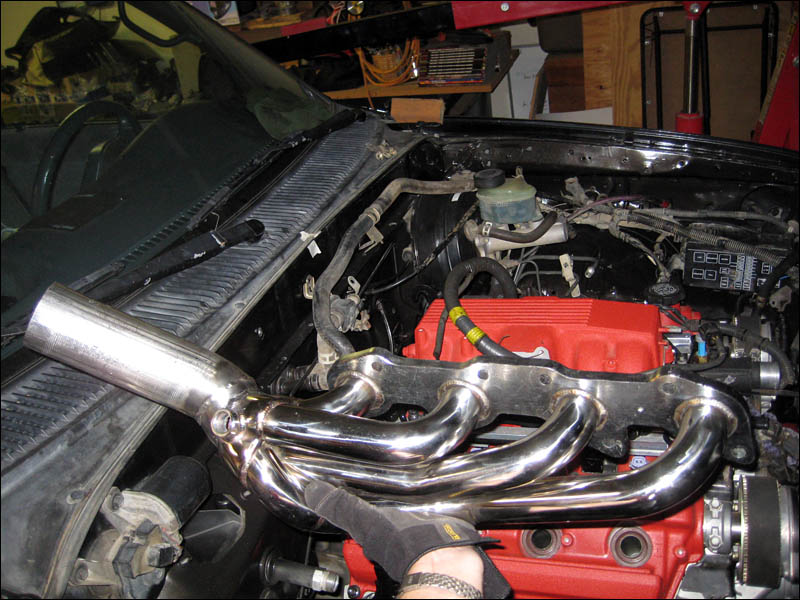
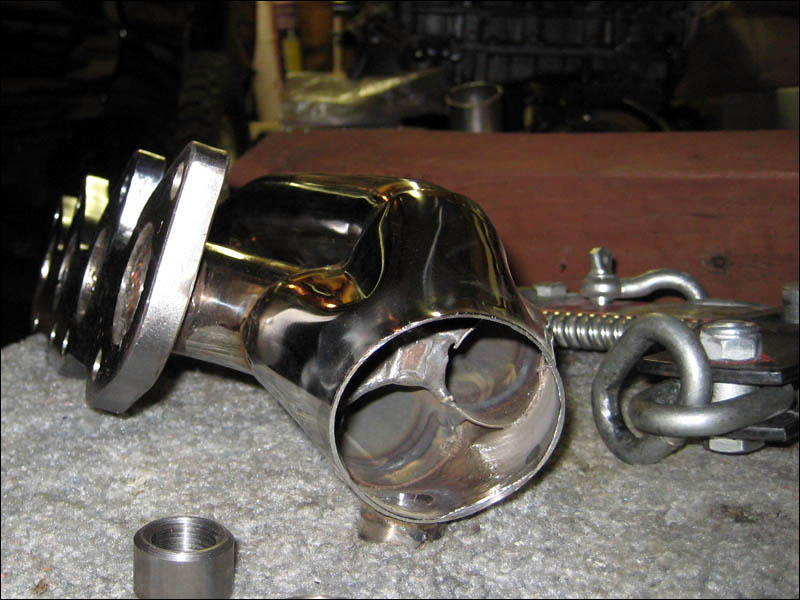
Ahhh it's nice to see the engine mounts in and working like advertised. All the measuring and pulling hair out paid off. I seem to have a ton of space where the oil filter is located. I'm hoping that I won't have to use the adapter for the oil filter location. Here in this picture we you can also see how much of a "S" shaped bend I'll have to cut and weld onto the header collector. I got a piece of stainless steel flared out a little at a muffler shop so that I can put it in the collector and just form the surround steel to get a good union between the two.
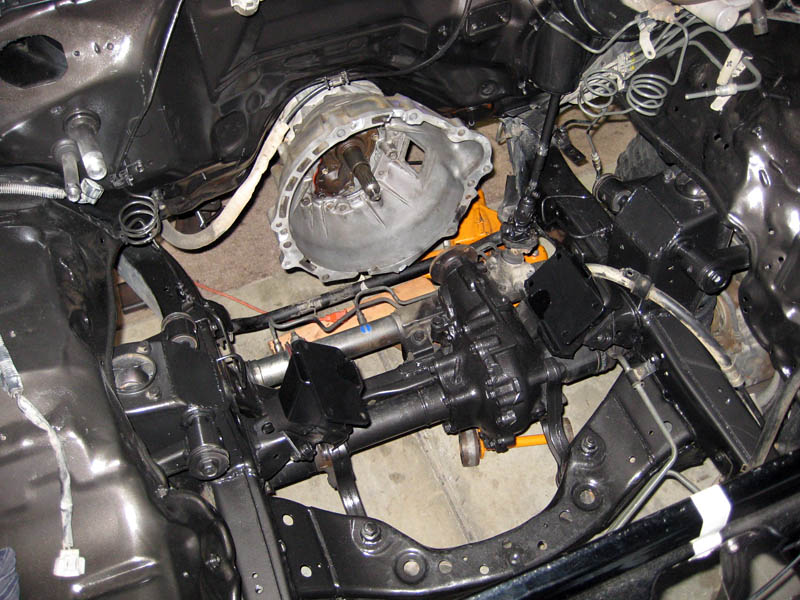
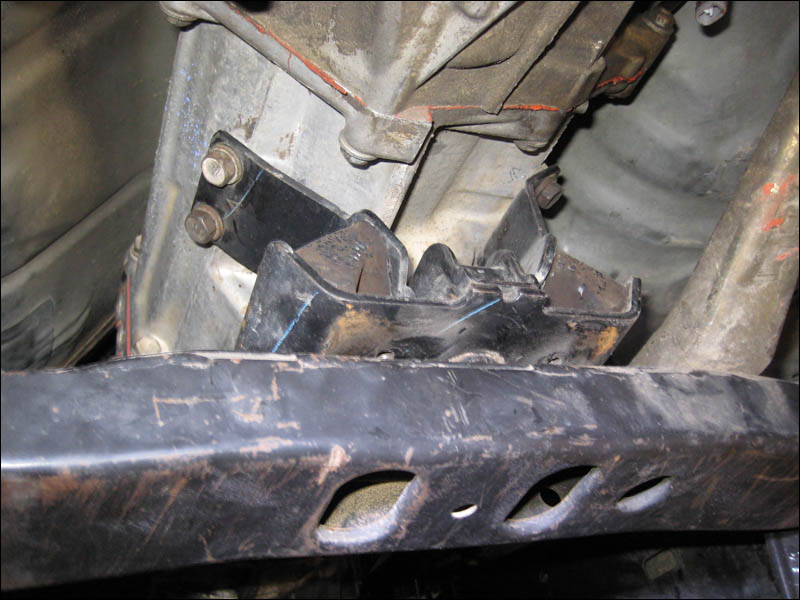
The transmission is in the perfect place, just where I wanted it. I will remove the measured material I have in mine from the bellhouseing which will, in turn, cause the transmission to move forward just enough to line up with the transmission mount. This is a picture of the mount as it sits right now. Then engine is in and once the bellhousing is modified then the transmissions own mount will simply fall into place.
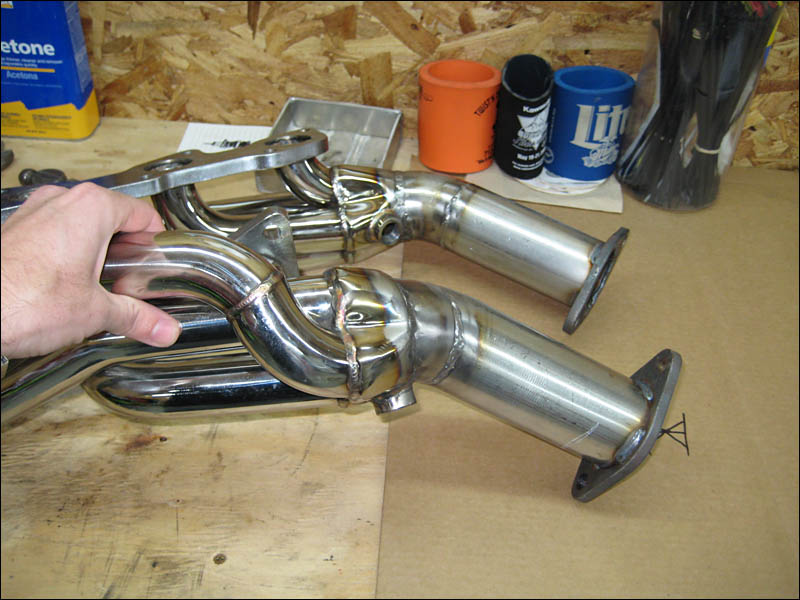
Feeling 90% today. I had to tend to some work this morning but was able to get away at noon to keep the ball rolling on the truck fabrication. I knew the exhaust would be a pain in the butt and I was correct. The headers the I bought we so cheap I am still just so thankful to have them. Cutting them at the collector and replacing the 2.25" with 2.5" is definitely the way to go! What a big difference. I HAD to cut the drivers side to put in a couple bends to get it to clear the steering shaft. That was a tricky little devil but I got it spot on. It was really difficult to arrange and cut the pipe bends to make them mate to give me the exact result I had in my head. Not for rookies that's for sure. I'm sure you have to be somewhat artistically minded as well.
Here is one side all done and ready to race. I got the tip to come up perfectly up through the hood Jesse James style.
Ok I'm kidding that is the drivers side header turned upside down. But it's fun to look at it oriented like that. Here is how it actually will be positioned right side up on the drivers side. Boy and I glad to have it done. It was stressful since I had to cut and tac weld it then take it to my neighbors. Then I cut out the second bent tube and tacked it on and had to take it back to my house then install and make sure it was positioned just how it had to fit. But as you can see it sure bends in quickly right after the header to hug the engine and clear that steering shaft.
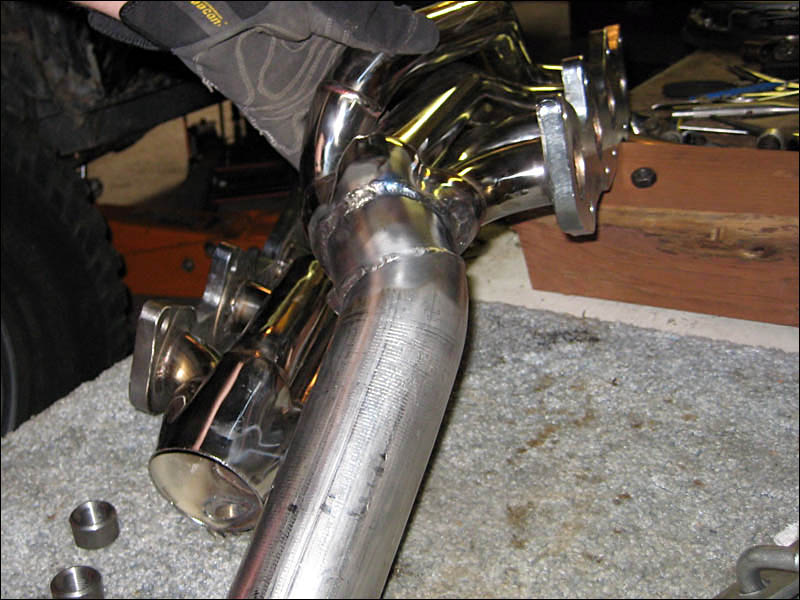
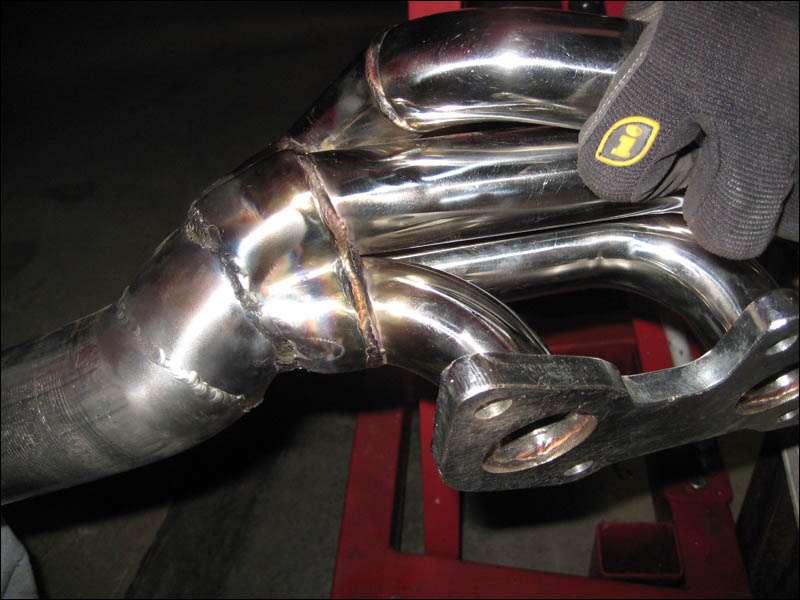
Here we are up close so you can see how I modded mine. I cut the collector to open up a nearly 3" hole. Then I took a short piece of tube that I bent a little to give me the first curve. Then I tacked it in there and heated up the surrounding collector with a torch and molded it to the tubing with a hammer while it was red hot. Then I finished the tig welding. Then the second piece I added went a little smoother since they were from the same piece of stock. Tomorrow if I feel like a perfectionist I can polish out that stainless to match the rest.
To make the other side match I cut the collector to open it up. Then tomorrow I'll install it on the engine and find out exactly what angle I want to weld in the tubing. It would clear before I chopped it but I'll angle it down a little more just to make it symmetrical to the driver's side and when I weld in the new piece it will be angled down straight instead of angled out like it was.
I also picked up a couple bungs to reposition the O2 sensors if I want. The headers I hace locate it right at the collector which might be the correct location but I am not sure about it being mounted from the bottom. I'll have to read the Innovate wideband sensor install guide that I have. I thought the O2 should be located a couple inches down the line but I might be wrong.
Another half day worth of exhaust fab, crossmember creating and and stressful tig welding. I'm pretty tired. Nothing like doing some metal work and then taking the engine in and out of a truck in the middle of it all. We are insane for doing such things and calling it fun. I'm going to skip the X pipe altogether and just run the exhaust back another 2ft to a muffler on each side. I have a very strong feeling that I'll be lengthening the exhaust once I change the cab supports in the near future. I don't even want to spend the time right now if I'm just going to change things later on.
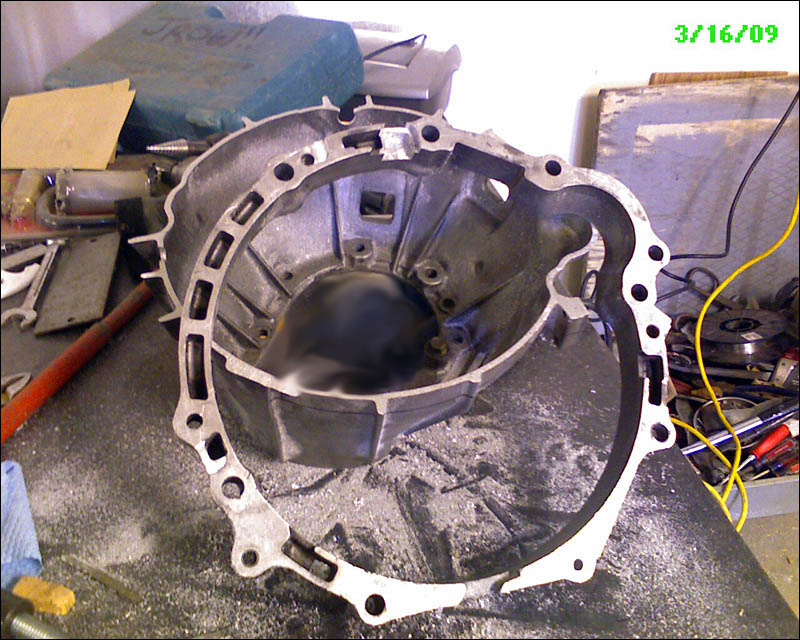
Here is the progress I got done on my bellhousing today. The 1uz-fe is getting that much closer to operating status in the Tacoma. It's close...
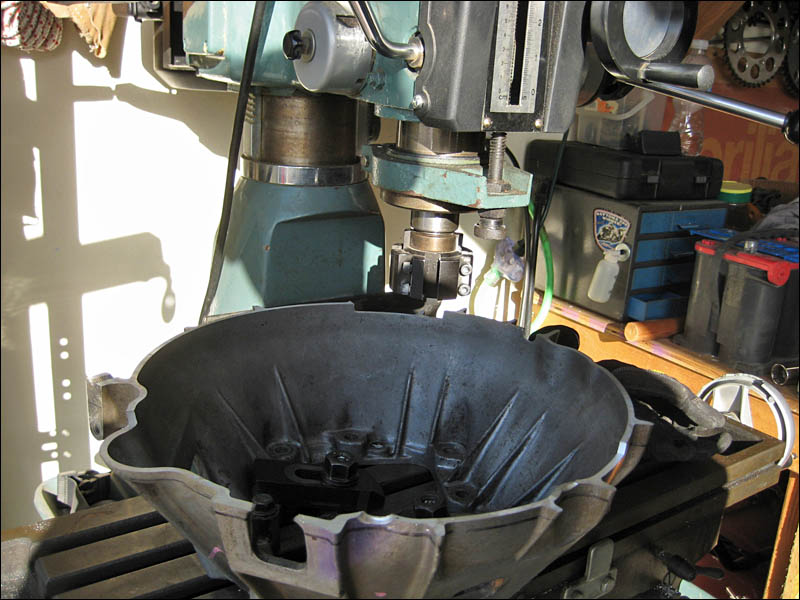
Tomorrow after I get my cutters sharpened on my fly cutter I'll finish milling the surfaces and they will be welded back together if everything goes as planned. I almost finished removing the stock but my cutters just wouldn't last for the duration. Maybe if I had a nice powerfeed Bridgeport they would have made it but my poor little Enco just can't hack it for that long. I've surely saved myself so much money by making things on my own that I've paid for that machine a few times already. Plus I got the Enco verticle mill for a bargain from a friend. Moving the thing was basically part of the deal! hehe. You can't just go and move one of those things! You have to have some heady equipment to load and haul it away.
Here is a picture I took after I vacuumed up the mess it made. I also removed the cutters as I have to take them in to have them sharpened first thing in the morning.
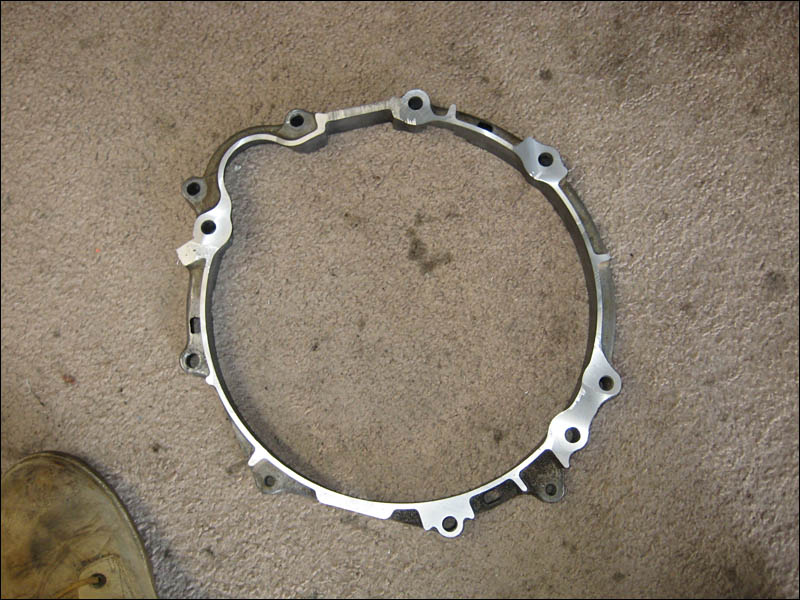
Here is the engine deck plate all machined super flat. Just need to bevel the edges of it for welding stock to fill and it will be stronger than the day it was cast, seriously. I have the help of some serious welding wizards that will be using a couple different welders to ensure a super strong junction. Plus with the material removed it will be even more stout than factory.
To continue on I went and grabbed a roughing endmill to finish removing the desired material. It wasn't as fast but it worked better and was more controlled. If I had turned up the speed it would have went faster but I just didn't want to spend the time to change the belts. Here is a video showing the machine in action finishing up the bell end.
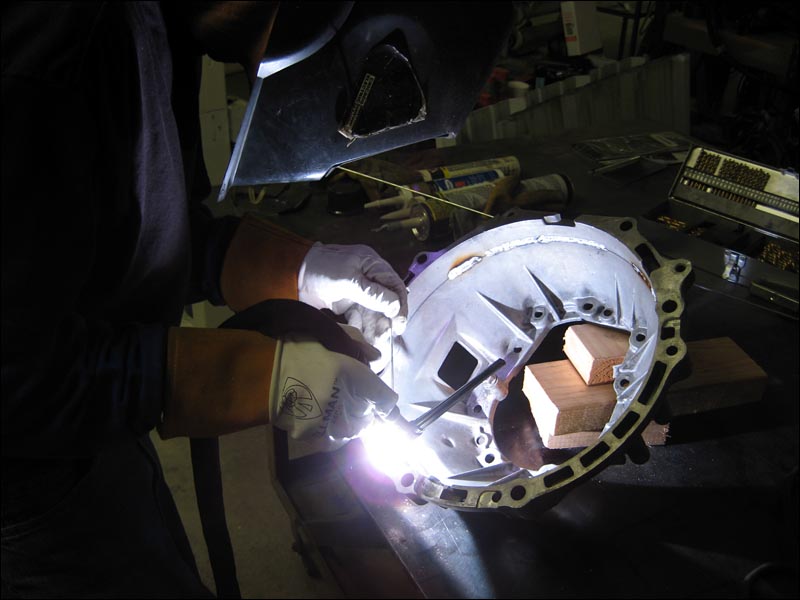
Making more progress. My new modded bellhousing is looking very very strong with the welding we've been doing on it. The water cooling line in the Miller got punctured so my friend welding it up couldn't hold onto the torch anymore. Hopefully soon we'll get a new line and finish it up on the inside and around the outside. After a few tack welds I drove back to install it on the engine/trans just to check the pilot bearing clearance and it is RIGHT on. I measured enough times so I expected it!
Click on the "I AGREE" to watch a short video of the welding in progress: Making the Magic happen:
It's pretty fun using all these tools I've been collecting as well as my friends welders. As long as I'm not on some production line! It get's old once you do it for the 3rd time. It's going to be hard to sleep tonight. I will be making some major progress this weekend now that this will be all done.


 It's going to be hard to sleep tonight. I will be making some major progress this weekend now that this will be all done.