The Toyota 3RZ engine mounts that you see here have more rubber than I would prefer but hey, they were free and I'm not feeling like re-inventing the wheel for the sake of time. Looking at what the Toyota mounts sit on makes me want to redo the whole front end right now. But forget that I just want the engine running for now. Gotta know when to say when.
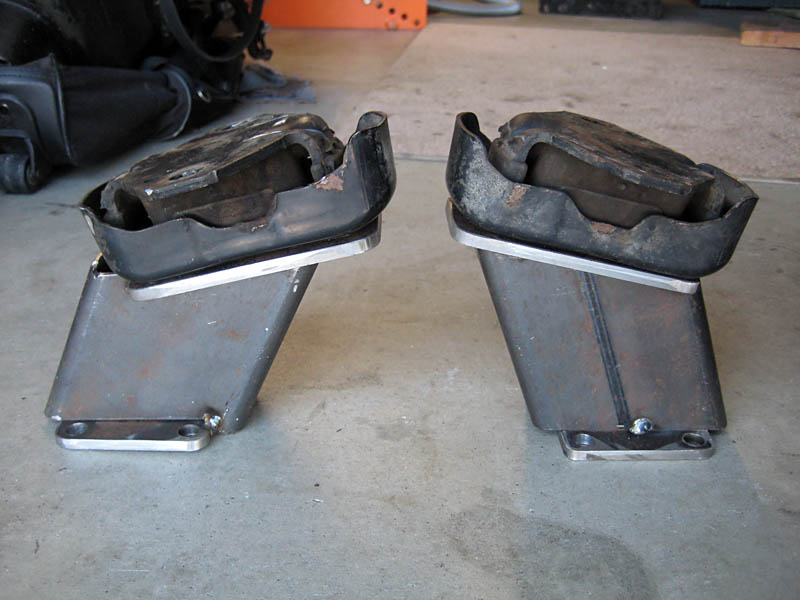
My 3RZ mounts are probably 3 years old and are half worn out I would think. Like I said before I made these mounts strong and easily adaptable to flat poly pads that I can mount on new frame mounts when the time comes. These are angled and cut down to the absolute perfect size that I need to keep the engine exactly where I want it at the exact angle. It took me longer to get the engine to sit where I wanted it than it did to cut and tac weld these mounts. I measure many times as I want the 1UZ engine and W59 transmission to sit exactly where I'm putting it.
Notching the parts that you are making allows you to stack them together where you measured them in the first place. This way the pieces on both sides will all "sit" together in place with just the weight of the engine. It was kind of funny but I made two tac welds to the drivers side mount and on the other side the engines weight simply sandwiched the notched parts together. I then let down the whole engine (bolted to the transmission obviously) on the mounts to double check that it would compress the 3RZ rubber mounts to the height that I wanted. With the whole weight of the engine then resting on the mounts I confirmed that the engine was level and not leaning towards one side. After that, tac weld it a couple times and remove for the finishing touches.
As soon as the welding was done I cut out a couple of holes in the upper side of the engine mount that would allow a socket and extension access to the one nut that holds my new creation onto the factory 3RZ rubber mount. The hole is in the middle of the top plate that faces the engine. It has not structural role and can't be seen once the mount is bolted to the engine. This lets me separate the new mount I made from the 3RZ rubber mount. I removed the rubber mounts and welded up the pieces then left as fast as I could to have them powdercoated black. I'll be picking them up in the morning and placing the engine in the truck to measure my power steering hydraulic lines that I'll have made asap.
So tomorrow:
Pick up coated mounts
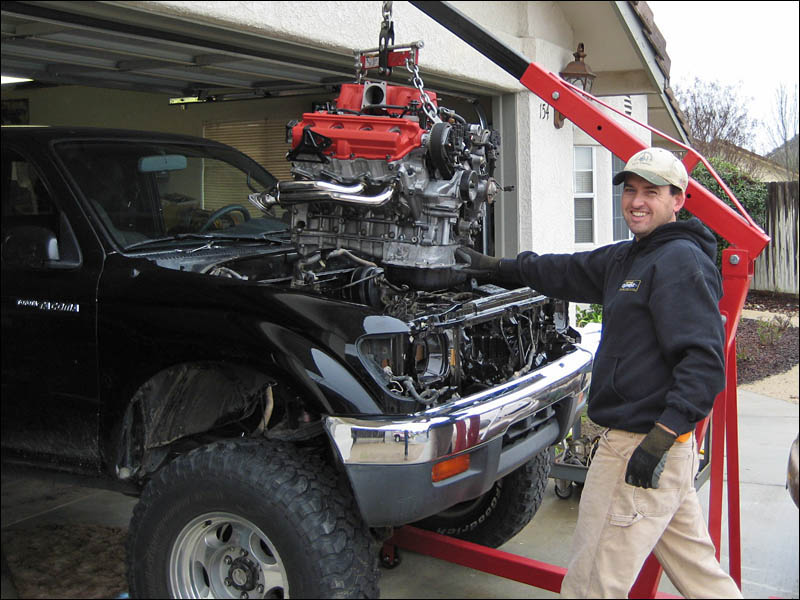
Insert 1UZ into Tacoma
Measure powersteering lines to be made
Fit header (now cut off) and 3" tubing pieces to fit and tac weld around steering shaft
Have buddy weld the stainless header mods up
Get in some quality time and come up with final solution for transmission mount
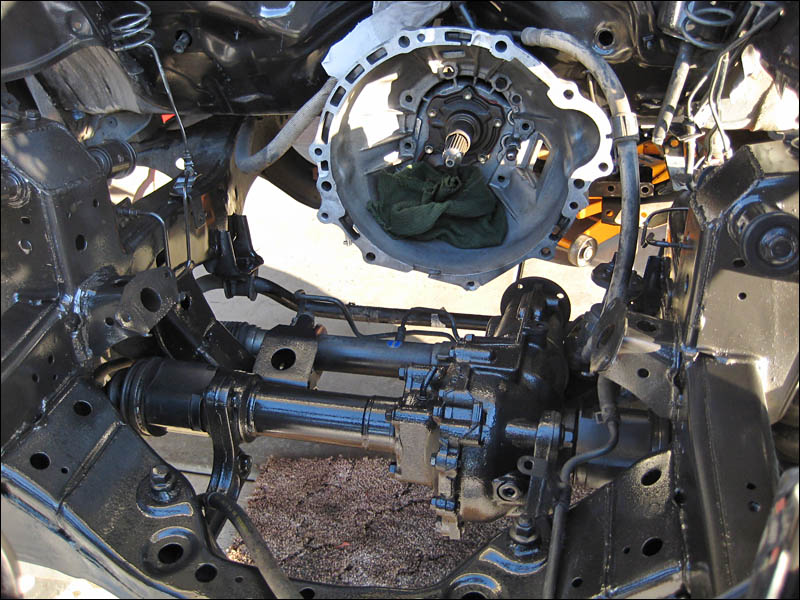
Ahh the transmission mount. All of you Tacoma guys are going to be so jealous of the height of the transmission in relation to the frame. You know how the transfer case and crossmember hangs down? Well my tranny now mounts much higher than that so I can basically cut off the ears that protrude from the frame that the crossmember bolts to.
You know, these things to the left and right in this picture:
Those ears coming out from the frame look so ugly. I could leave them there and make a couple of plates to bolt on the front and back in order to hold the cross member directly on top of it. But what do you think of that? Yeah it's a quick fix and I can just leave it be just for the time being. I want to make a new cross member so badly but that would take a whole day to do it like I want. Ahhhhhh I can't say if I'll do it or not right now. I know, I could EASILY cut them from the bottom of the frame and just trim them allowing me to move them upward in between the frame rails. Alright! Done deal. I can have that done tomorrow.
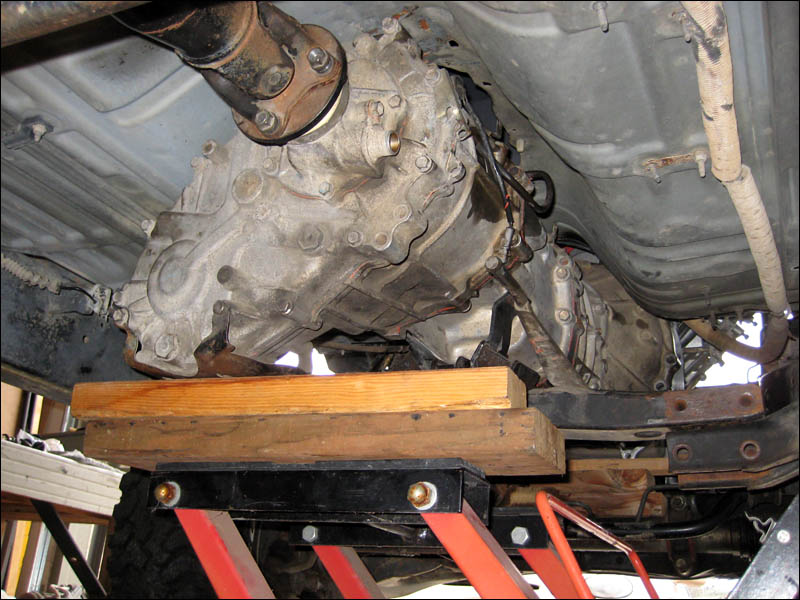
Here is the trans/transfer case mounted where they are going to stay:
Is it going in or out? Make up your mind already!! So much fun I don't even care. I'm focused on finishing so much I forget just how much fun it will be once it's done. =D
Reading my todo list yesterday everyone probably thinks I'm on crack to think I was going to get that much stuff done. I got close, even though I'm sick.
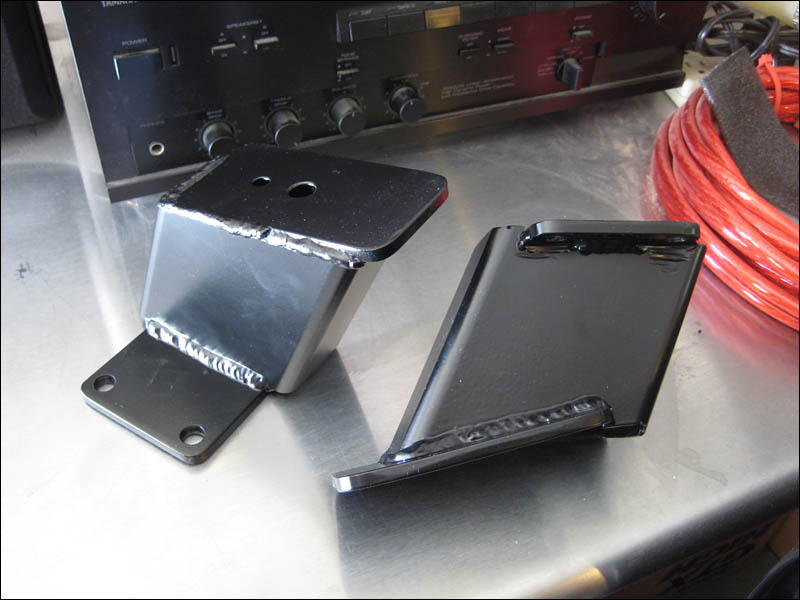
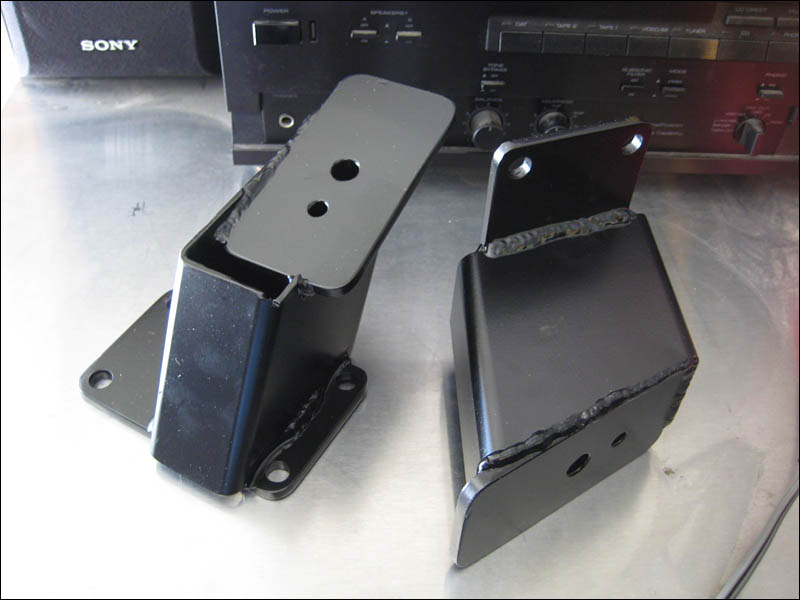
First up today I ran to go pick up my engine mounts from the coating company:
Those bolt holes are really close to the square tubing but I ground down the welds to allow for installation of course:
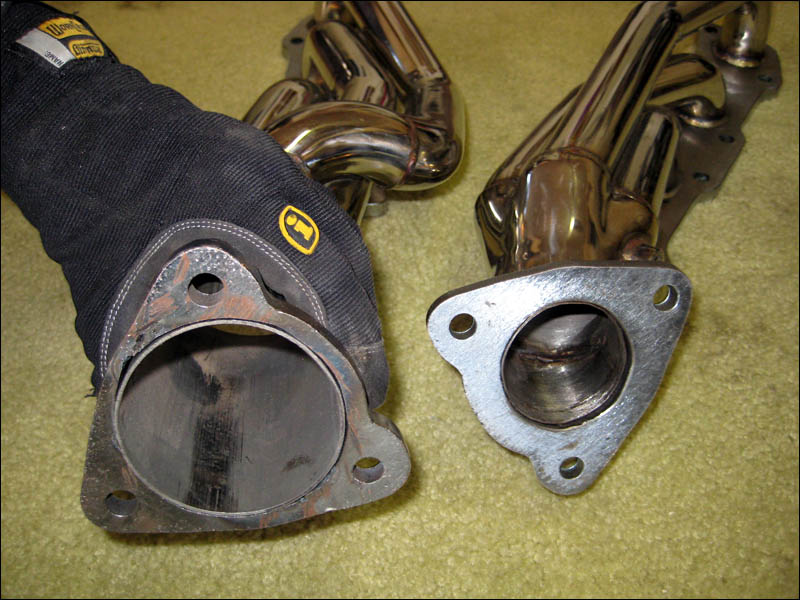
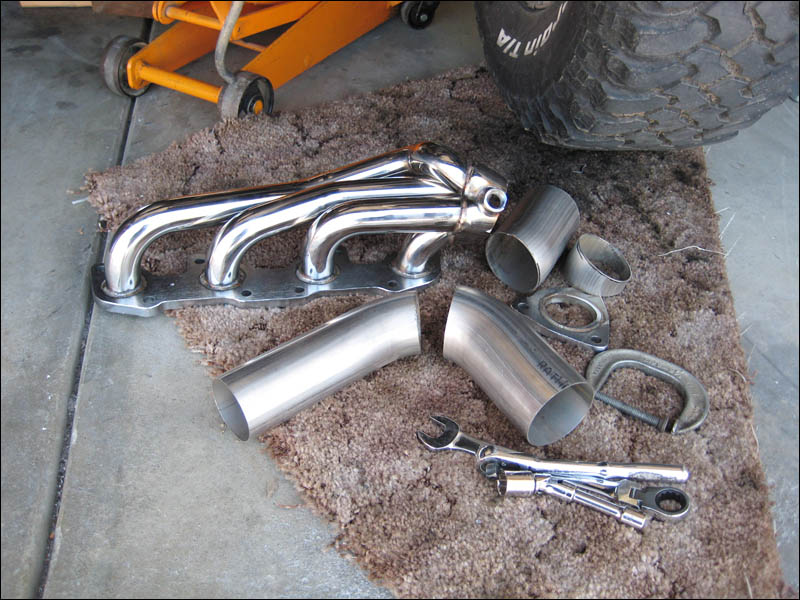
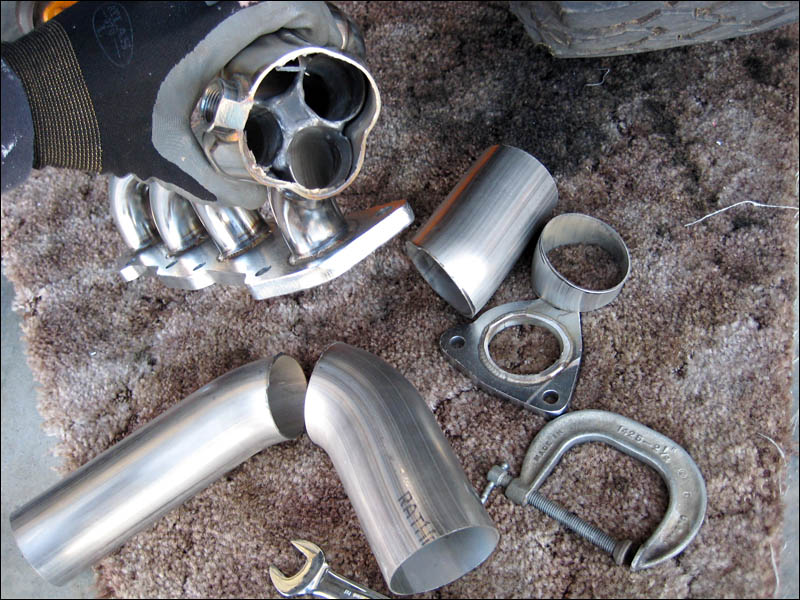
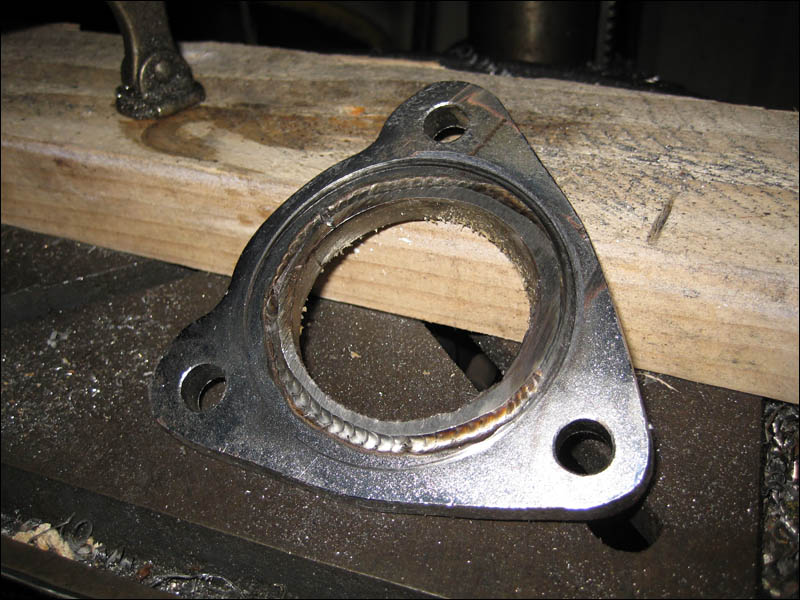
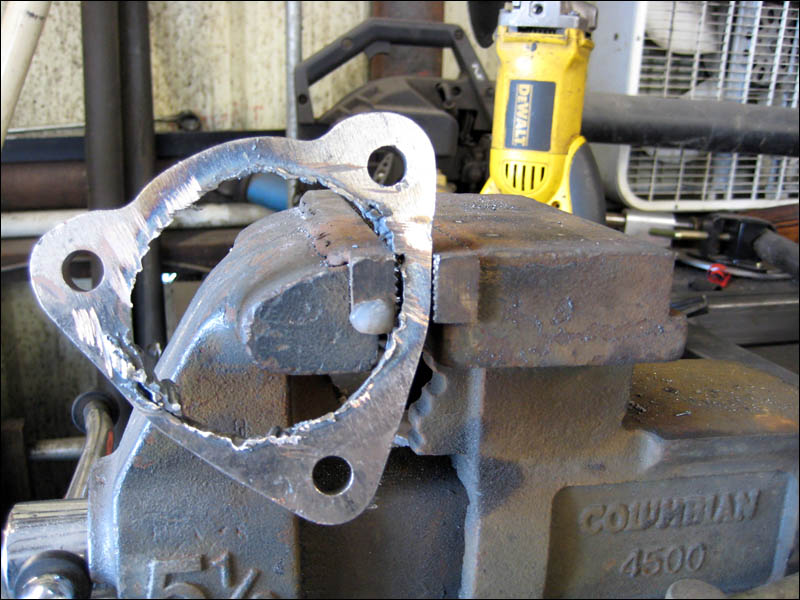
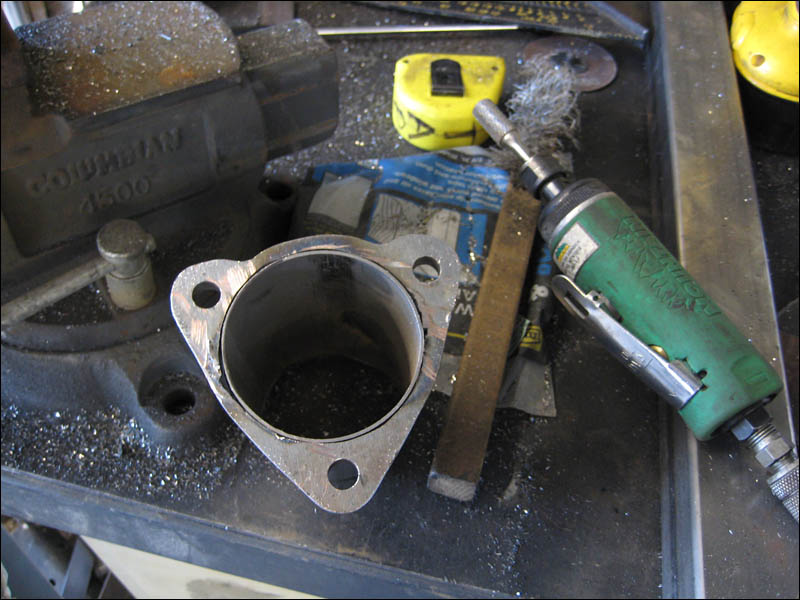
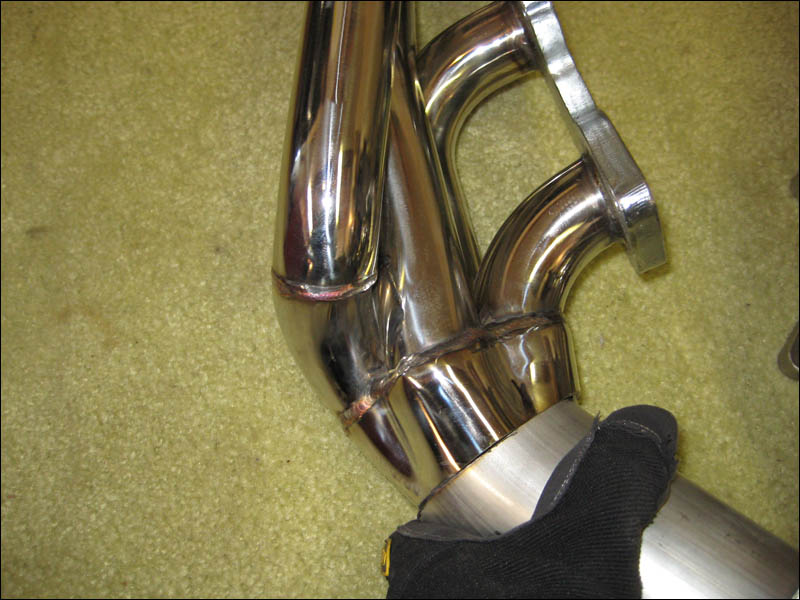
The next good deed on the list was to go cut out my header flange that I cut off from the collector so that I could make some room around the steering shaft. The cut after the collector left a hole 3" in diameter. I put a 2 1/2" tube up to the collector and that didn't come close to filling the hole. So I grabbed a 3" piece of stainless and bingo! 3" exhaust it is!
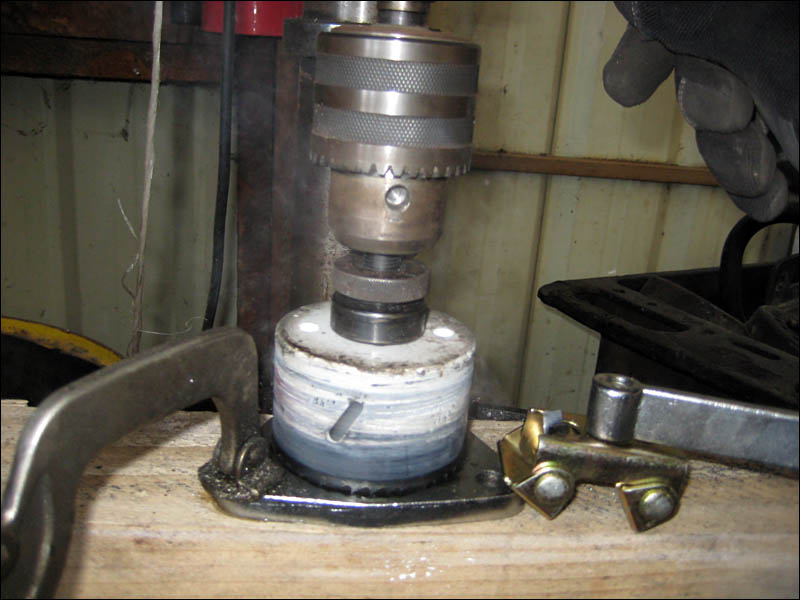
Now to cut a hole in the flange so that I could slip the tube inside of it and weld it. The flanges are so big they are big enough to accommodate luckily. Just to humor a friend of mine at a shop I used his 3" hole saw that he showed to me. I laughed and decided to waste some time just trying it for fun. It was a joke. That steel is SO damn tough. For such cheap eBay headers they sure are strong!! The company that sold them to me really was blowing them out. These are really high quality headers. Yeah the collector isn't the most accurate piece ever made but the welds are amazing and they are true stainless steel with super thick and strong steel flanges.
Just for fun here is a video clip of the feeble attempt at cutting this flange with the hole saw. =] Smokey! The hole saw started to smoke instantly even when I shot some lubricant at it to help:
I probably spent 10 minutes going at it just to see what it would do. I barely was able to score a ring around the cut. There was not any cutting going on at all. It's nice to think that this would have worked though. Ain't happenin though!
So time to quit playing around. I grabbed the plasma cutter and let it loose on this flange. The stainless wouldn't cut at all of course but it provided a nice guide for me to follow all around the perimeter. The stainless did heat up and just turn into molton steel which dripped off as I cut around it. Watch those toes! That stuff was dripping off a little hotter than a wax candle that's for sure.
It looks like a piece of junk but trust me, it's cleans up really nice!
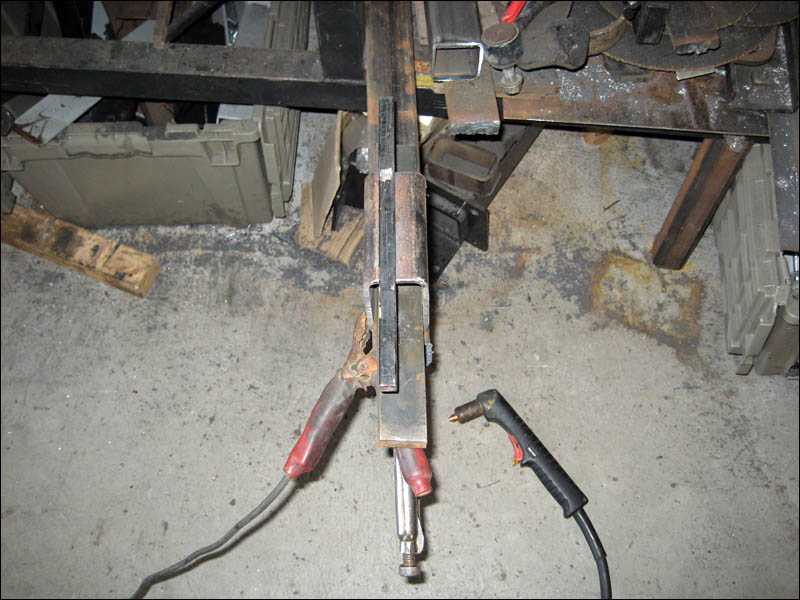
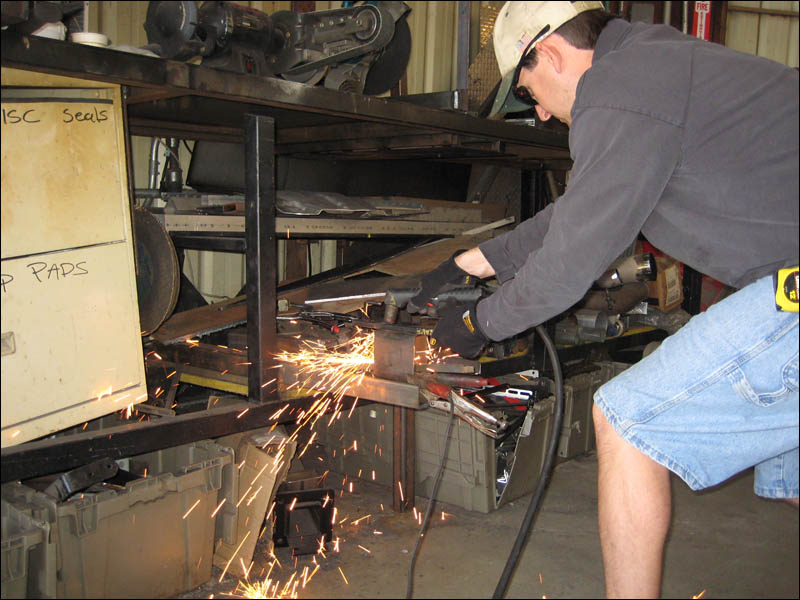
While I was playing around in the steel shop I decided to chop a couple pieces of rectangular tubing for my transmission mounts. Here you can see my guide that I put down long ways down the side of the tubing to run the plasma torch on top of. This allows me to make a perfect line right down the steel.
Plasma cutters are one of the most amazingly convenient tools.Just got to wear eye protection and stand back from the fireworks as best as you can.
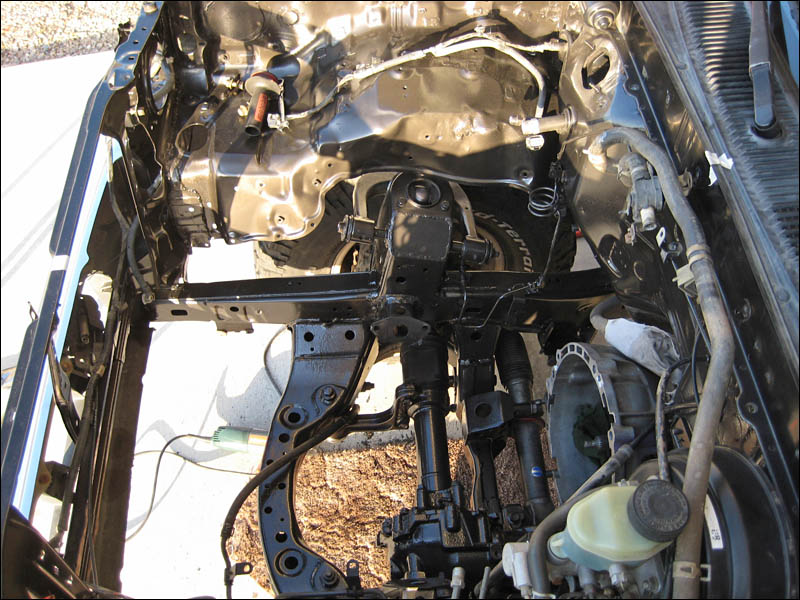
And the last dirty deed I did today was the last of the house cleaning inside the engine bay. I just had to degrease some more and unbolt some of the lines. I also have been annoyed by slag that was clinging to some of the metal around the compartment from the Toyota factory. The grinder mopped up the random slag nice and smooth. Then I went ahead a took advantage of the warm sun by painting the whole thing.
Tomorrow the whole thing will be dried and ready for me to lower the engine in. I can then make the final measurements and fit and tack the tubing for the headers. With the headers and engine mounts & painting down I can start working on the smaller items on the engine swap list.
I've been really sick so I'm moving a bit slower right now.Thank goodness my friends have as much enthusiasm as I do about this project. Here is a donation from a good friend of mine's racing trailer.
One of them even has the correct bearing I need... but it's a little crusty so I am surely ordering a new one tomorrow. I would rather have to buy a bearing than the whole thing. What was also encouraging is that the pilot bearing in my 3RZ seems to be the exact size as the ID of the crank's output shaft. I'm going to pull it out of there tomorrow when I go snag a friends bearing puller. Or maybe I can just go buy one faster and save the swearing I would be doing otherwise.
Looking forward to have this part over and done with. It's going along pretty smoothly.
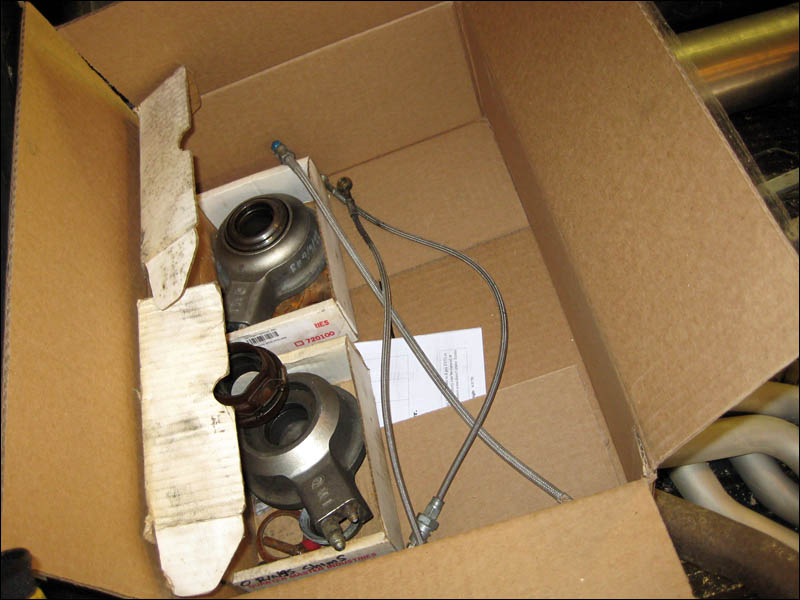
The QMI is a more expensive hydraulic throwout bearing. I'm not exactly sure why but I am very happy to have the ability to service the bearing rollers so easily with it's features. You can also change out the bearing and the diameter of the parts as well. But if you really want one for less money here is a great alternative that people have been very happy with: http://store.summitracing.com/partdetai ... =HRE-82870
I don't see how you can go wrong with the Howe hydraulic throwout bearing. And for half the price I surely would have been using one if I didn't have friends chipping in with the QMI unit.
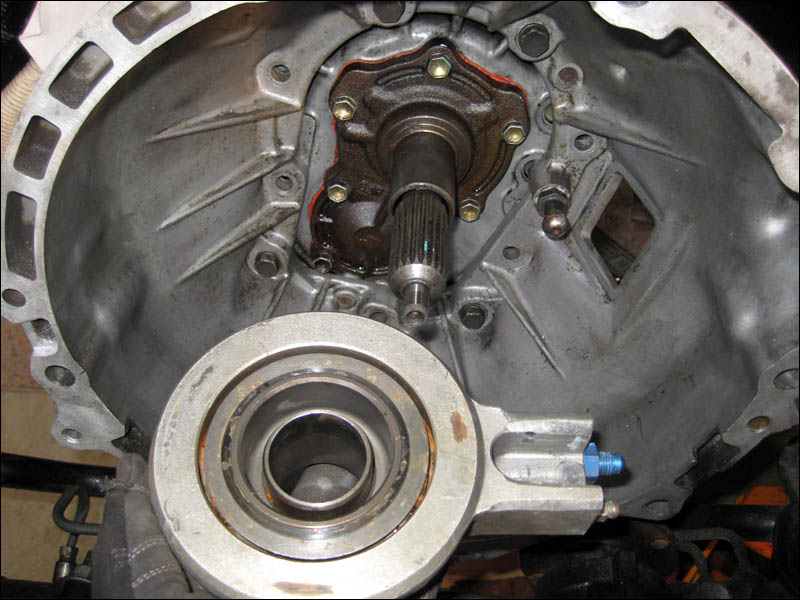
For those of you who want to see what the backside of this hydraulic throwout bearing looks like. It indexes on the pivot for the clutch fork that is there from the factory. Install a shiny new bearuing, hook up the hydraulic lines and I'll be in business.
I'm also going to have a friend flare out some 2.5" tubing for the collector on the header. 3" is a little nuts and I'm not building a drag truck. It would just cost me more money to run the larger stuff and who knows the result.. 2.5" will be perfect. I'll also be switching to a more standard flange that I can just buy a whole set for under $20. I'm done messing around with these whacky custom flanges.
 You know how the transfer case and crossmember hangs down? Well my tranny now mounts much higher than that so I can basically cut off the ears that protrude from the frame that the crossmember bolts to.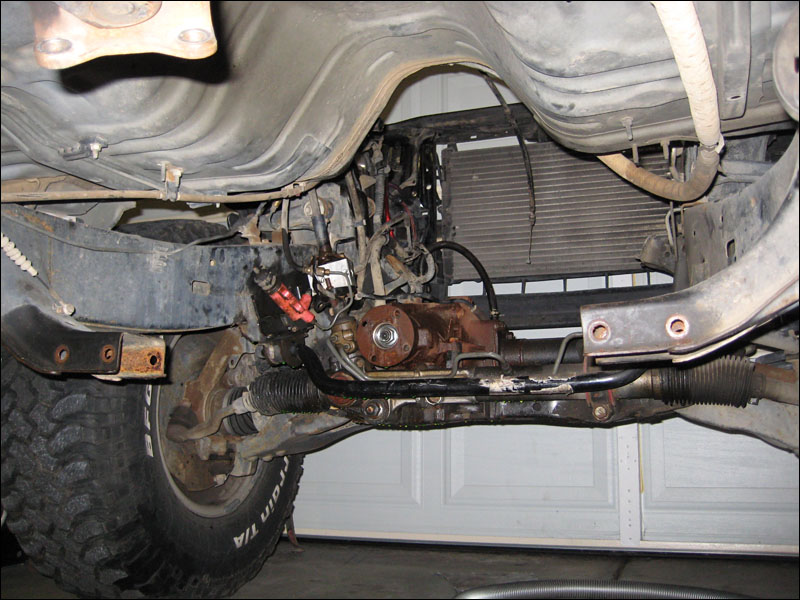

 PITA
PITA