Page 14 of 22
Posted: Fri Oct 02, 2009 1:49 pm
by Smithers
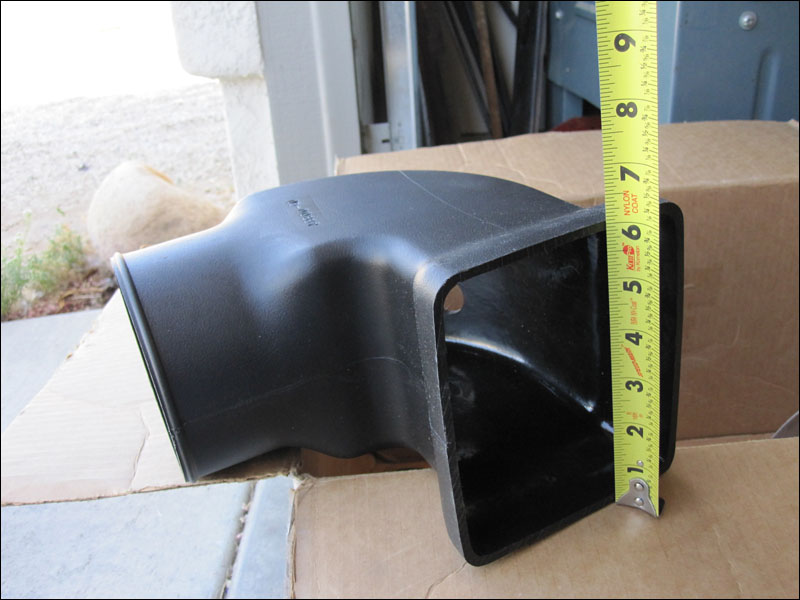
The AFE Offroad Filter kit even came with a handy snorkle!! Woohoo!
Posted: Sat Oct 03, 2009 10:11 pm
by Smithers
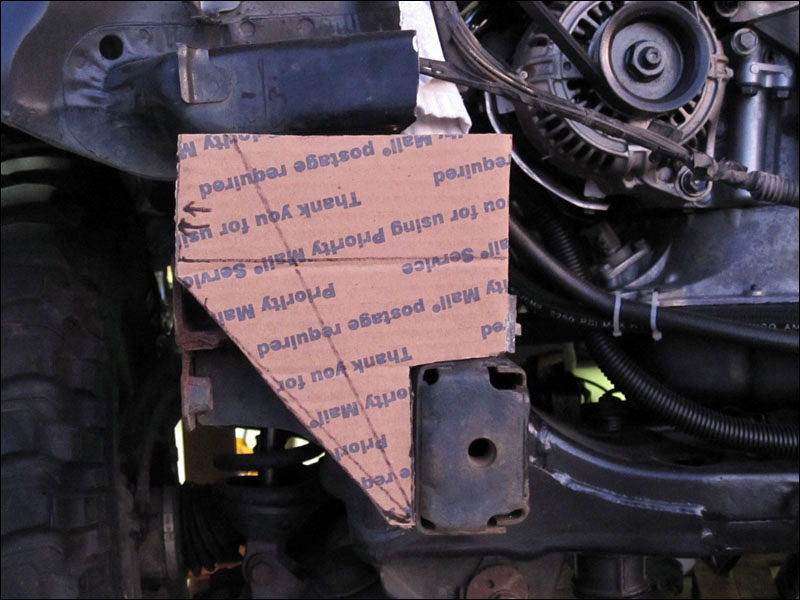
I had to do some thinking about what should happen at this point. I was dead set at leaving the body up at 2" until I needed more room under the hood. I wanted to base the height for the body off of some tubing that would run from front to back but that will take too long. It's probably a good idea to make some strong corners to anchor the front end down. So check it out, here we are cutting it up again. Grab some cardboard and get to work.
The stock ears on the frame were just barely holding things together. If any kind of impact would have come along there is no way the front bumper or bodywork would provide any resistance. My buddy that owned the truck before I did even tested them out for me. Yeap, they don't hold up at all. They were bent up and the body shop probably just hit them back with a hammer to bolt things together and send it back out on the street.
I played with some angles and made sure to have a radius with some material to work with at the very bottom where the plate comes to a point. The arrows are just markers to remind me that there needs to be some additional plating along side of it to mount the bumper. The bumper brackets simply bolt up to the outside of the ear that holds up the body. I'll be using the stock bumper for now but I need to keep in mind that it's going to get replaced by something custom of course.
I took this picture just after I raised up the rear body mounts. The front just hangs in the air after you lift the rear of the cab which has 2 body mounts where the kick panels are located and 2 more in the rear corners.
Posted: Sat Oct 03, 2009 10:16 pm
by Smithers
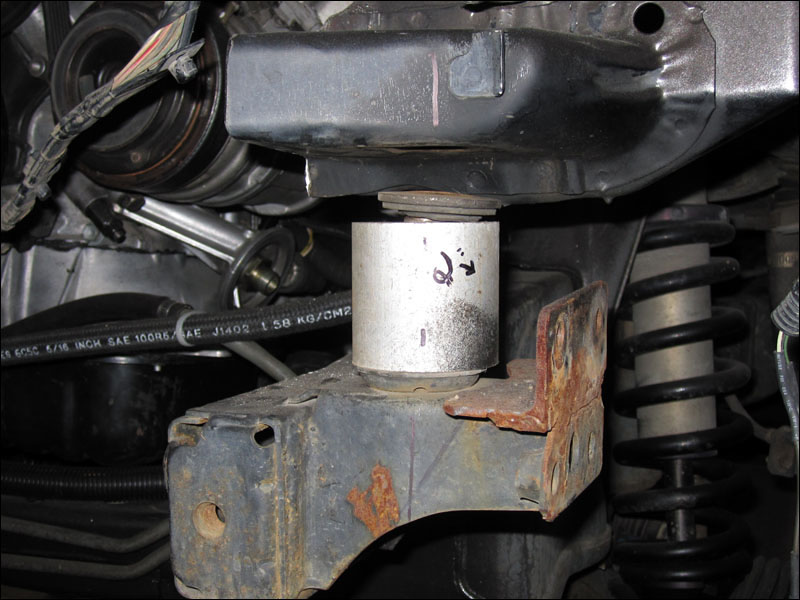
Here is what was in place all this time. I just made these 2" spacers out of aluminum back a few years ago and they worked great. But of course these round type of spacers aren't very stable and allow for some flexing. There a thousands of Tacomas out there with round plastic spacers that people buy from those body lift manufactures. As long as you aren't wheeling hard they are ok but they take their toll on the body. I'm SO glad I went ahead and got rid of them. You can see the angle iron I welded on top of the stock bumper mounts. When you lift the body you need to bring up the bumper as well to match.
The 2" you see written on the spacer was for the spacing between the verticle lines drawn and the actual mounting hole that the bumper bracket mounts to. But the space just happens to be just over 2" as well.

Like I said the body was already lifted up in the back so the front is just hanging up in the air. The part that rests on the spacer is pop welded to the body and glued from the factory. But that part off the body and the body is paper thin and you won't be able to weld anything to it. So don't cut those off ever. Use them to integrate into the mounting points. I'll be enclosing that completely in steel that will be welded to it.
Posted: Sat Oct 03, 2009 10:25 pm
by Smithers
One raw plate cut out and just put up to check for measuring. I have roughly cut the ears off of the old mounts and more will be cut when I'm ready to start welding. I will probably angle the new piece back a few degrees to follow the profile of the body's mounting surface that will rest on top of it. I haven't made up my mind on that part. But I can't wait to have this part all welded and done tomorrow.
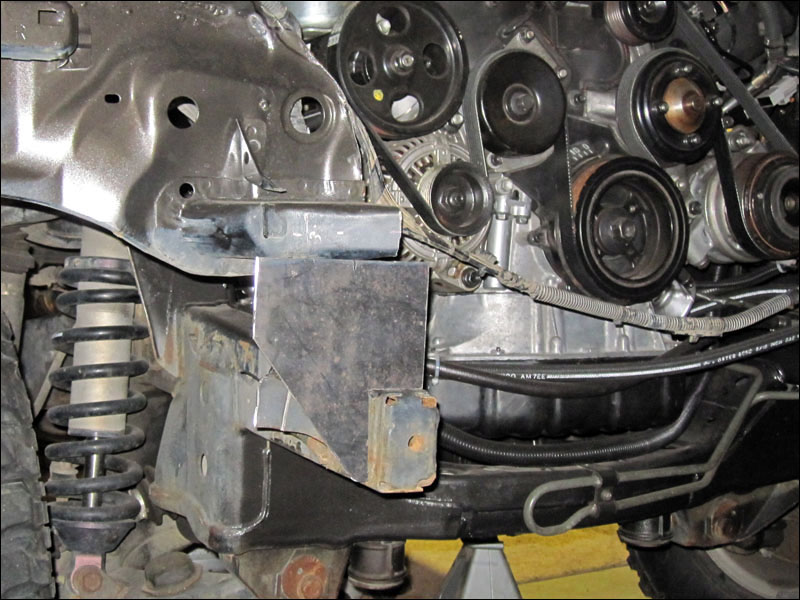
Posted: Sat Oct 03, 2009 10:27 pm
by Smithers
With the body up in the air another inch the truck looks killer. It looks a lot better and I'll have plenty of clearance in the fenders now. This will solve more than a couple of my tire and wheel travel issues. I'm very happy with the result. It's about the height of a full size truck now for sure. And the radiator fits A LOT better in the position that I have planned for it. Very happy indeed.
Posted: Sat Oct 03, 2009 10:30 pm
by Smithers
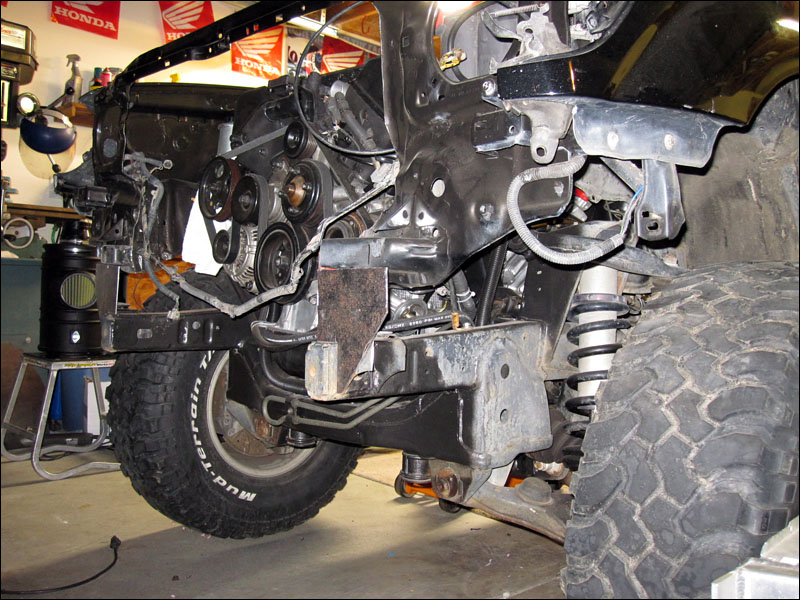
The plates that are on the ends of the bar I made follow the body very well. I'll be making identical plates to put on the bottoms of the body's mounting area and this will be boxed in and very strong. Then that assembly will rest on polyurathane which will sit on top of the new frame mounts. Kinda hard to explain but of course I'll have the pictures soon.
Posted: Tue Oct 06, 2009 6:17 pm
by Smithers
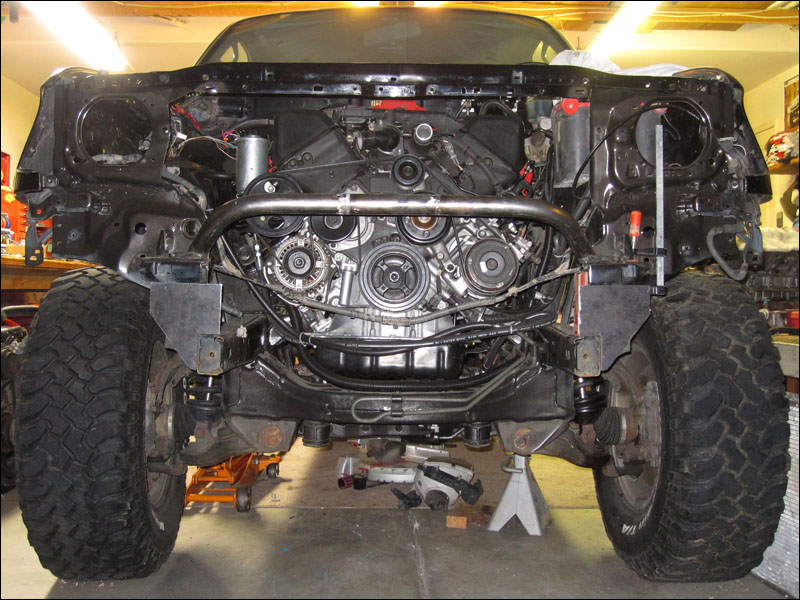
Ok today I went crazy and nearly finished up the front. I will stop at this point and weld the rest at a shop where my friends have a big giant tig welder waiting to finish it up all pretty like.
Posted: Tue Oct 06, 2009 6:19 pm
by Smithers
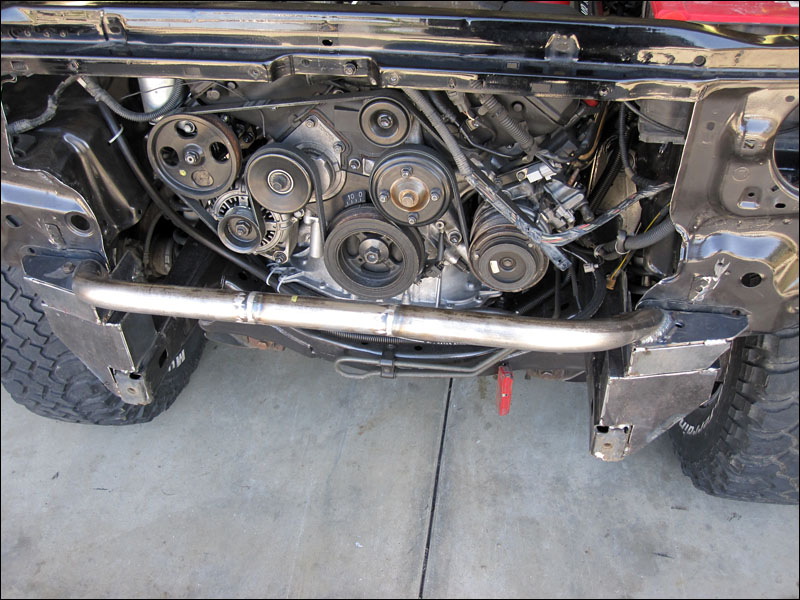
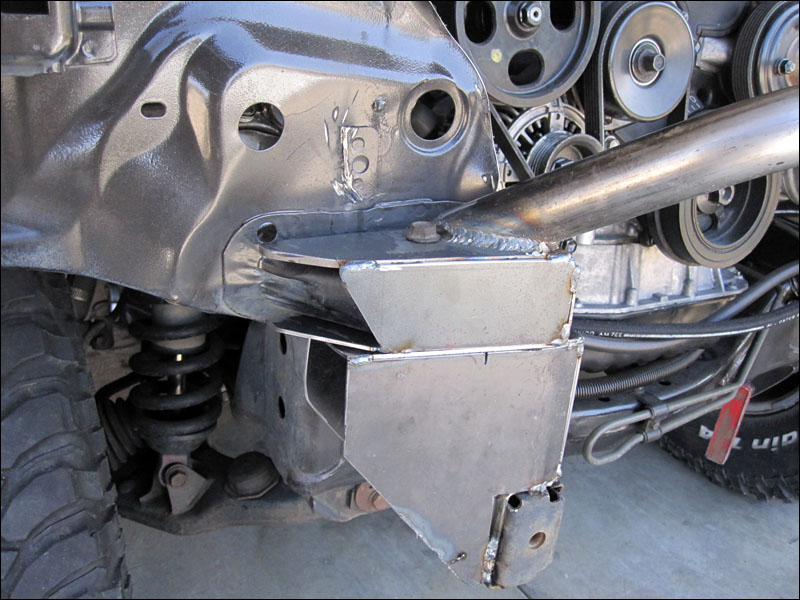
Got the body mounts all boxed in and reinforced the best I could do.
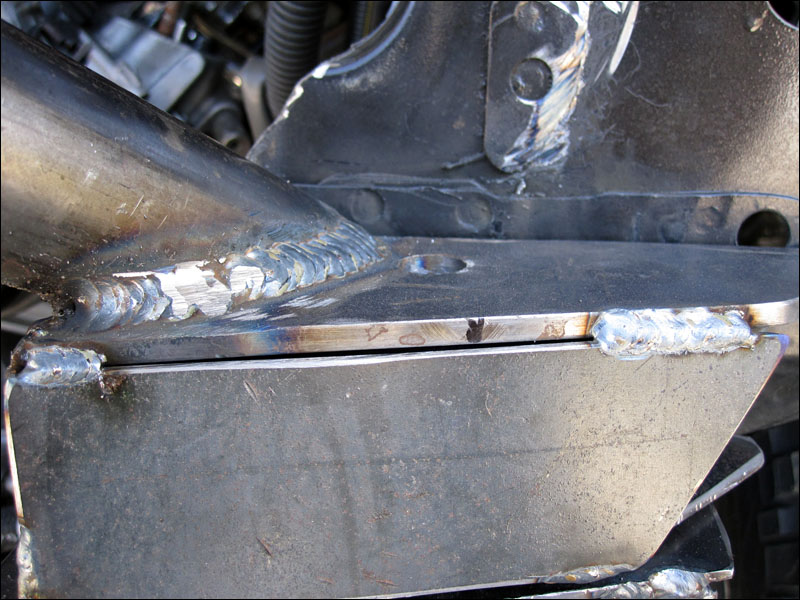
I'll cap the ends off as I decide where the bumper will mounts exactly. This needs to be done just after I mount the radiator.
Posted: Tue Oct 06, 2009 6:20 pm
by Smithers
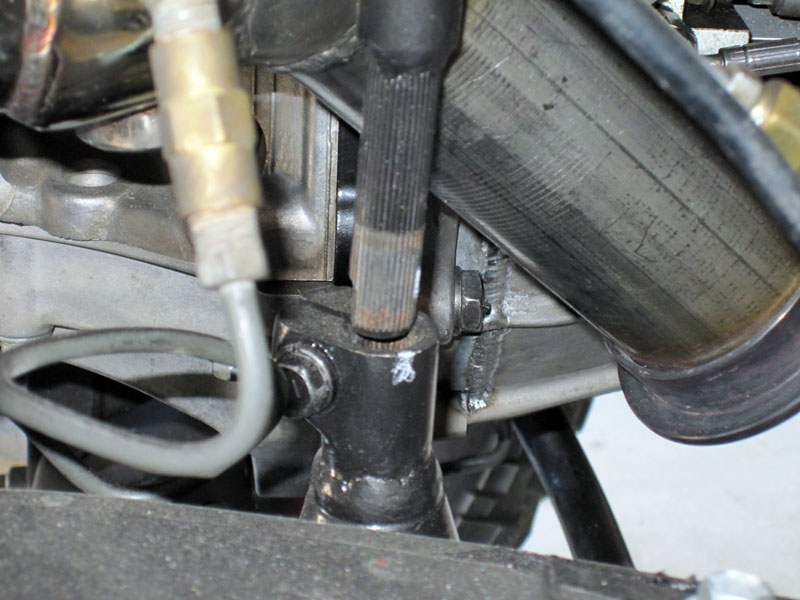
And now to tackle the next obstacle as I have raised the body a little more with all this recent work. The steering shaft needs to be extended AGAIN!
Posted: Tue Oct 06, 2009 6:25 pm
by Smithers
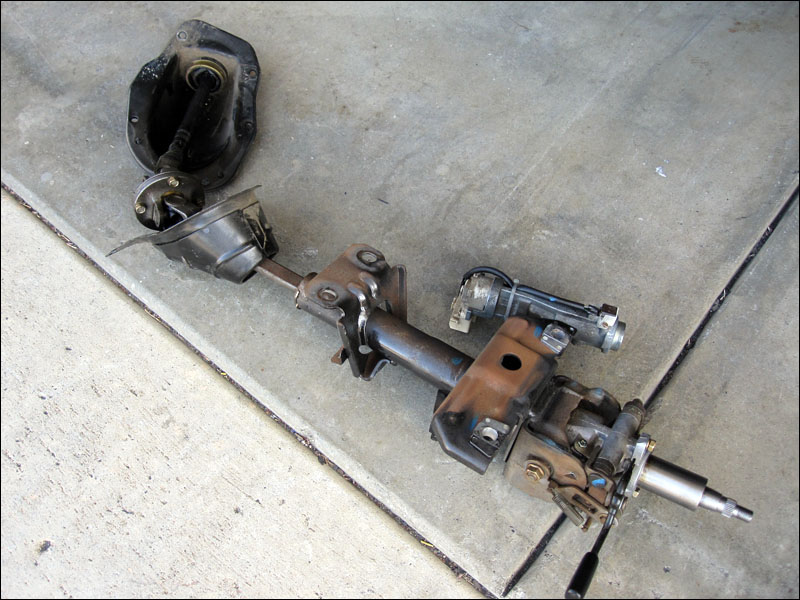
The whole column needed to be removed because now that the engine is in there the area is extremely crowded. So you just take off the steering wheel, remove a couple interior panels, a few 10mm bolts holding the firewall cover plate, two 14mm bolts and two 14mm nuts and presto! The whole steering column just pulls right out.
Posted: Tue Oct 06, 2009 6:25 pm
by Smithers
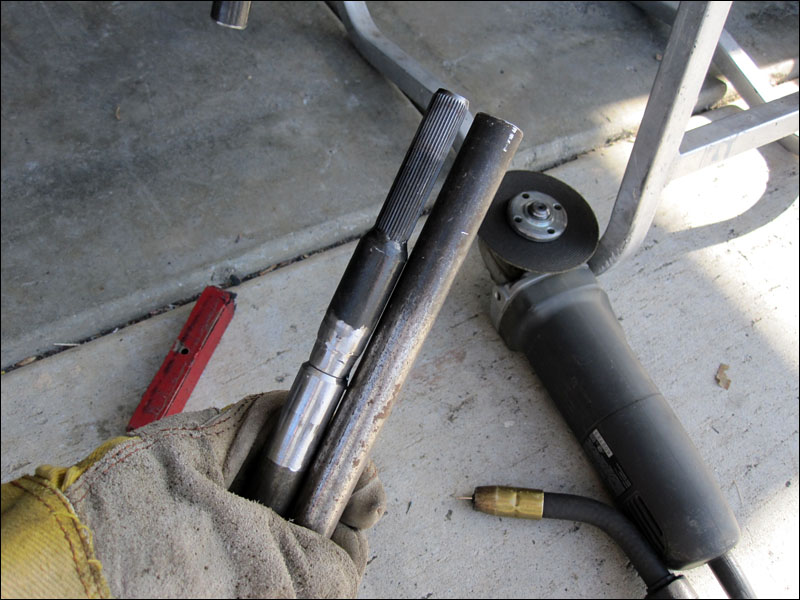
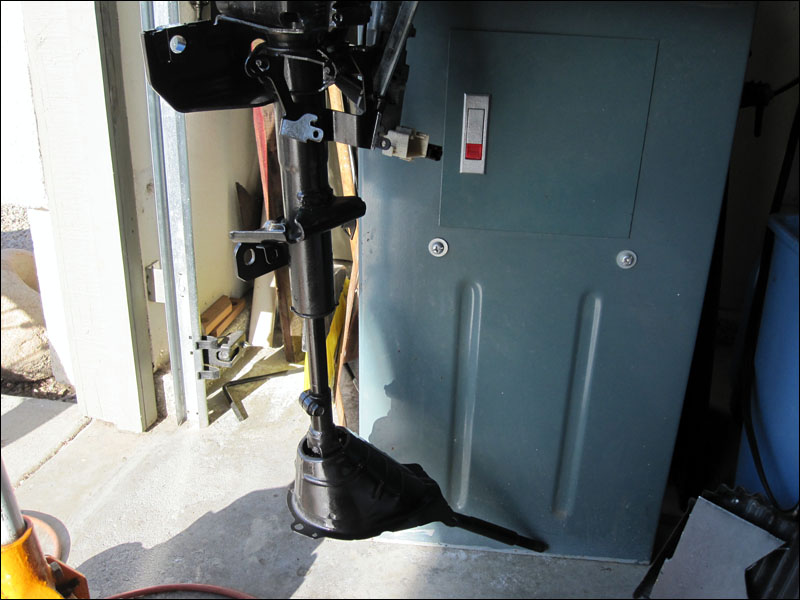
Then whack off an extension of steel rod, make sure that sucker is straight and weld in place like so:
Posted: Tue Oct 06, 2009 6:27 pm
by Smithers
And since the steering column was the only thing I didn't get a complete coat of paint on when I stripped and painted the cab, I went ahead and gave it a nice paint job. This is how to extend your steering shaft correctly and there is no question about the structural integrity of this mod. This Tacoma steering shaft is super strong and now the correct length as my body lift is now just over 3 inches. I didn't stop their either. I wanted to stop a few times today but I went ahead and reinstalled the whole steering column back in like a good boy. That was a good days work.
Posted: Thu Oct 15, 2009 10:44 pm
by Smithers
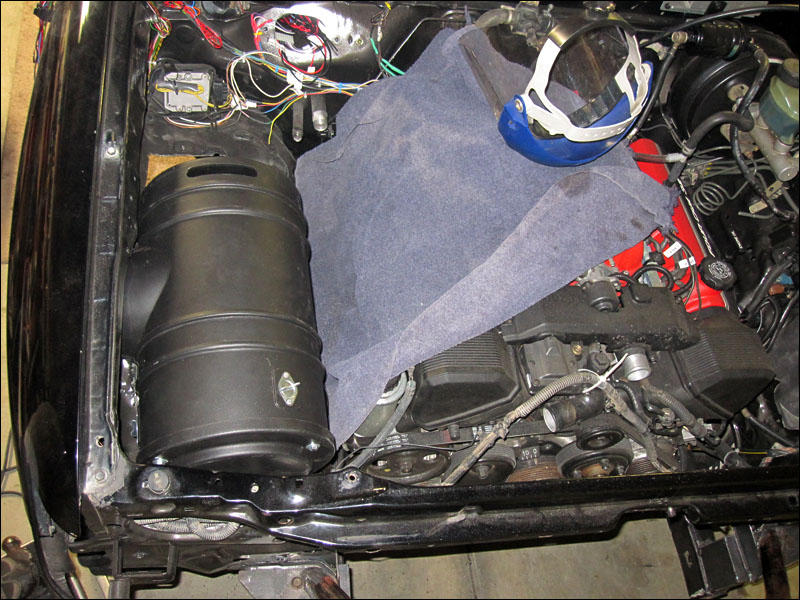
So yeah, tonight when I got home I had to do SOMETHING to the truck. I've been too damn busy lately to get some good time on it. I make a white line with a chalk pencil and just started choppin. Had to cover up the engine and my face to keep the sparks out.
Posted: Thu Oct 15, 2009 10:46 pm
by Smithers
Now you can see how I had planned it all out. The intake will work great from the inside front fender. I'll have a pre-filter to keep out the big rocks or small animals from going into the canister. It will all work out pretty damn good.
Posted: Thu Oct 15, 2009 10:49 pm
by Smithers
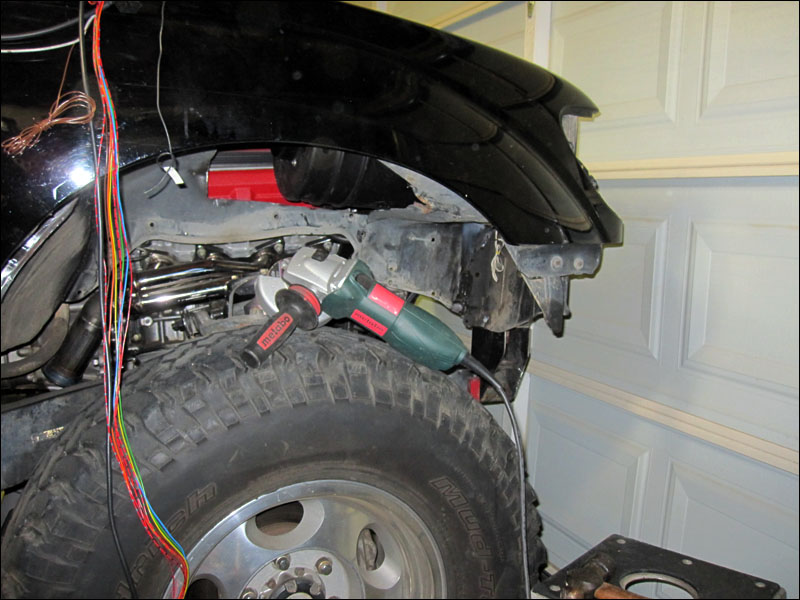
And I don't think I'm going to stop here. I really am going to just cut all the Toyota fender out actually. Then I can strengthen things up as well. I want to just have nice flat and smooth surfaces under there and there will be more room inside the engine compartment to boot. I've always wanted to roll out some fenders so I'm looking forward to this. Plus the wheel wells from the factory are the proper diameter for much smaller tires. The proper diameter will be so much better. It's great to be doing all of this stuff I've always wanted to do in the back of my head.
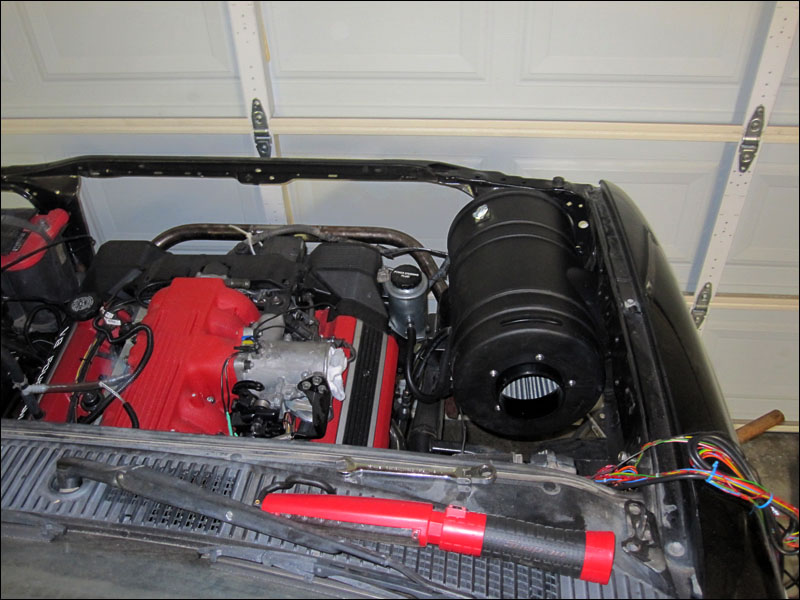
Yeah the tube will have to have a pretty good bend in it. Not sure how much I'll like that. I got a couple ideas for flex joints. I'm so tired of aftermarket intake systems that come apart because the pieces pull apart from not having flexible joints. That happened a lot with my old setup offroad. It was the most annoying thing. Jeez I can't even predict what my tube will have to look like. I'm contemplating cutting a lot more out of the inner side fender and pushing the canister even further to the side to make the tube radius less dramatic. We'll see tomorrow.