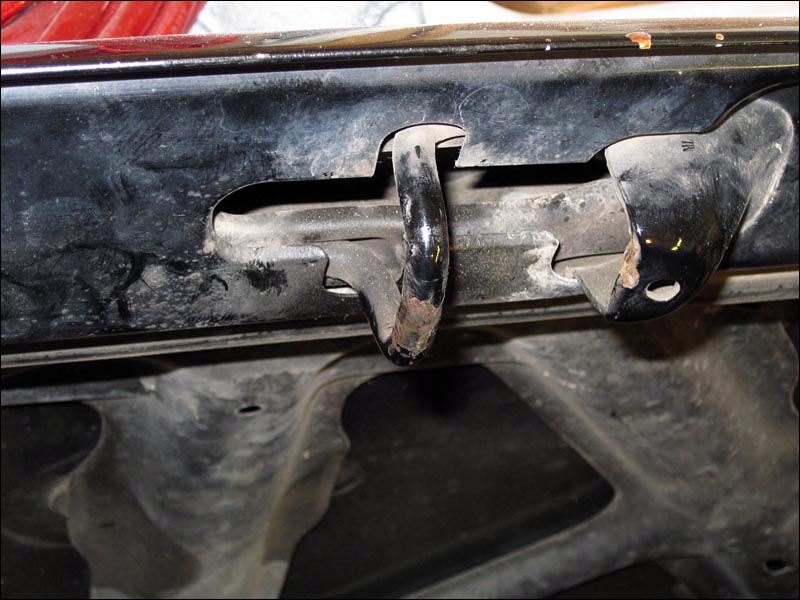
Putting the newer hood on is easier said than done. The hood latch tongues are longer on the 2001-2004 hoods than the 1996 style ones. I think this is because the hump in the middle of the newer one makes it higher. I just know that it looks a MUCH better than the older hoods. ANyhow I had to cut off the thing and shorten it to go into the latch where the older Taco has it placed. I didn't really fabricate the latch when I built the front end support but I got it close. So at this point I'm just making things connect as best as I can.
Here is the old 1996 Tacoma tongue which is very short compared to the 2001-2004:
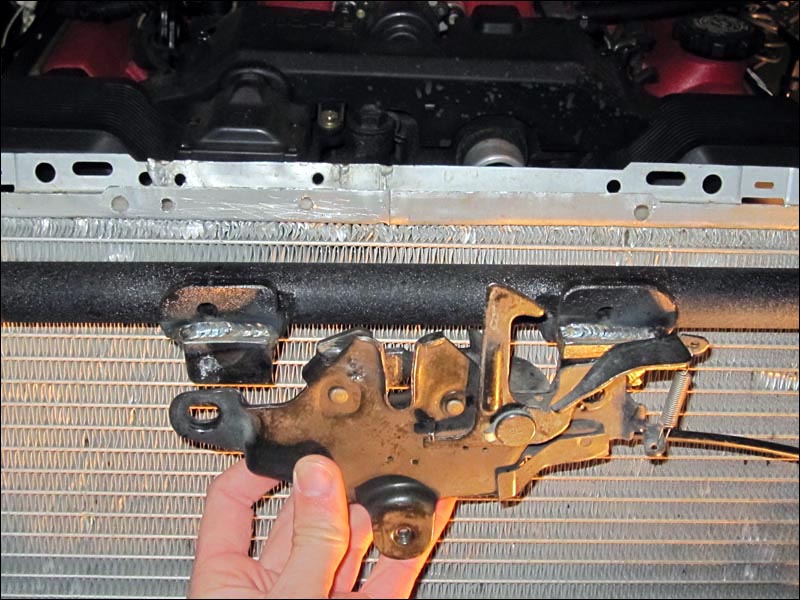
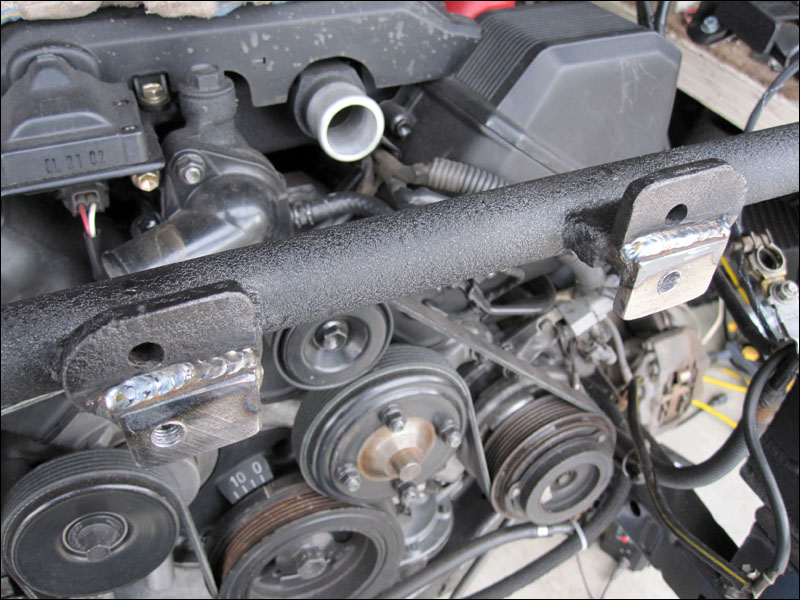
And over to the side here is how far off it was with the latch located where I welded the mounts. This was ok because I had to move the mounting point forward 1/4" as well as lower it just about 3/4" too. Thus, I simply had a couple of tabs ready to weld in place as you will see below.
Here are the new tabs I welded on that put the latch EXACTLY where it needs to be. This worked out perfect in order to let the hood sit just where it needs to be in order to line up with the fenders. Mission complete.
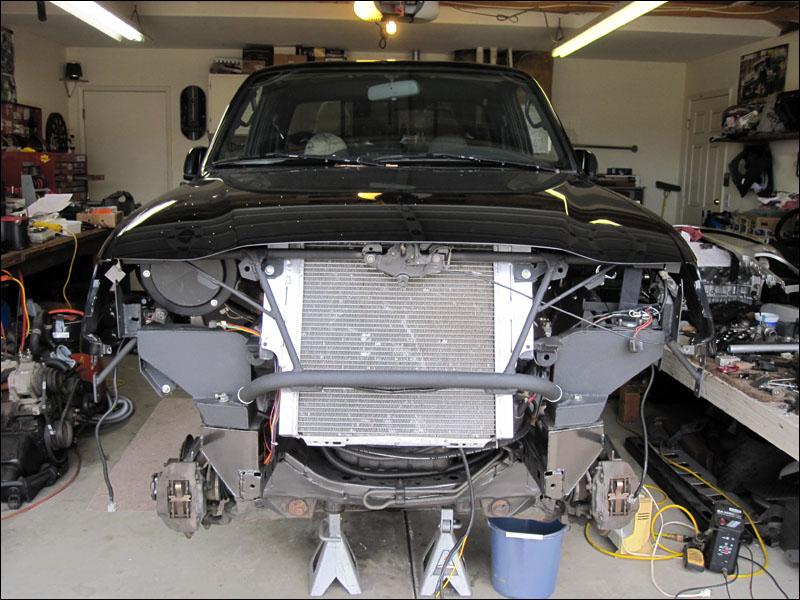
All lined up and the hood bolted in finally. I drilled out the latch tabs and I'll be threading them real quick so I won't have to hold nuts behind them to secure the latch on the front end support. It's strange seeing the engine compartment with a hood back on. It looks kinda stripped but only like 8 bolts are needed to put on the front grill, headlights and fenders. The rest of the front end goes together really fast at this point. Now for those pesky computer wires...
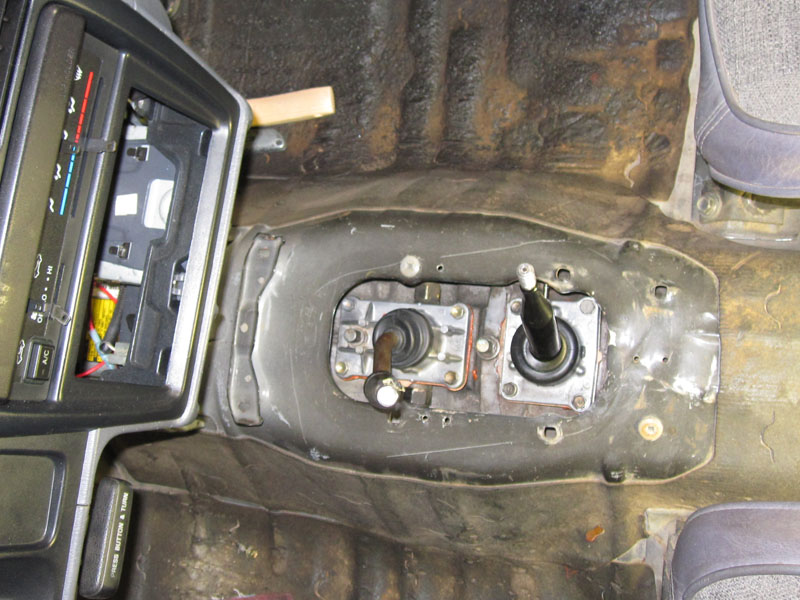
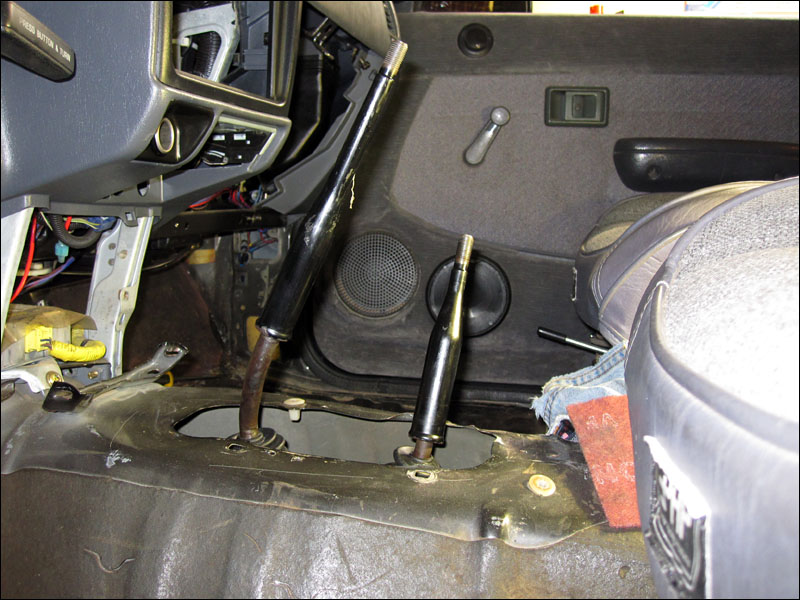
Today I was able to sneak in a few minutes of work on the Lexus Tacoma. I just had to finish assembling the shifters and put the new rubber boots over em. All done with this part.
And with all the transmission moving around and engine mounts fab I got the shifters right where I want them. The cab needs to be up off of the transmission for good form and airflow etc. When you start jumping your stock Tacoma ext. cab the cab will start sagging and eventually end up resting on top of the transmission. I'm glad to have the cab reinforced in ok shape and at a really nice height just off of the transmission. When you put a body lift on a Tacoma there will be a much larger gap than this. But with the Lexus V8 the optimal engine position is at a height in which the transmission gets raised just enough to bring is up a couple inches which cancels out the gap from the lifted body. I'm pretty happy with this. not that the top of the engine is that much higher than the 3RZ 4cyl engine that came out... it just came down to the mounting in the engine compartment, the fit for the oil pan and the oil filter. It all worked out better than I thought when it comes to these factors. I'm not saying it's easy! It's just very convenient to have a body lift on a Taco that is getting a 1UZ. I actually consider it absolutely mandatory.
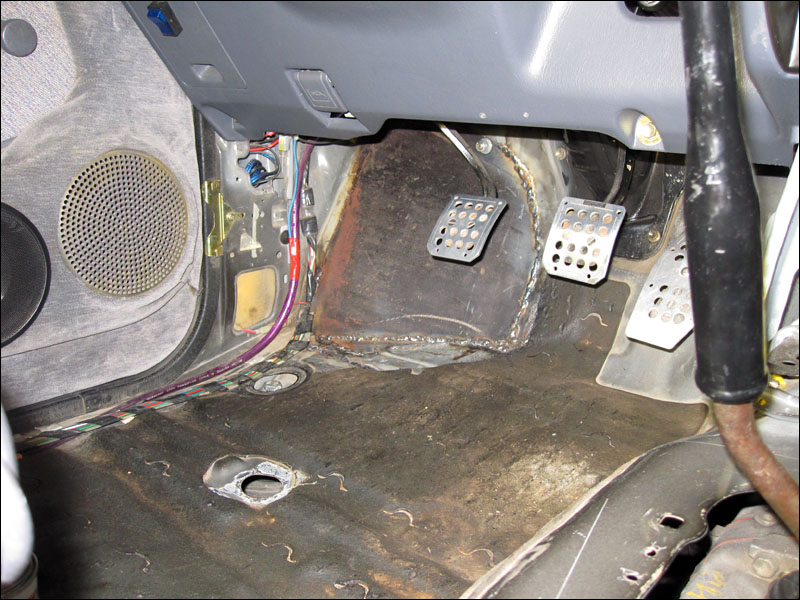
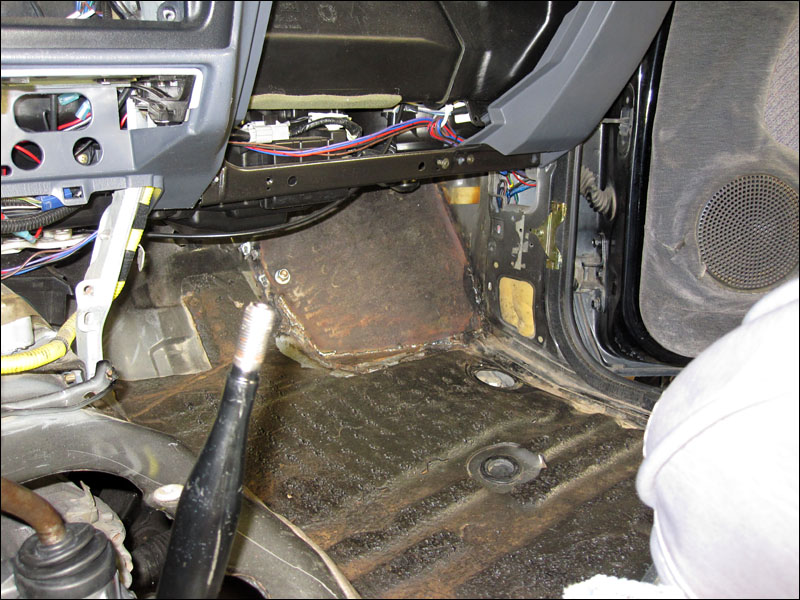
And last week I finished welding up the gaps and corners for the steel plating in the floorboards of the truck. You will definitely pick up some new skills while learning to concentrate most of the heat from your welding tip into the plate and then welding it together with the flimsy factory steel that you want to join. You can't just put the arc to the flimsy body steel and weld it to the thick plate. You will blow out the thin stuff before you ever get enough heat into it. It's a lot of fun messing around with it but you'll get the hang of it.
Ok just finishing up the details that hold the whole front end together.
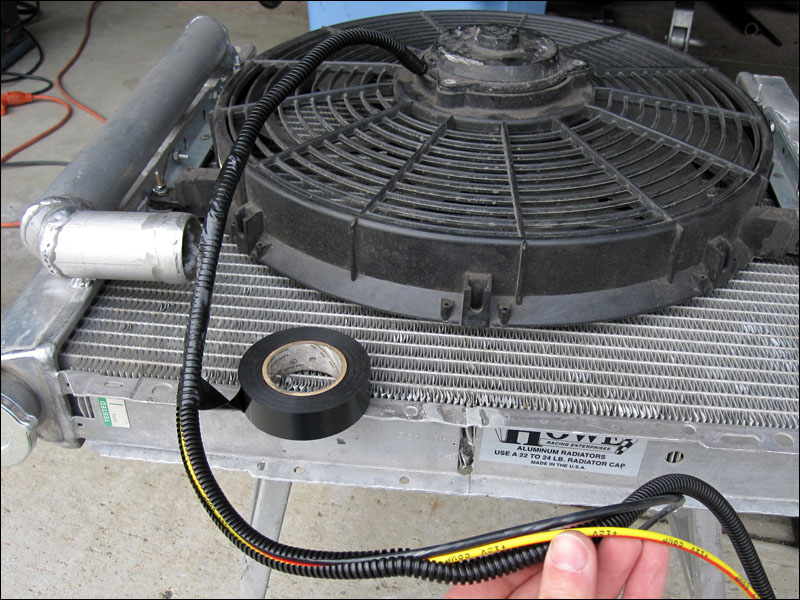
Cleaning up the wiring for the electric fan for this Tacoma. I always run some larger gauge wires to the motor and this time I opted to wrap them in some heavy plastic and wrap that with some 3M tape. I've had some issues with these wires being in danger in the past so this time I wanted to get it wrapped up tight and it will be secured in place with zip ties.
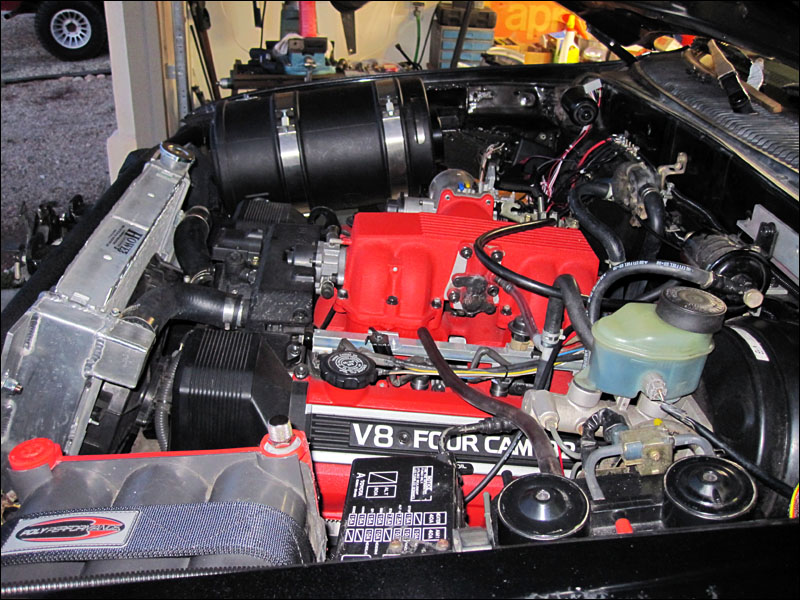
And I got to spend some quality time adjusting the intake system bracket to hold the assembly 3/4" lower so that the hood could shut all the way. I need to get some rubber mounts for the corners but at least now the hood shuts completely, the latch works perfectly and the hood edges are all lined up just right.
Now that radiator is secured with new hardware, I just bought a slightly curved hose for one side of it and the fan wires are on a new 40A relay which is activated, when needed, by the Adaptronic ECU.
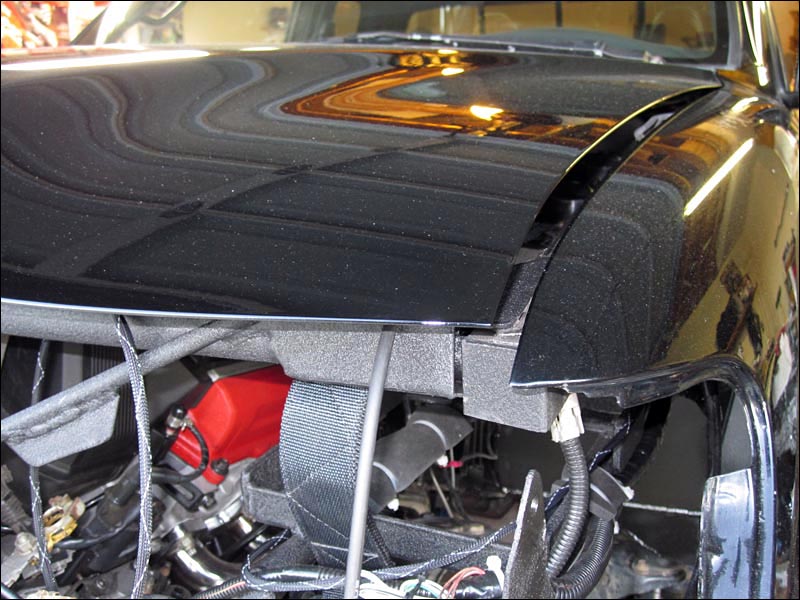
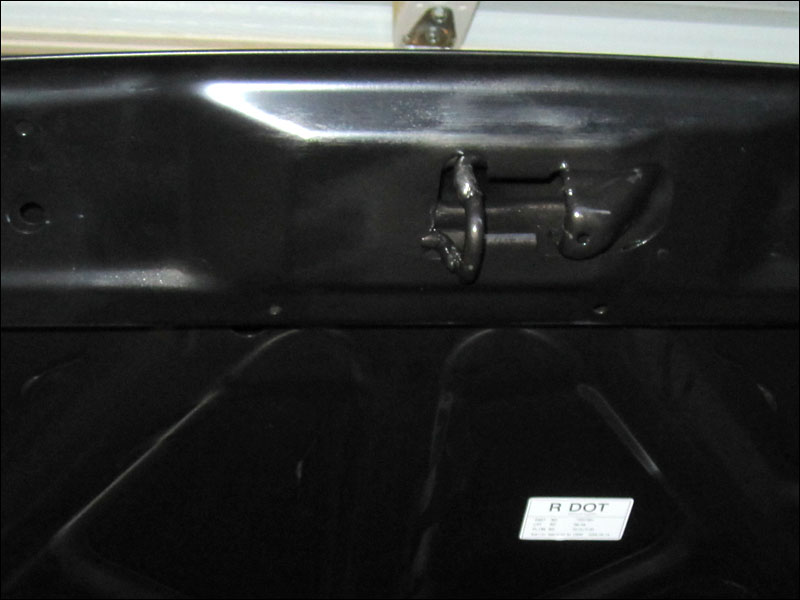
Ok I know this picture is boring but it's of importance. I had to cut, shorten and re-weld the tongue to the hood. It's doesn't have to be super strong but I offset it to the right a little bit which allows for more material to be laid into the joint when it is welded. Its definitely strong enough! And it sits in the latch nice and straight.
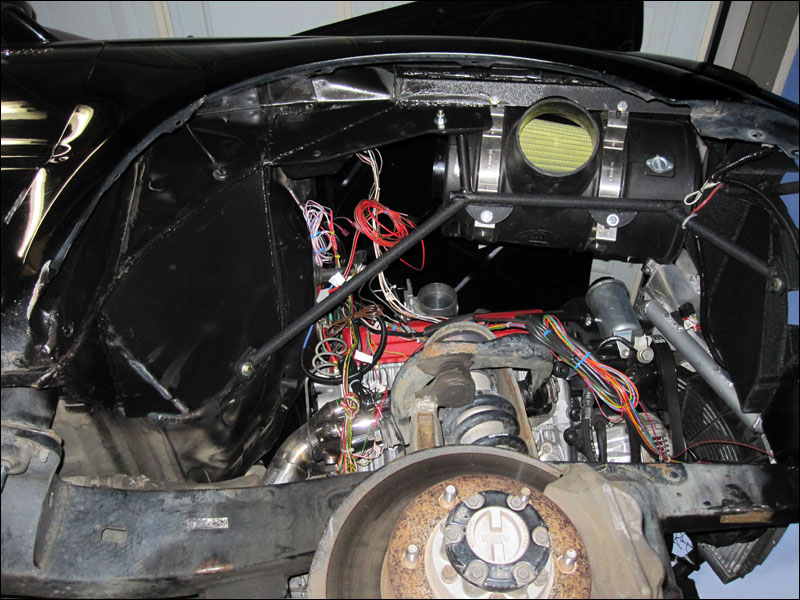
My camera had a hard time getting the color right in this picture because there is a LOT going on in it! I had to adjust the air canister down to follow the hood line and now it clears with even a little gap between it and the hood when it shuts. It's mounted very solid which was a concern of mine (when designing the supports) since it has a little weight to it. But with the mounts I made it's not a problem.
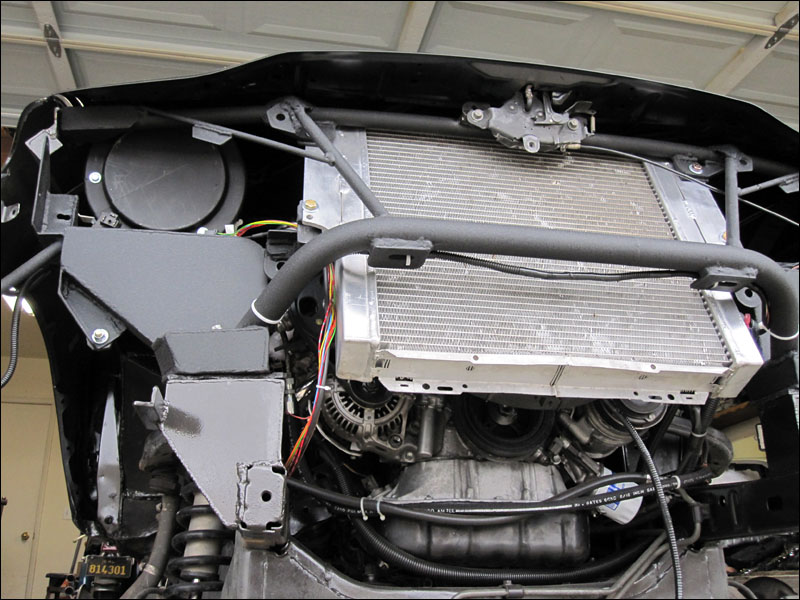
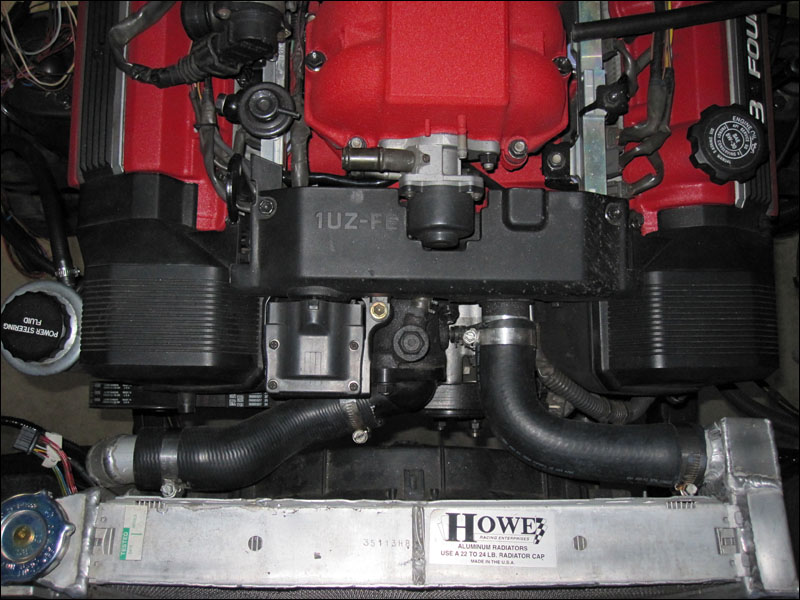
Also you can see my radiator hoses for the Lexus V8 for the first time. All the extra effort it took to get the intake for the radiator up top was worth it. I love having super short hoses. Clean, no clutter and they are out of the way.
This is how it looks just before putting the grill and bumper on. It looks so clean compared to stock and it's many times stronger. It took a lot of hours to get it all symmetrical and everything lined up. There is no way I would spend the time to make another one.
Now here is a neat picture of the top of the radiator. This gives you an idea of how much room is left between the aluminum radiator and the engine. Every tenth of an inch is important here.
Stuffing a Lexus V8 into a compact Tacoma truck isn't the easiest thing. As you have seen with other peoples conversions the stock front end doesn't leave one inch between the radiator and a Lexus 1UZ. The only thing you can do in that case is to mount the electric fan on the front of the radiator... which isn't a bad thing but it complicated the air conditioning for sure.
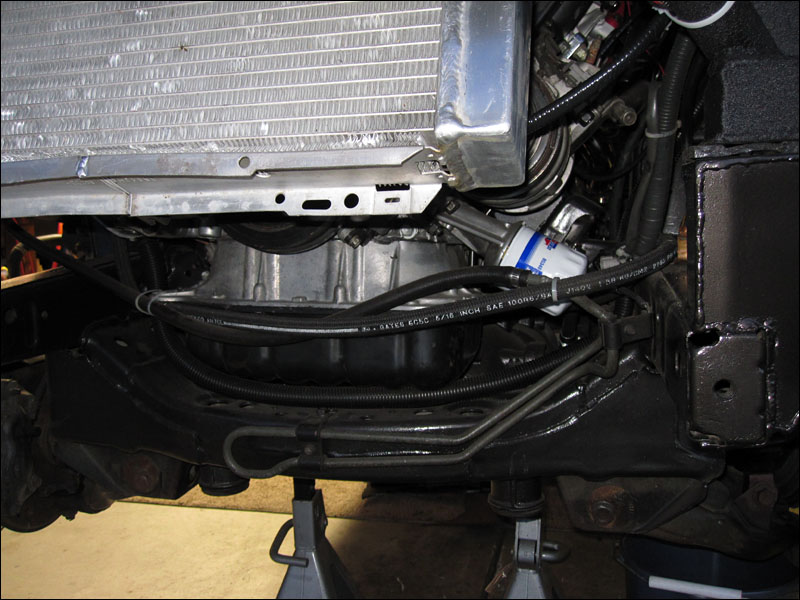
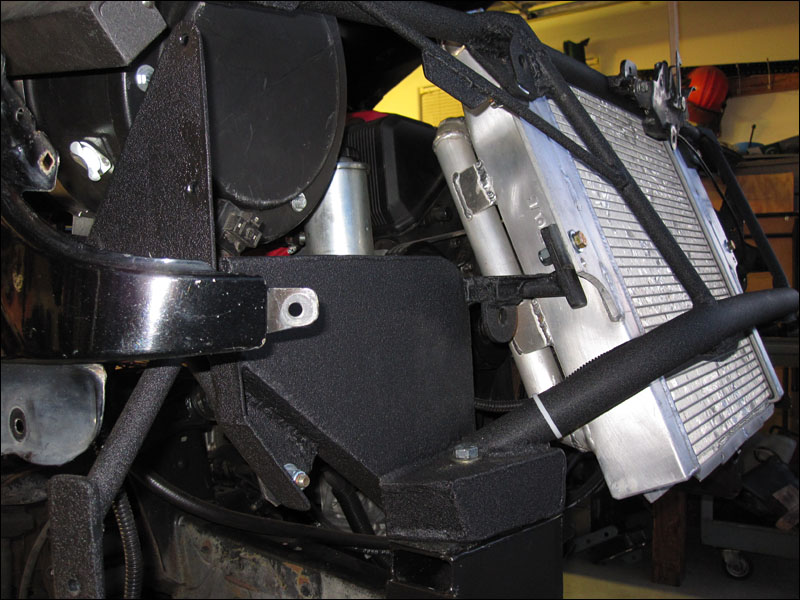
Here is a neat shot from the bottom of the front. Tilting the radiator back like I did is an idea I got from stock cars. They commonly push out the bottom to lower the overall profile of the front end and it just makes more room for my fan. With the pre-runner style bumper I want to build in the near future this also falls right into place as I want the bottom of the bumper to go back under the truck as far as possible while giving me the most ground clearance as possible. I am very happy with how high I was able to mount the radiator which gives me the most clearance on the bottom.
The 2004 hood helps out with this because it doesn't slope down as aggressively as the earlier Tacoma hoods. It's more bull nose which gives more space underneath it.
Here we have the mounting hardware shown for the AFE 75-11061 off road air canister. Of course I made the brackets extra strong and used higher grade bolts to hold it down. Using the air canister was what encouraged me to cut off the whole front end and both the fenders. There is NO WAY one of these canisters will fit under the hood of ANY road going truck or car. This thing is absolutely huge and it was impossible to mount anywhere with the OE fenders in place. It was a TON of work to build all the supports and mounts but I learned a lot and got a whole lot better at welding so I was happy to do it.... it just added on another month of work!
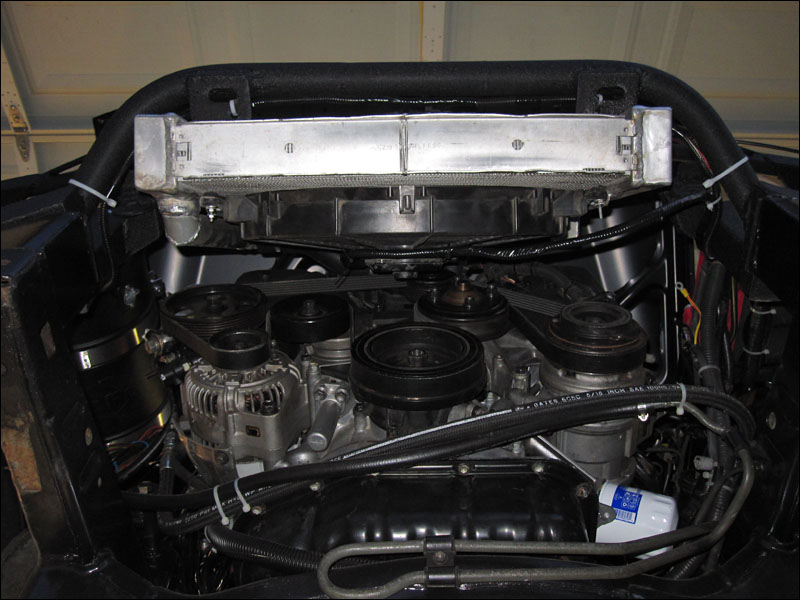
I'm also VERY happy with the clearance I was able to get around the oil filter. I didn't design the engine mounts with oil filter spacing in mind. I just got lucky. I actually bought a water cut block that would adapt some oil lines to the oil input/output of the engine because I thought I would need to relocate the filter. Not having to mess around with the relocation saved me a day of messing around building mounts for the filter and probably saved me over $150 in additional hardware costs.
Very happy to be using the stock oil filter location.High five on that one! haha
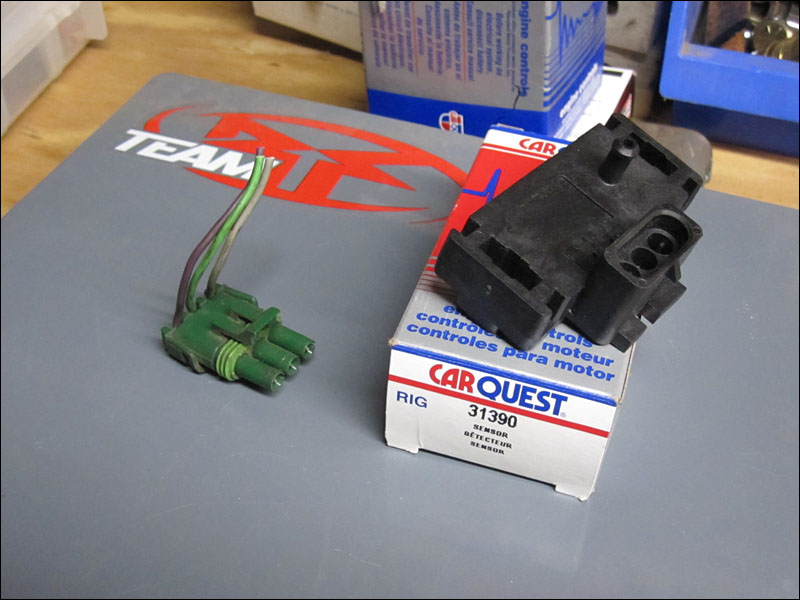
Need to install this MAP sensor for the Adaptronic ECU. It just needs to be connected to the intake via a hose so it can get a wiff of what kind of pressure is in the manifold. I of course realized it doesn't need to be mounted directly on the manifold. I also had to find a plug from a GM harness to get the pigtails to connect to. I forget where/who I got it from but it is necessary.
 The hood latch tongues are longer on the 2001-2004 hoods than the 1996 style ones. I think this is because the hump in the middle of the newer one makes it higher. I just know that it looks a MUCH better than the older hoods. ANyhow I had to cut off the thing and shorten it to go into the latch where the older Taco has it placed. I didn't really fabricate the latch when I built the front end support but I got it close. So at this point I'm just making things connect as best as I can.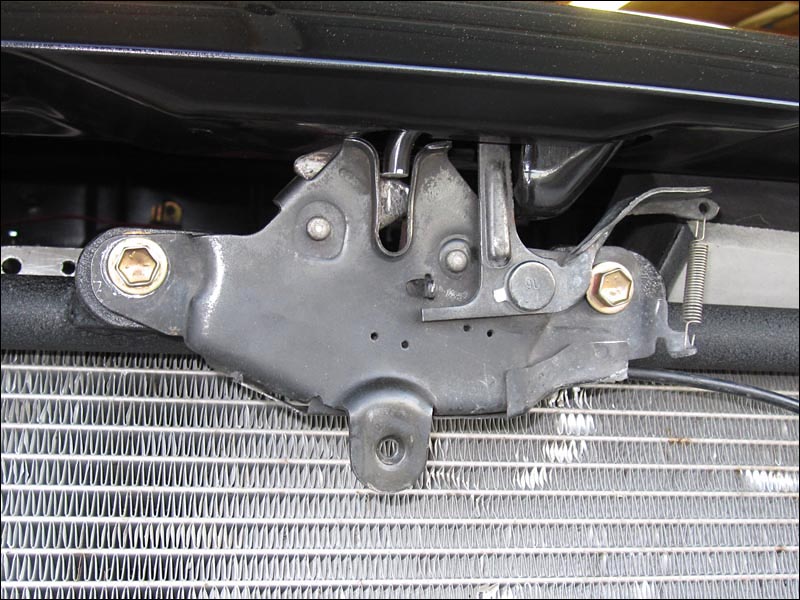
 It looks kinda stripped but only like 8 bolts are needed to put on the front grill, headlights and fenders. The rest of the front end goes together really fast at this point. Now for those pesky computer wires...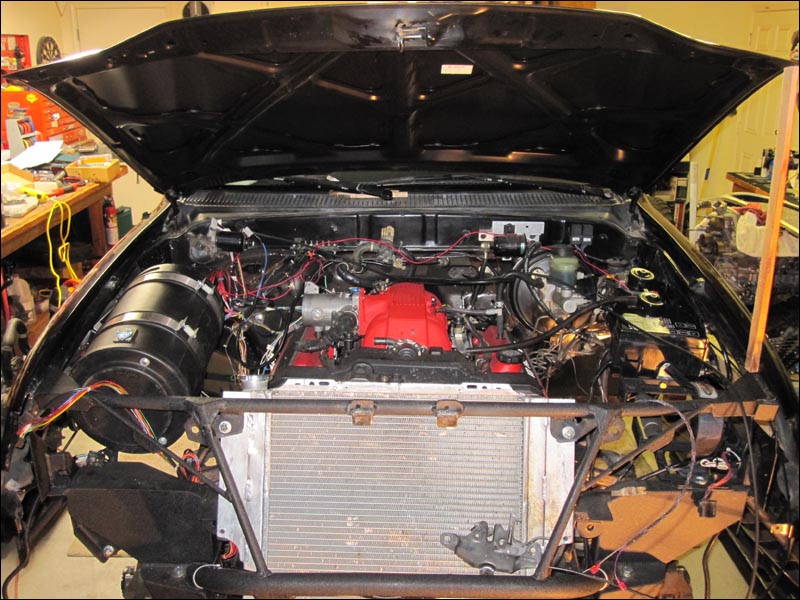
 High five on that one! haha