|
|||||||
| The Honda CA95 / Benly 150 Restoration The little brother to the CA160 in our family of Hondas |
 |
| Thread Tools |
|
#1
|
||||
|
||||
|
I thought I'd share the before and after pics of my CA95 restoration project. With this project I really focused on the 'C95' general export model as my inspiration, so I added the wiring harness and turn signals from that model, in addition to the right-hand turn signal switch.
I obviously added some 'personalization', too. The 'Honda' logos on the side covers are aftermarket replicas of the logos on the '65 Honda S500 roadster car. The '150' badges are aftermarket, too. I took Spokes' idea and used self-adhesive door trim to add chrome accents to the fenders and side covers. I drilled and re-tapped threads for every grease fitting, so the grease fittings are modern metric fittings that actually fit a grease gun. 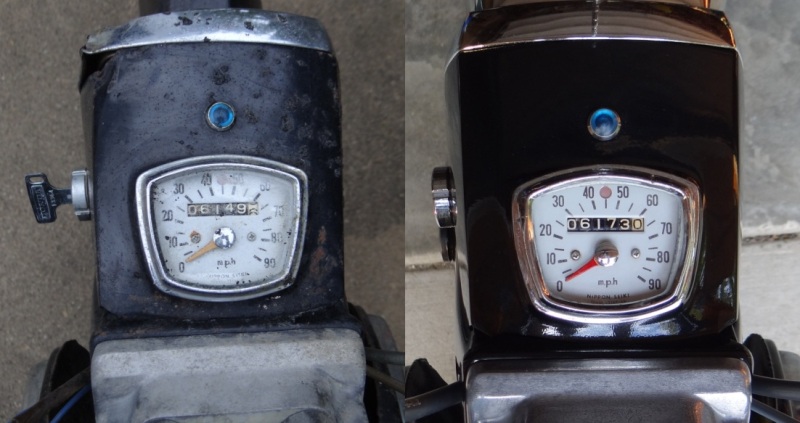 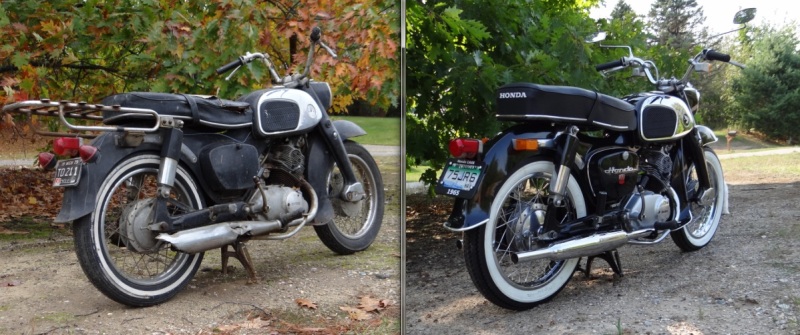 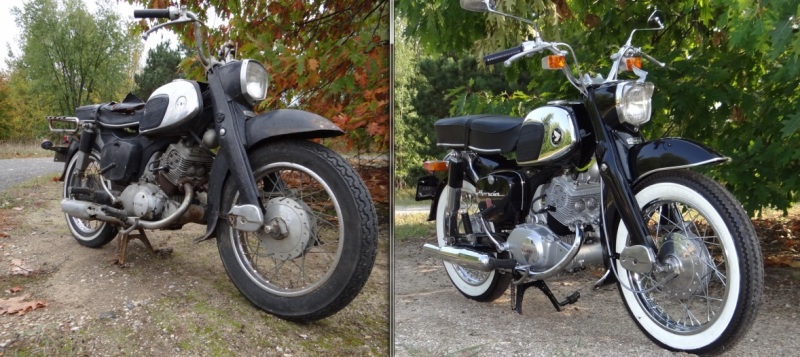 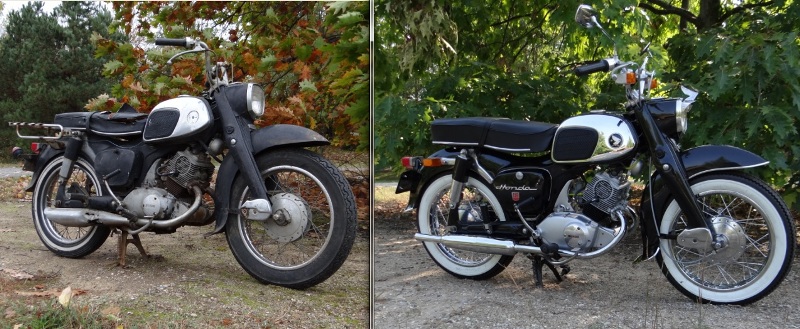 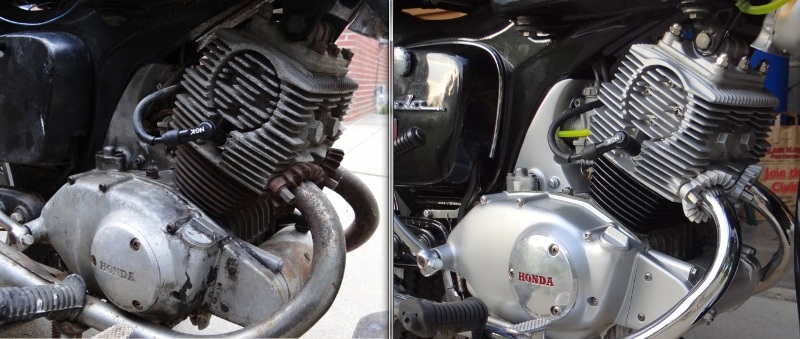  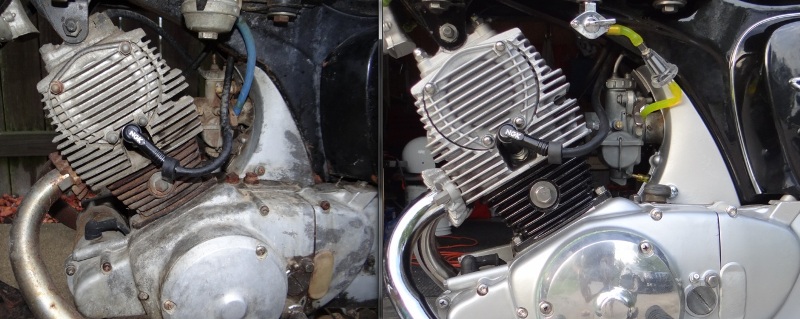

|
|
#5
 09-18-2012, 10:14 PM
|
|||
|
|||
|
What an inspiration!
|
|
#6
09-22-2012, 08:27 AM
|
||||
|
||||
|
Nice montage, what music should I be playing in my head?
The bike is awesome BTL. Just in time for nicer weather...
|
|
#7
09-22-2012, 08:57 AM
|
||||
|
||||
|
Quote:
|
|
#13
05-22-2013, 12:50 AM
|
|||
|
|||
|
Absolutely stunning job BTL!
 Couple of questions re your exhausts. I've got the same or similar TT style exhausts and I'm wondering if you ran into clearance problems between the kick starter and the muffler expansion chamber. If I set the right hand exhaust with the same clearances as the left it hits the kick starter.  To get it to miss I have to set it quite close the frame and rear axle nut, clearance issues made worse because the TT style doesn't have the recess that the original exhaust had.....did you have the same issues? To get it to miss I have to set it quite close the frame and rear axle nut, clearance issues made worse because the TT style doesn't have the recess that the original exhaust had.....did you have the same issues?Also, what type of packing did you use between the header pipe and exhaust? Yours looks really clean whereas I used the bright orange external slide joint type (which has already split on the bottom  ) )Thanks, Kev. 
|
|
#14
05-22-2013, 01:27 AM
|
||||
|
||||
|
I like the style of these mufflers, but as with any non-OEM parts, there were some trade-offs.
My memory isn't as good as it once was, but I don't recall having clearance issues with the kick starter. I do recall adjusting the clearance a bit, however. Viewed from the rear, the right exhaust is somewhat closer to the frame than the left, so perhaps I adjusted it that way to avoid the kick starter lever. I just don't remember. When I bought the mufflers, the only baffles I could find at the time were tiny - 4 inches long, so the bike can be a bit loud at wide open throttle. I may look for longer baffles someday, or perhaps baffles I can wrap in glass. It's really not a high priority. I haven't solved the issue about sealing the pipes - perhaps Spokes or Sam have suggestions? These slip-fit pipes don't leave clearance for rubber gaskets like the original Honda units had. I also didn't want to braze/solder the joint. I've put about 350 miles on the bike since it hit the road in September, and there's only a tiny bit of carbon showing at the pipe joints, so it's not been a major concern of mine.
|
|
| Thread Tools | |
|
|


