|
|||||||
| LEXUS 1UZ-FE Engine Swap My blood sweat and tears. It will be worth it!! |
 |
| Thread Tools |
|
#1
|
||||
|
||||
|
I took the valve covers and intake manifold in to have them powder coated a nice wrinkle finish Porsche/ Ferrari style red. The red is a special color that is coming from back east and should be here by Monday. I can't wait to see how they will look. I posted a thread about the powder coating process and the prices typically involved. It is good reading for someone new to the ways. Check it out. I love the stuff.
Powder Coating Information 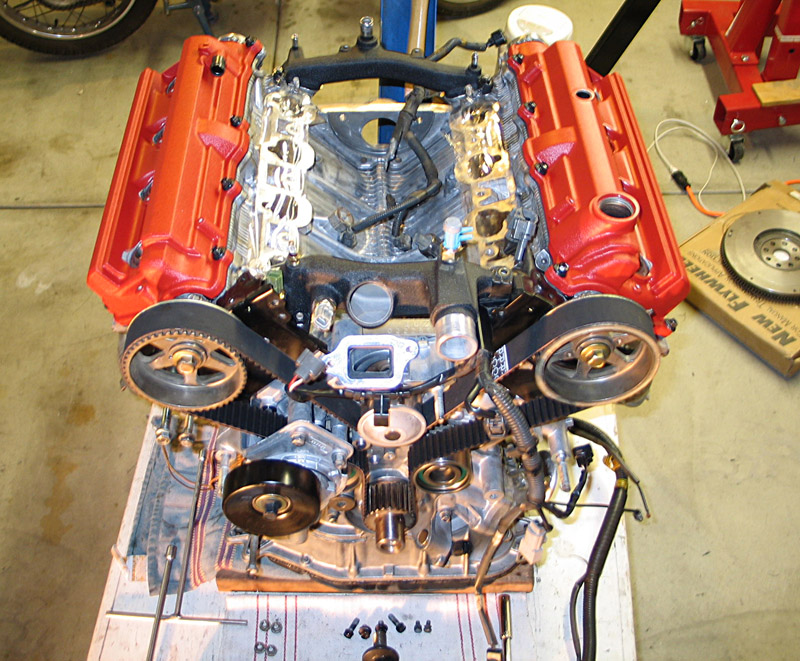 While this is taking some time I decided to give the block a good scrubbing. I had the intentions of just putting the engine in without doing much to it but since I'm waiting for some parts and coatings I have the time. I'm basically scraping the sludge off and then soaking the whole thing by spraying some degreaser on it. I brushed a lot of the stuff off but it's still packed into the tight little spots and cracks. I have a pressure washer I'll blast it with, taking care to cover the exposed valve train and intake ports with cling wrap. It makes me feel much better having things cleaned up. Now I know the condition of every component. Power steering pump was leaking in the past which drooled oil all over the passenger side and some around the drives side as well. This was the reason my block was looking a little nastier than expected. Upon openening up the valve covers I found that the engine has less use on it than I thought it woiuld. Looks like I'll be rebuilding the power steering pump as well. It's not hard. 
|
|
#2
 10-05-2006, 09:47 PM
|
||||
|
||||
|
How I love air tools. I use a wire cup style brush on a right angle high speed grinder. This really removes particles and corrosion quickly while being flexible enough to follow the contours of surfaces that are rounded or that have seams on them.
I changed out to a 2" flat disc that has a 2" stem that is secured into the chuck of the tool. It accepts different abrasive sanding discs and spins very fast to give a very nice shine to any alloy it touches. I really like this one for cleaning the gasket surface areas very smoothly and makes them shiny. This tool has saved me more elbow grease than ever. Besides 2 classic cars I restored (from piles of junk)with my father I have restored some classic streetbikes and did it all by hand. The only things I didn't clean, strip, sand down, re-surface, prime, paint or polish BY HAND were the spokes and the polish on the rims. I used a home made buffing wheel that is operated by an electric motor. I only wish I had this right angle die grinder back then. They are only $30-40 at a store.
|
|
#3
10-17-2006, 09:02 PM
|
||||
|
||||
|
Ok now we are getting somewhere. Today I received all but one or two parts I had ordered. I even received the idler pulley that will replace the hydraulic one. It looks like a match, thanks to Cebby for the tip. Here are some intimate pictures of it for all those who are curious.
 Very nice I can't wait to shine it up a little. Here is a pic of the fat pile of parts I picked up from my local Car Quest parts dealer. They take care of me indeed. to them! They recently acquired an additional computer system that allows them to access OEM distribution channels!! All of the parts I ordered were OEM accept 1. This is key since the nearest Lexus dealer is 2.5 hours away. I did talk to the Lexus dealer and they gave me some tips that are very tasty pieces of information. 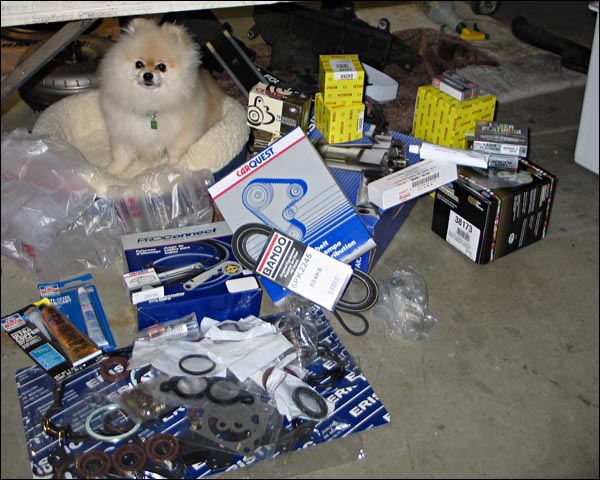 Ok the lower left gaskets are from a company that stands behind their set with the ol' Money Back Guaranteed! They look fine to me. I had them before I knew Carquest could get OEM stuff. So before you PM about what Lexus of Santa Barbara told me... a tech there said they don't replace any idler pulleys for the timing belt when they replace it. I thought that was crazy since it requires so many hours to do it. The pulleys aren't that expensive. He also told me that they use a special Toyota gasket dressing called FIPG. I remember this was a topic of great debate so I hope this settles the fight over which type of gasket stuff to use on most of this engine. To my suprise I was able to order this through Carquest Auto as well. Sweeeet. 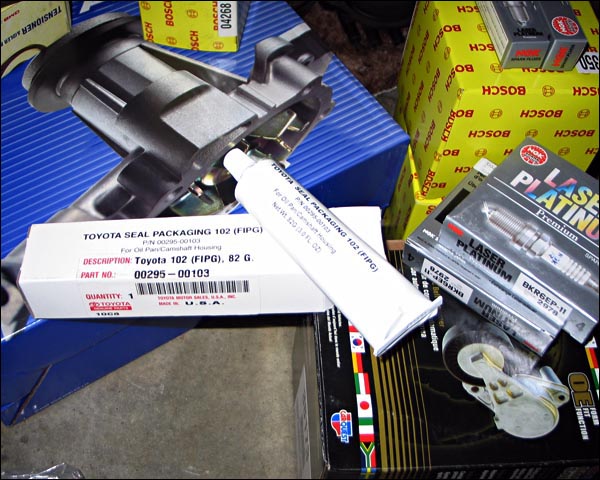
|
|
#4
10-17-2006, 09:20 PM
|
||||
|
||||
|
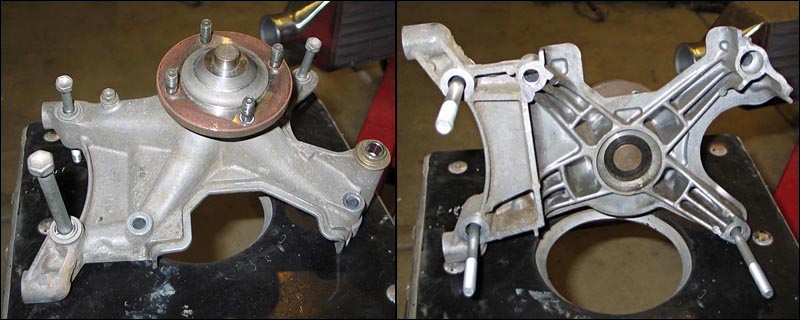
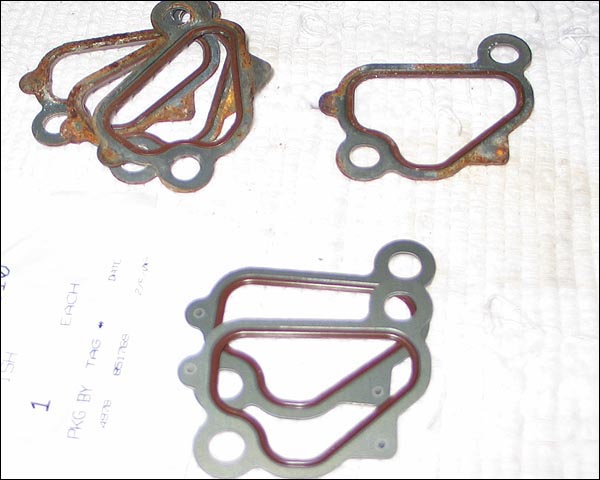
The deeper I got into this engine the happier I was that I am taking my time. The water pump was in horrible shape and surely it was dead. And the water passage gaskets were also worn out and had been leaking! These are very important and I highly recommend replacing these. Check out the condition they were in. Pretty nasty.
 Now on to my favorite part. The powder coating. I had a box of little random parts coated black today. I love throwing all the little parts in a box and handing them off to my buddies at Pacific Metal Finishing. They wash and sandblast the parts before coating them. They even bake the parts for me if they were really greasy before they coat them. They really make sure the finish is perfect. If it's questionable they will ask me if I want them to do it again (the only situation was a restoration of a trailer I had them coat in the past). I just love not having to spend the time prepping/blasting the parts! Here is a picture of the difference with a couple parts. Better than new. I have a replacement for that pulley pictured. It's crusty. 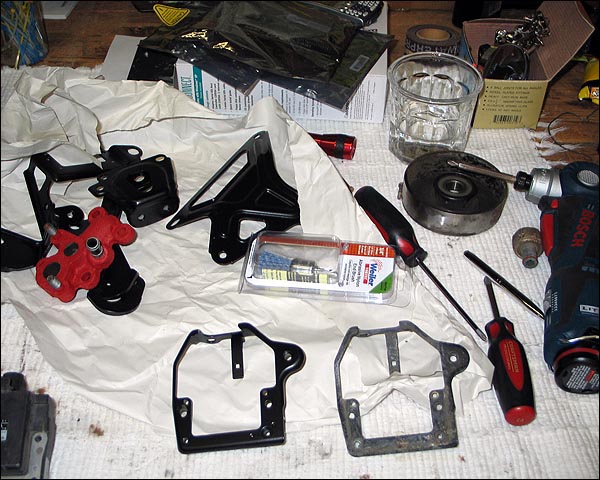
|
|
#5
10-17-2006, 09:22 PM
|
||||
|
||||
|
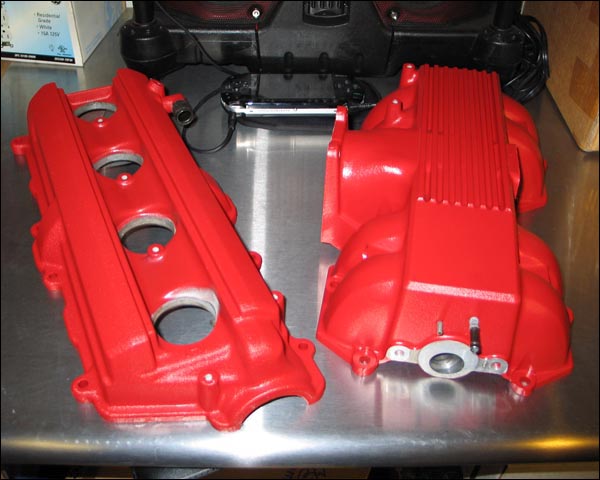
I've been waiting all week to see what the covers will look like on the engine. I got them back today and had a little time to rest one on top of the engine just for kicks. :lol: It looks better than I thought it would. I alllmost had them done black but I'm glad I went red.
  I can't wait to get back to work on this baby. I bought some bits to help shine up the block surfaces nice and clean so I'll need to put in some quality time tomorrow making it worthy of the red covers. ") No pain, no gain. No pain, no gain.
|
|
#6
11-14-2006, 10:19 PM
|
||||
|
||||
|
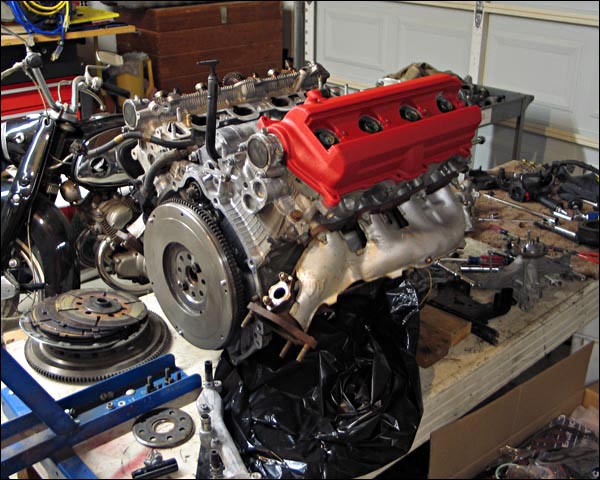
Hey check it out! Got the cams perfect and valve covers on! That was my main goal today. Timing belt put in just right, got things cleaned and odd and ends painted up nice. Next I need to rebuild the starter because it goes right in the valley on top of the engine and I never want to have to replace it. Then I need a set of injector O-rings and some injector caps as they have all cracked from old age.
It's coming together nice and I had my homeboy Ed help make sure everything is going together correctly. So now where am I at? Well I need to remove some carbon deposits from the intake manifolds and also the injectors need some attention. I've read about some builds in which the person neglects to change out the old seals and rubber grommets. This is not ideal. The rubber sealing these injectors from top to bottom are what, 15 years old?? YEAH this would be a very wise idea to change out all the rubber. I have the grommets and o-rings on the way from back east somewhere. They should be here tomorrow. I'll have a shot of them being replaced as well as the starter contact replacement maybe. These are just details that need to be addressed in order to guarantee reliability which is top priority. I also need to order the seals for the power steering pump rebuild... damn!
|
|
#7
07-09-2007, 06:10 PM
|
||||
|
||||
|
I haven't added to this thread in a LONG time. I have since acquired another engine which seemed to be in better condition. I simply wasn't confident in the original engine and I knew I would need even more parts. So I tore down both engines and had a set of heads completely ported and polished (among other things). Now I'm using the newer engine which will be controlled by the standalone ECU. I have had many things powdercoated and the block has been cleaned up even more than this first build.
|


