|
|||||||
| Cool Motorcycle Pictures & Stuff Other motorcycle related stuff and some pictures. |
 |
| Thread Tools |
|
#1
|
||||
|
||||
|
I've done a lot of motorcycle repair here and there. I know the basics of plastic welding and I've used industrial materials courtesy of Rifle Farings in Atascadero California. Being lucky enough to know the folks there since I was a kid I was always able to get chemical bonding agents that would literally light on fire if you didn't mix them properly. These are the hardcore adhesive materials that just weren't available in stores but now you can get stuff like this all over, even Wal-Mart. I bought 2 different brands of plastic weld to test out last week but they didn't look too impressive. Before I opened up those packages I went to my friends at Carquest to see what they had to try out. The Paso Robles Carquest here stocks a full paint and body supply inventory so I assumed they would have something good for me to try out.
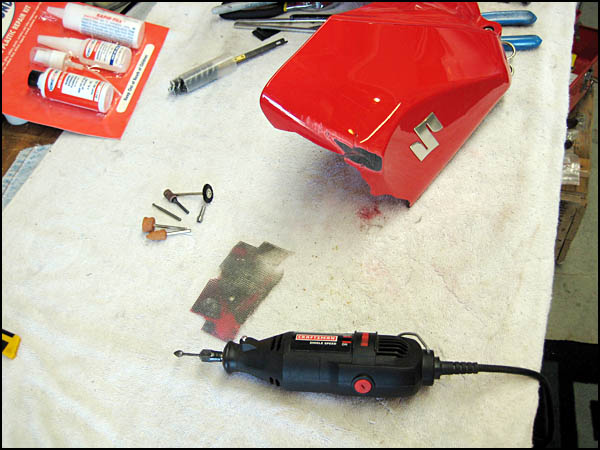
Enter yet another player in the plastic weld industry. A representative for this new product actually dropped off a kit at Carquest and told them to assess or try out the new product. Of course I was lucky enough to score the whole kit to use on my work! What great timing. Here is what I got 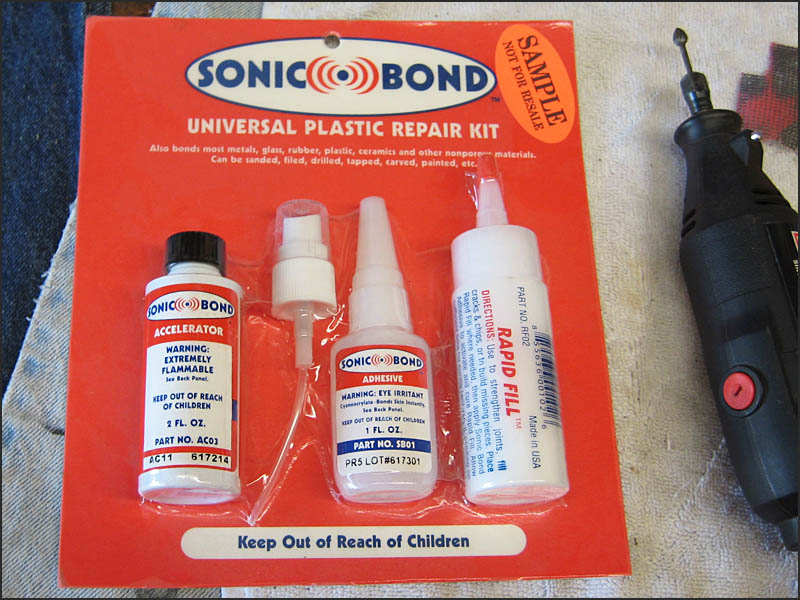 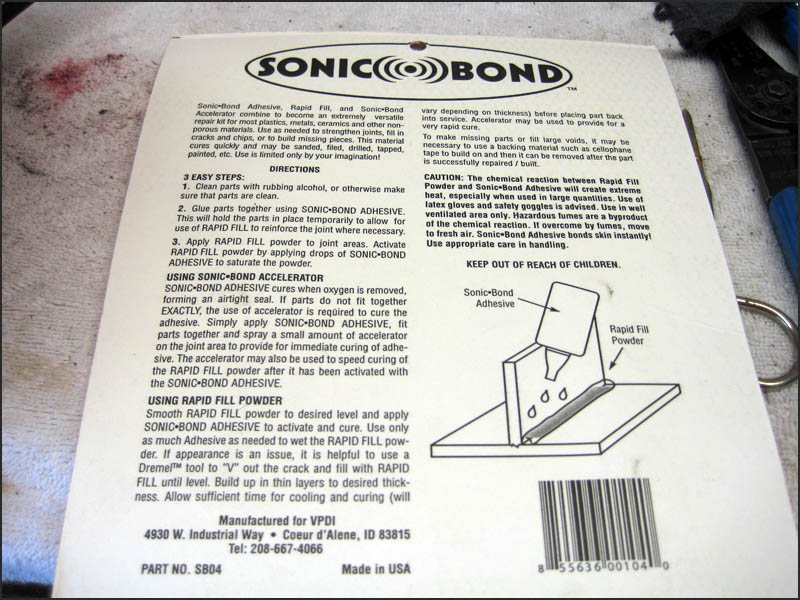

|
|
#3
 04-29-2008, 03:45 PM
|
||||
|
||||
|
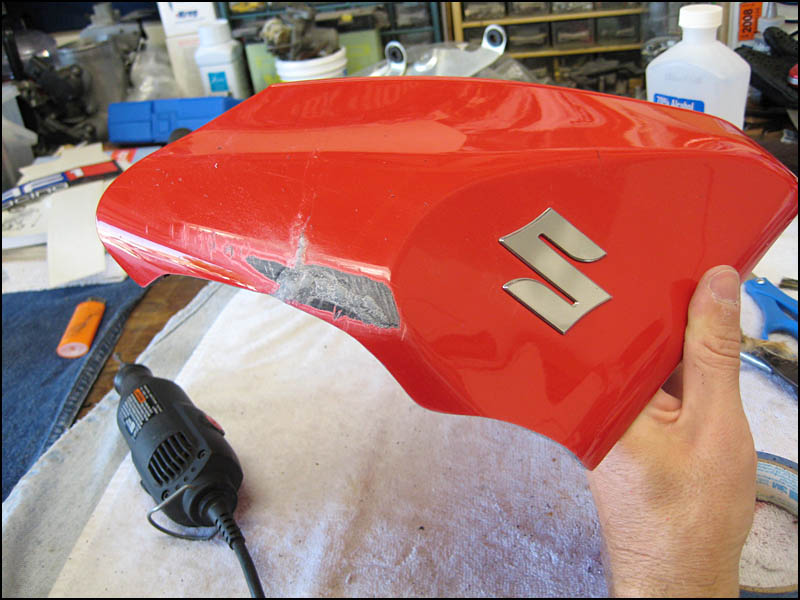
Ok back to work. I've used this stuff over the last couple of days and I have to say that I'm really impressed. I literally have welded plastic parts together that were completely broken apart and they are holding very very well. Here is a preview of one piece that welded up very nicely:
Before: 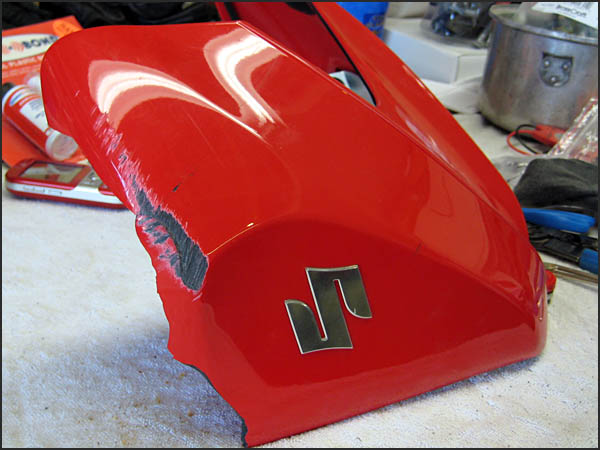 After: 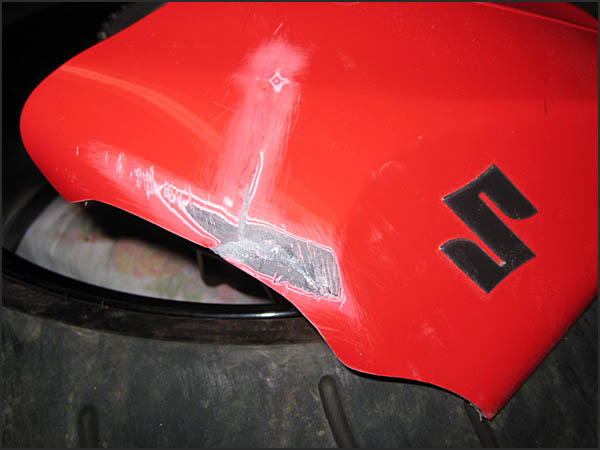 Most of the action is happening on the underside in order to strengthen it. The goal on this fixing up is to do it for as cheap as possible in order to get back on the road. These pieces are rather expensive so we'll just weld them up and throw some matching paint. I trimmed the jagged edges so it would look good from the side. Not many people compare one side of the bike to the other so there it is. The weld isn't exactly the best thing to use for surfacing the scratches. It's sole purpose is to join the plastic. I'll be using something else for the light scratches. The weld is very strong and is hard to sand without damaging the surrounding plastic. I actually used a file to remove some of the weld down to the surface. Then I followed with a light sand to smooth it out. Those cracks are surely not cracks anymore.
|
|
#4
05-07-2008, 09:52 PM
|
||||
|
||||
|
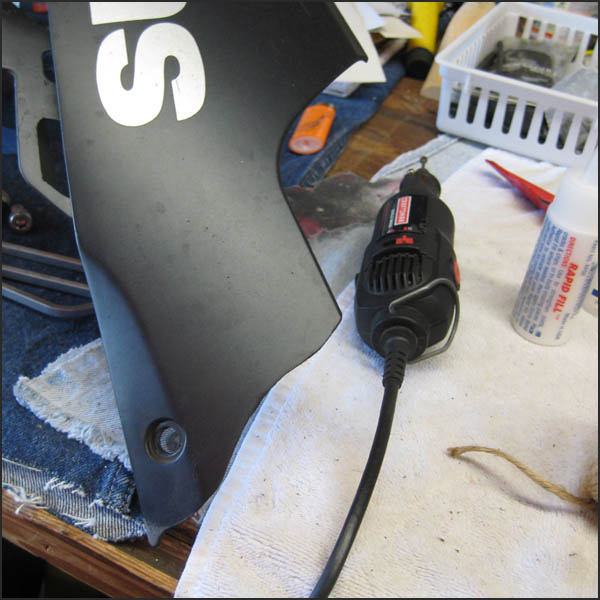
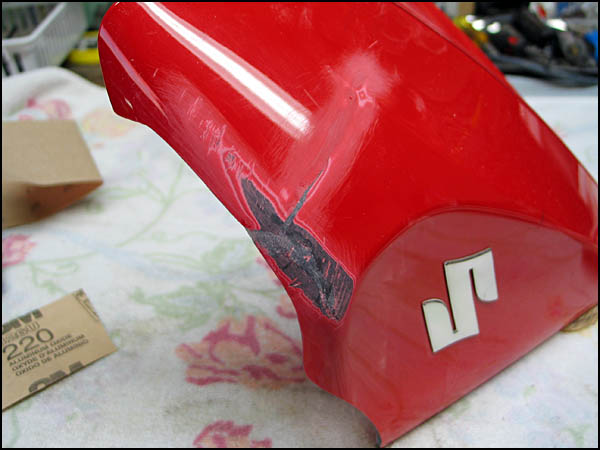
I'll start with the fuel tank cover. There are a few cracks that join each other and in order for the plastic weld to adhere to the pieces there needs to be a good surface for it to grab onto. The cracks here are very jagged so I took a dremel to the cracks to create a nice groove for the adhesive to bond to. This allows more adhesive to fill the void and provide a stronger grip on the adjoining pieces.
 First I put some tape along the outside of the cover so that the pieces would all be flush and even while I used the dremel to work the cracks. 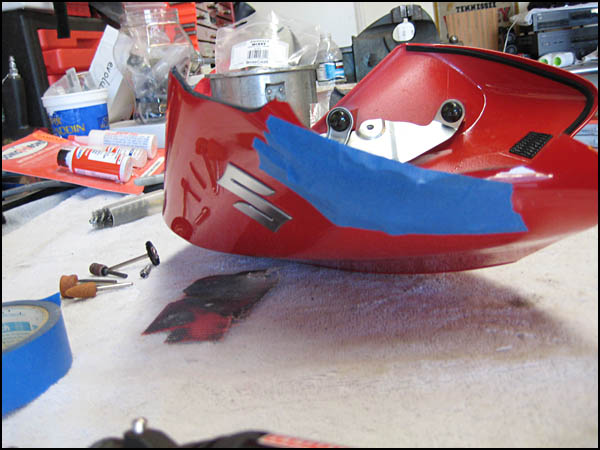 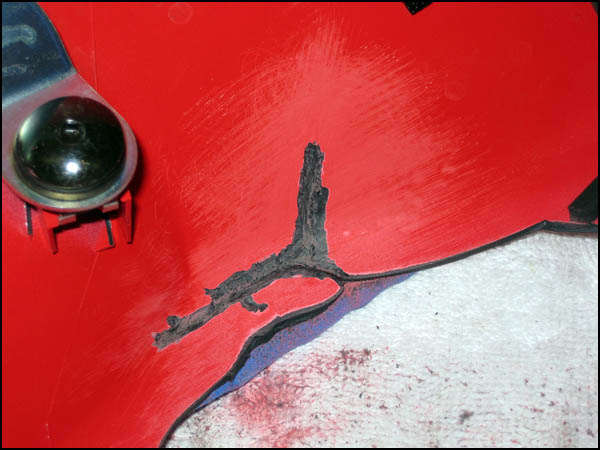 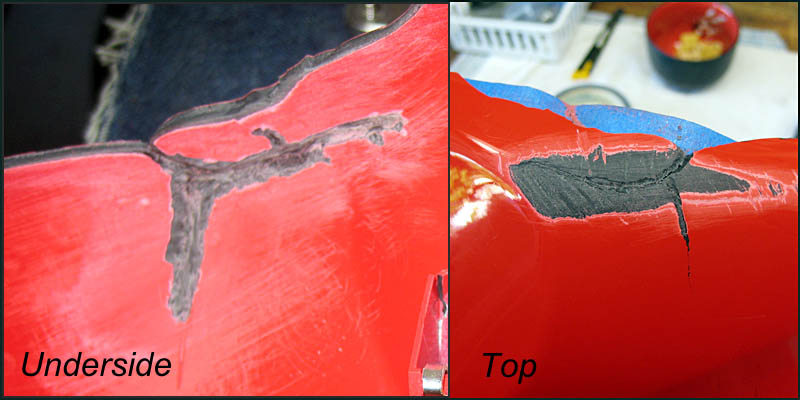 If I just left the surfaces flush then sanding the area would cause all of the plastic weld to be removed in order to get a smooth surface. We want a good amount of plastic weld in there so making a valley along the crack is ideal.
|
|
#5
05-07-2008, 10:14 PM
|
||||
|
||||
|
So to begin adding plastic weld to the area I simply dripped a couple drops in the crack then sprinkled a little of the powder on top of the liquid. It's really easy.
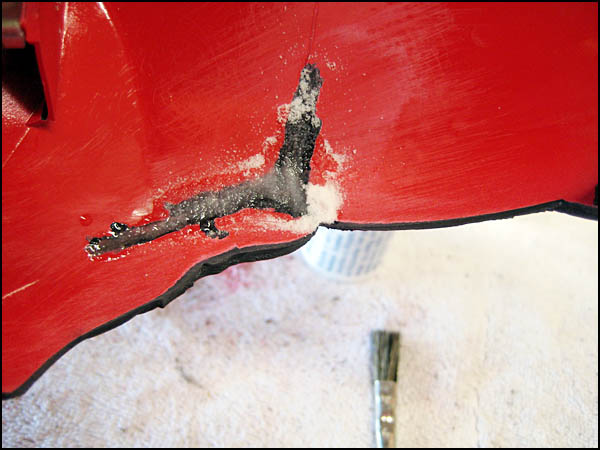 Just add a few more drops and sprinkle some more powder and the cracks will start to fill with material. I used an acid brush to even out the powder. What also worked well was applying the powder on top of the drying adhesive and smoothing it out a little before adding a drop of two on top of it. This will make the surface a little smoother. The powder really soaks up the adhesive really fast so don't use much adhesive at all. 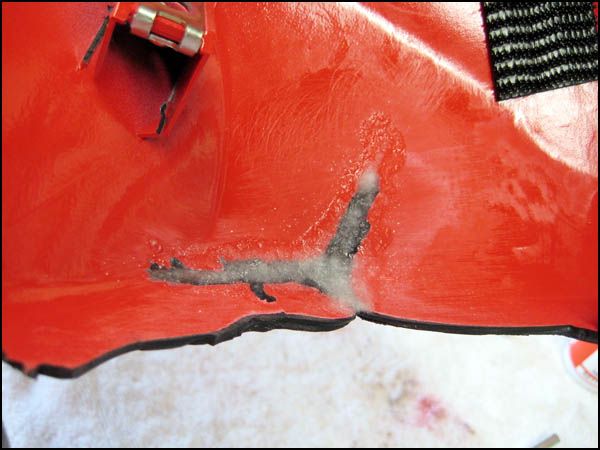 I then removed the tape from the outside surface since the parts are now secure and will not move around anymore. Then I went to work on the outside filling in the cracks. This was my first time using the material and I have since learned how to apply it to make the surface more even. But this is decent. 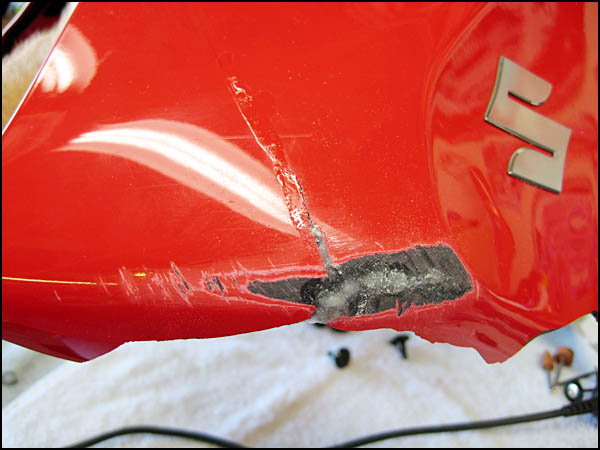
|
|
#6
05-07-2008, 10:17 PM
|
||||
|
||||
|
Then I used the dremel tool to smooth out the jagged edges to clean it up a little. We're doing a fix job on this bike using as little $ as possible. So this will work for now. We just want to get this bike back on the road so later on the owner can buy this $170 part but for now that's not in the budget. :P
  Above I took a flat file and proceeded to smooth out the rough plastic weld material. The plastic weld is so strong that sandpaper doesn't do very much at all. A metal file did the job of smoothing down the majority of the surface to prep it for some Thin Ice. Not bad. Later on the smooth coat will be applied over the scratches and sanded down in preparation for paint.
|
|
#7
05-07-2008, 10:26 PM
|
||||
|
||||
|
This trim piece will also get some work done to it. These parts will be a great test for our plastic weld compound.
 This is a very clean break that I taped up from the outside to begin reconstruction from the inside. 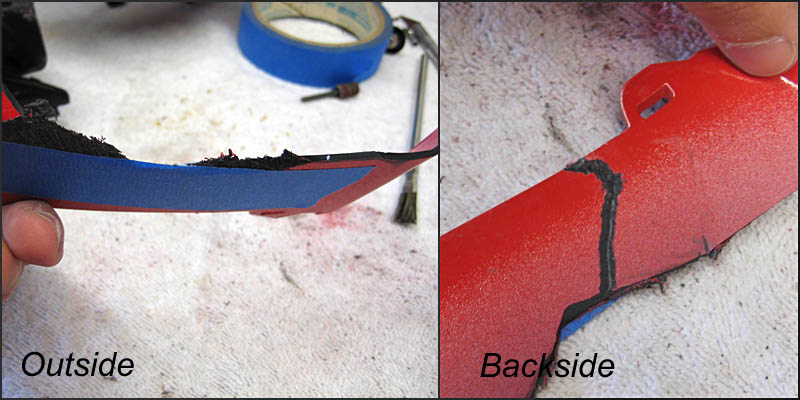 I put some adhesive in the joint to prime it and hold it together initially. Then I just put some powder on top of it and added a couple drops. The bond happens very fast. After a minute I sprayed the area with the accelerator that is provided with the kit. Supposedly the liquid chemically removes the oxygen which causes the adhesive to harden much faster than without.  I did not use the dremel to make a groove along the outside of the crack. The adhesive bonded well to the perfect crack and left the surface nice and flush.
|
|
#9
05-07-2008, 10:31 PM
|
||||
|
||||
|
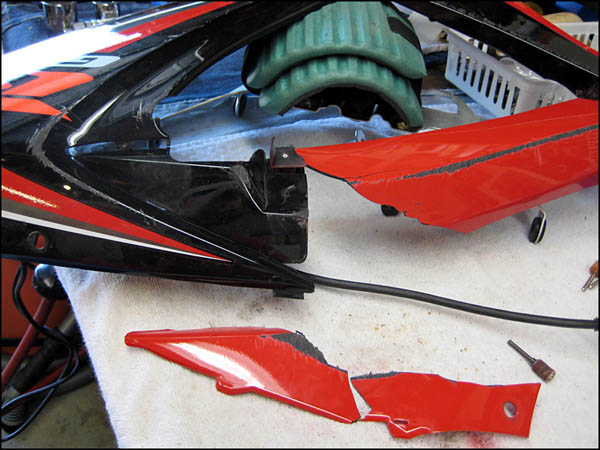
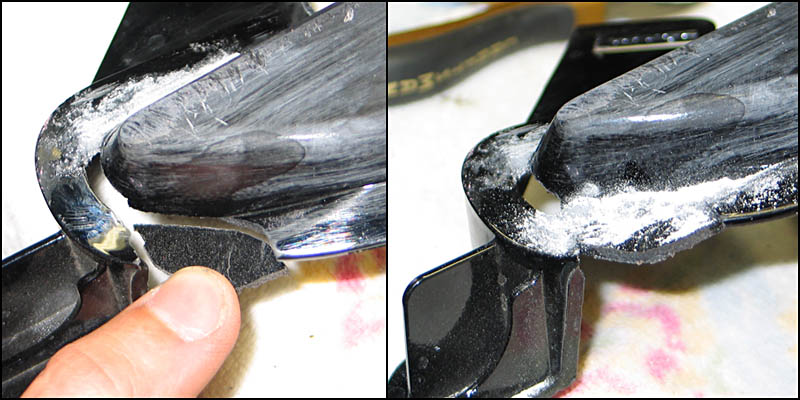
Now on to the black right side fairing that took a big amount of damage. The tip piece was completely broken off so this made a great test piece. The plastic weld worked VERY well and I really put the finished piece to the test by flexing it back and forth in my hands. It held great. I used tape on the outside to hold the pieces together while I used adhesive to hold the parts at first. Then I started to fill the cracks with powder and then apply some adhesive on top of it. The acid brush really helps even out the powder nice and smooth before you add the adhesive. Once the powder is touched by the adhesive it basically turns to stone.
 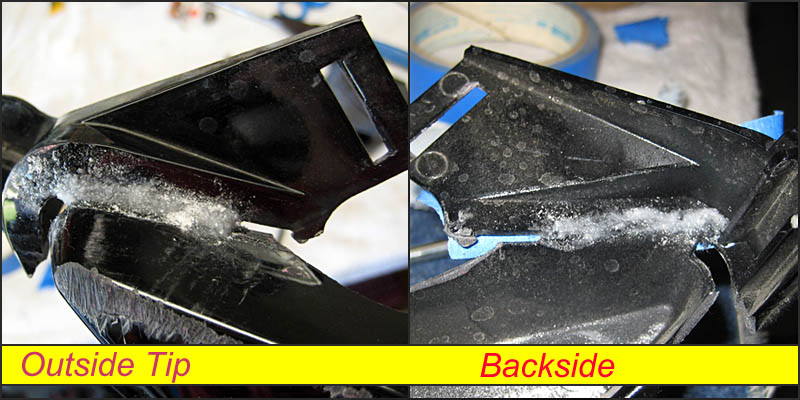 It looks rough now but later on I was able to sand it with 100 grit paper to make it nice. I eventually will put a coat of Thin Ice over it and give it a smooth finish. For a part that was completely broken off this turned out very nice.
|
|
#10
05-07-2008, 10:47 PM
|
||||
|
||||
|
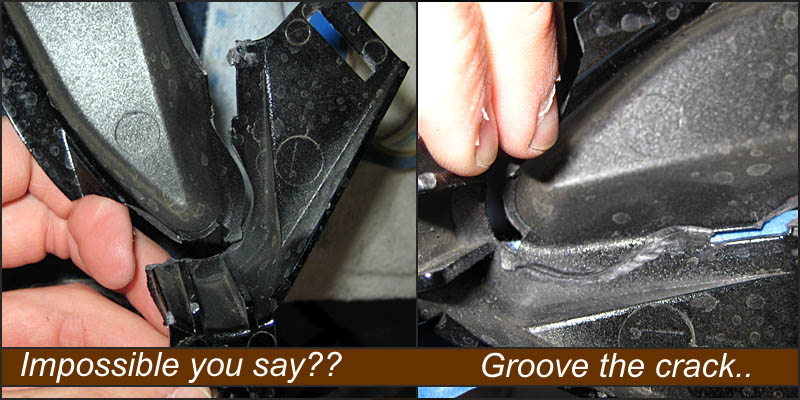
This is a big crack that I taped on the outside and did the same process on. The crack is nice and clean so the adhesive worked well enough that I didn't have to put a groove along the outside crack. The plastic did deform a bit though so it isn't exactly perfect but the Thin Ice compound will do the rest.
 Here we go tape the outside to make the crack sit flush. 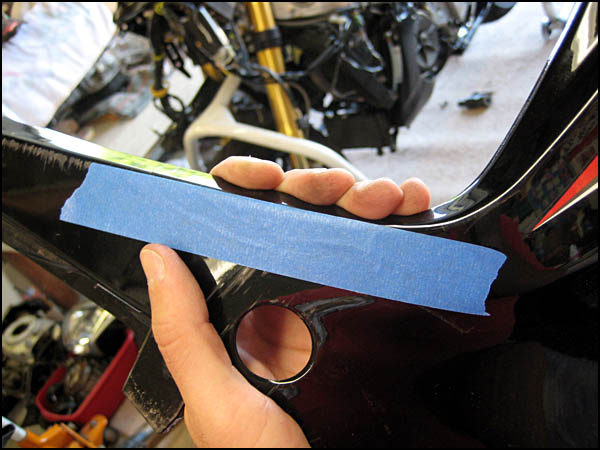 Groove the crack to allow material to fill and make a good plastic weld. 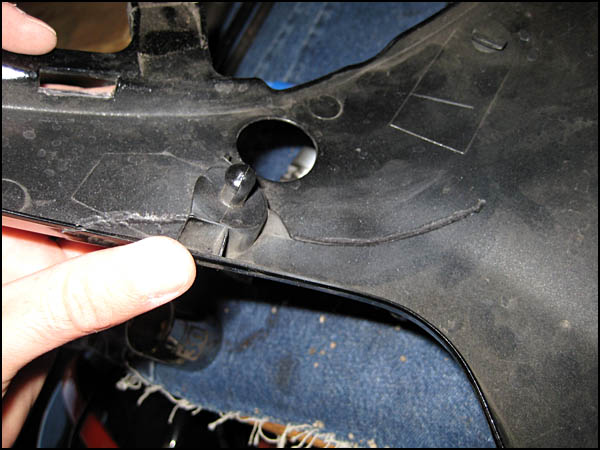 I applied some adhesive, then sprinkled and evened out some powder up and down the crack. Then I put a drop of adhesive every inch along the line of powder. The bond is rock solid. 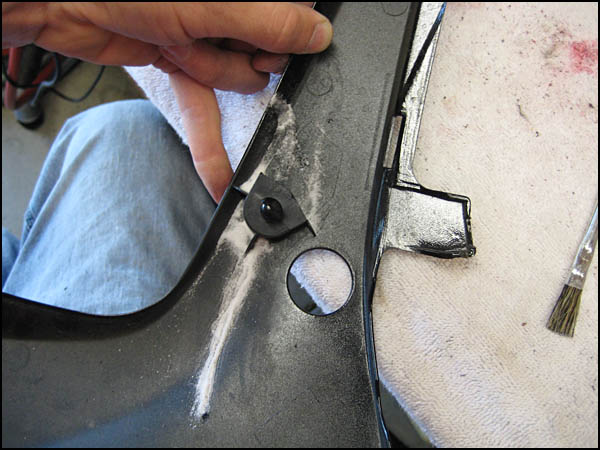  Since the plastic is deformed a bit from the twisting apart I used some more material to fill and even out the crack on the outside. Once dry I could sand it down a little and then use the Thin Ice compound to make the surface smooth like it should be. 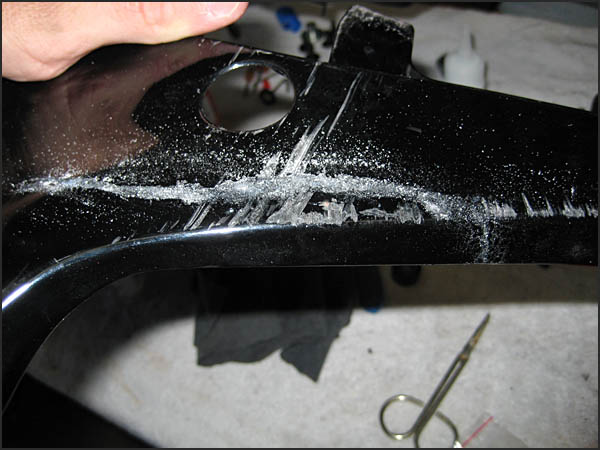
|
|
#11
05-07-2008, 11:09 PM
|
||||
|
||||
|
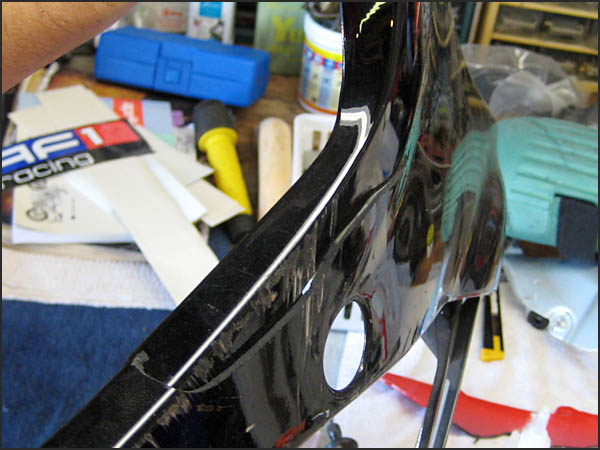
So if you scroll up and look at the piece that was completely broken off and welded you might notice that it's really in bad shape even though it's welded up. Well not it's time to cut some spare ABS plastic and weld it to the fairing. I have some spare plastic from my Aprilia so I cut down a little sliver or two and simply welded it to the fairing without any problem.
 I simply dripped adhesive in the cracks and put down some powder on top of it like usual. Seeing how the parts are really small I had to hold them with my fingers up close. When the plastic weld adhesive touches your skin it INSTANTLY bond your fingers together. It was pretty scary but I managed to pull my fingers apart and then I had to use my metal file to file off the glue that was welded on my fingertip. I will have to buy some latex gloves for next time! ") 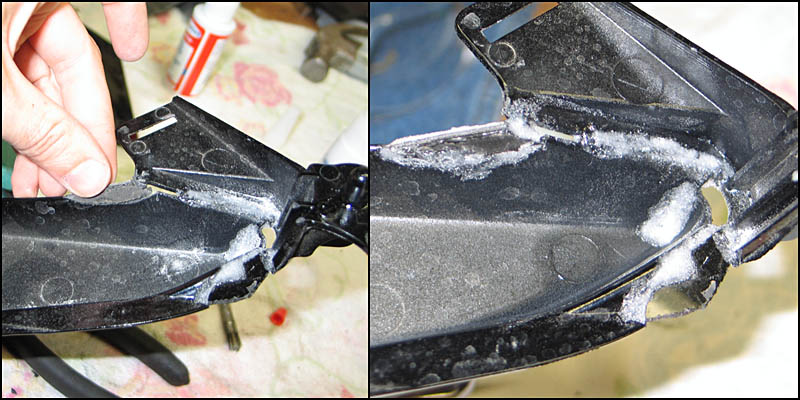 The inside isn't so pretty but it's damn strong! The outside actually looks pretty nice now that it's sanded. I'll be posting more pictures of it being finished and smoothed over later on.
|
|
| Thread Tools | |
|
|