|
|||||||
| The Honda CA95 / Benly 150 Restoration The little brother to the CA160 in our family of Hondas |
 |
| Thread Tools |
|
#1
|
|||
|
|||
|
Introduction:
I'm a new member on the forum here, my name is Gregg. I have a couple of Hondas; a '71 CB500 SOHC4, a '97 Prelude, and this '65 CA95 150 Benly I picked up a few months ago. I'm playing catch-up with this first post, as I have project threads for the CB500 and the CA95 on the SOHC4 forum. Future posts here will likely be similar. I've gathered 95% of my parts, and I'm almost ready to tear her down and rebuild. Thank you in advance for any help. Here we go! Here's the latest addition to my stable. I can call two bikes a stable, right? Anyhow, she's a 1965 CA95 Benly Touring, all original, 5K miles, all the pieces are there (even the horribly corroded original petcock), never been restored, she was cheap, and...SHE RUNS ;D We got her to fire on both cylinders last night after a bad plug was resolved. Almost better than the deal on the bike was getting to meet the PO, who has a 5K square foot warehouse stuffed to the gills with about 100 rare old bikes and cars. I got invited back to work on projects and take pictures, and I didn't have my good camera, so better pics will come later. My plan is to clean her up a little: replace the crusty cables, find a new petcock, clean the tank, find a new battery and cruise her around. I've never worked on one of these, so any advice or good resources would be greatly appreciated! - 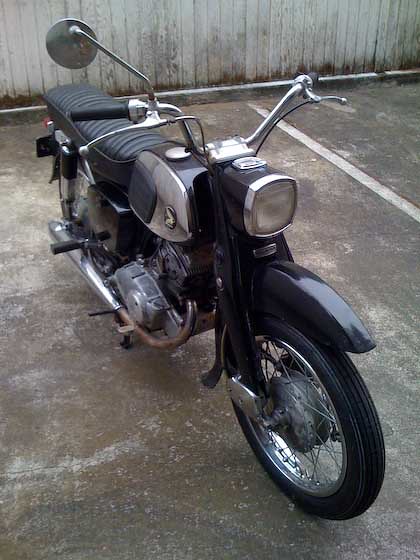 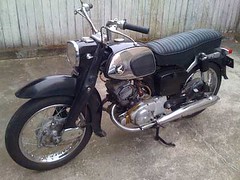 The outside has great patina, but the inside is another story.. 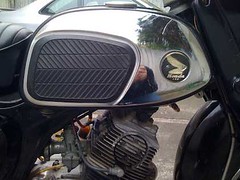 His homemade petcock... 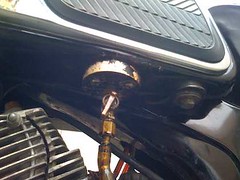 ...made kind of a mess... 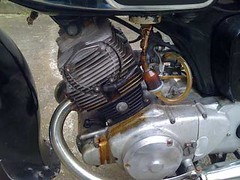 The other side is much nicer  In his shop last night 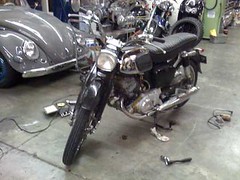 And the few shots I managed to get without being rude and not listening to his stories about his bikes: Triumph GT6 Fastback 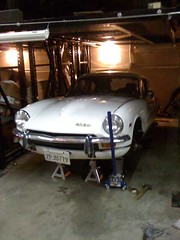 A DeTomassa Pantera engine (w/incorrect head resting on it) Sitting next to an orange 454 engine. 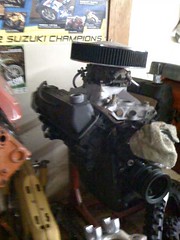 SL90? 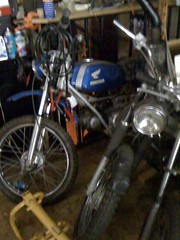 Name This Bike... 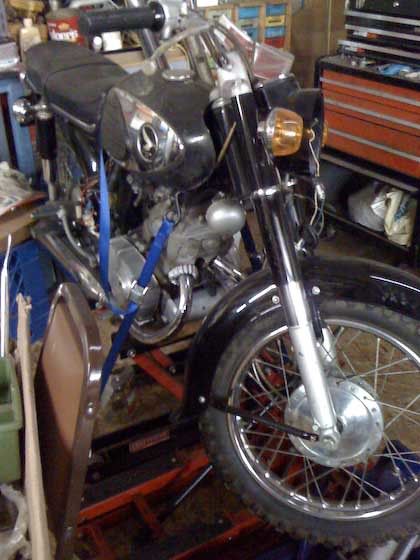 Two sweet bikes whose names I managed to forget..but the one on the right was by a company that was bought out by Harley, but this one was from before that) <EDIT> It's an Aermacchi on the right. 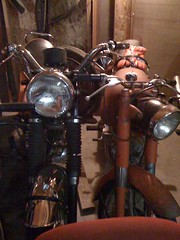 More to come as I clean her up. Maybe even a vid!? Oh, and here's my 'stable' 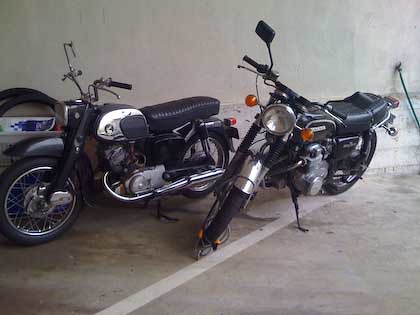 Oh, and here's what's left of the bike's original petcock... 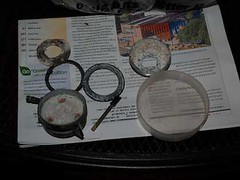 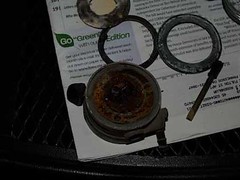
Last edited by Greggo325; 12-25-2010 at 08:09 PM. 
|
|
#2
 12-17-2010, 05:44 PM
|
|||
|
|||
|
The sun broke out for a little bit, so I took a few pics. I cleaned off a bunch of wax from some hard to reach nooks n crannies that were overlooked by whoever cleaned her last.
I have a gasket set on the way for when I rebuild her, which may be very soon. She spat out a good amount of oily liquid from the cylinder that wasn't firing, so I think the rings may be shot :-\ I just smile when I look at that thing. 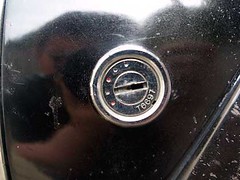 Not too bad on the outside 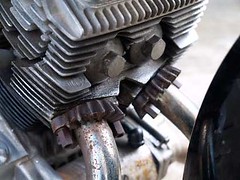 Speedo/Odo both work ;D ;D 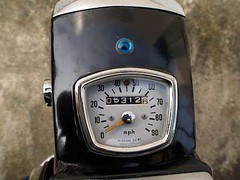  He said the pipes were $300 bucks on ebay, so I guess my 'all original' claim is sort of shot. 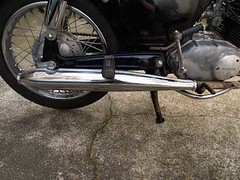 He's got the right header pipe for me somewhere in that shop, so I'll get it eventually. Brand new Chinese tires already on the bike...Good for temporarily holding air 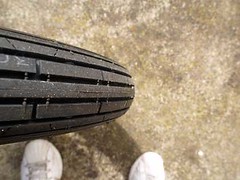 Sprockets/chain will be replaced  The tank needs a serious cleaning   <EDIT> THIS TANK HAS BEEN DEEMED UNUSEABLE DUE TO OLD LINER <EDIT> I love the crinkly paint. I will not be refinishing any surfaces. This bike was clearly kept inside here in sunny California, and I think it'd be a shame to significantly alter it. My dad has kept some beautiful automobiles over my lifetime; he's had some of them longer than he's been married, namely his 356's. His convertible has the original white paint from 1963, and with all her cracks and crinkles, I think it's the most beautiful 356 I've seen outside of a museum. It's only original once.  Got my $70 ebay petcock, it's in great shape. I had no reason to think it would leak all over the place when I installed it :  I got most of the old liner out of the tank after a good bath in 'The Works' The molasses did nothing...I rinsed it out and gave it a good baking soda wash to neutralize the reaction, rinsed it out some more, and filled her up with gas after drying out in the hot sun (We broke some records here in the Bay Area today). I got most of the old liner out of the tank after a good bath in 'The Works' The molasses did nothing...I rinsed it out and gave it a good baking soda wash to neutralize the reaction, rinsed it out some more, and filled her up with gas after drying out in the hot sun (We broke some records here in the Bay Area today). 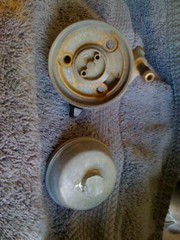 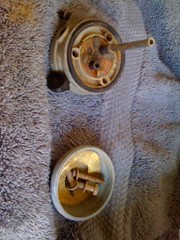 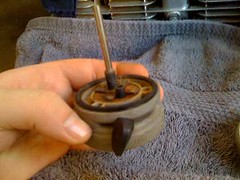 First I thought the petcock wasn't screwed on tight enough, so after spilling gas everywhere to tighten the screws, the lever wouldn't move anymore, and it still leaked. Luckily, I had cleaned up the PO's jerry rigged petcock with some carb cleaner and a new filter, so for now I'll use that. 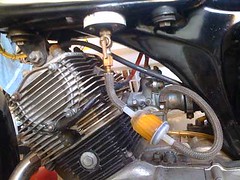 So, all this cleaning, gas spilling and frustration took up about seven hours of my day off. To top it off: When I went to start her up...the battery I'd charged up was dead :-[ On the bright side, the PO found the pipes he said he would give me. Oh well, tomorrow is another day. ----- Finally got my new battery today. Replaced the D10HS plugs the PO had in there with what are supposed to be correct D8HA's. I installed everything, turn the ignition on and the brake light lit up, so she's got power, but she won't start. Do you guys have any tips for getting these girls started? Choke? Throttle? The electric starter turns the motor over, and she's getting gas, so I'm thinking I'm probably just doing something wrong. I have no idea what the switch on the left handle does, but I tried starting it in both positions. The choke has a lever with an arrow pointing outward that says "OPEN", but does that mean the choke is on when the lever is lifted, and the throat is open when it's pushed down? Thanks Guys! Oh, and here's a chunk of the tank liner I pulled out laying dead on the driveway. 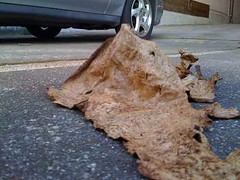
Last edited by Greggo325; 12-17-2010 at 05:46 PM.
|
|
#3
12-17-2010, 05:49 PM
|
|||
|
|||
|
Tore into the carburetor. By the looks of the gaskets, it's been a long time since it's been rebuilt.
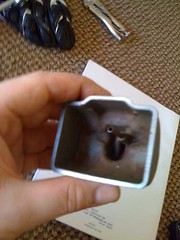 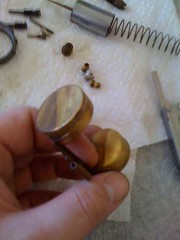 As I was taking it apart, the two small springs on the left side of the picture below dropped out from I don't know where I hadn't seen them as I was unscrewing everything. Does anybody recognize where these go?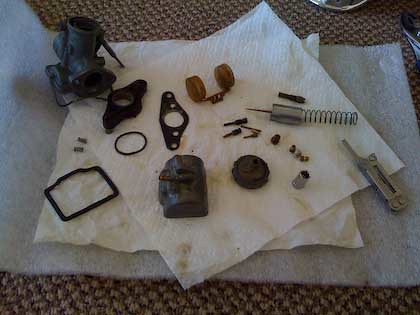 I replaced the plugs and battery. I have spark, but no gas because I've discovered that the tank is clogged. I really thought I got most of that crap out of there, but I guess not...What will dissolve old tank liners without destroying my old tank and paint ??? ------ I bought a 'new' tank.  It's from an early model, complete with petcock and chrome/rubber covers for forty bucks and no shipping (it's local). ------ Well, progress has been slow. I've been gathering parts (petcock/carb rebuild kits, and throttle/brake/clutch cables). I've rebuilt the carburetor (my first one ;D). And, I picked up a used early model tank with petcock for $45 ;D ;D. The petcock is way nicer than the ones I have, so I'll be using the rebuild kit on it once it's cleaned up. The petcock was worth what I paid for the tank, and the tank is in really nice shape inside. Here's the carb after the rebuild 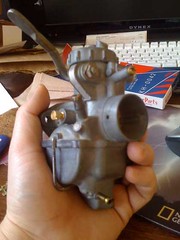  I used a Keyster kit.  The "new" tank after I pulled the chrome covers off. The inside is really nice and clean. 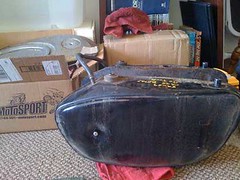 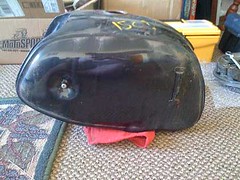 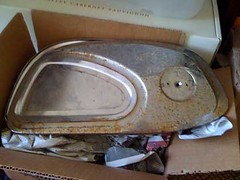 Here's the petcock that came with the tank, it’s in incredible shape! 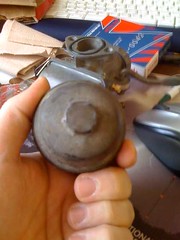  A very important lesson my dad (a VW mechanic) taught me years ago really rang true when I opened up the rebuild kit for the petcock: "Never throw any parts away, no matter how trashed" I had been expecting this piece to be included, and was very happy I hadn't thrown mine away. 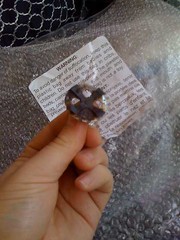 This piece can get really mangled when trying to disassemble these fuel valves, so be careful... The rebuild kit came with a rubber and a cork gasket...any opinions on which one I should use?? [img] http://farm6.static.flickr.com/5167/...dc34e6bc_m.jpg [img] Anyhoo, once I get the tank and petcock cleaned up I should be able to get her to fire up! ------ I learned that the early and late model tank covers ARE NOT interchangeable. First is the early model tank followed by the cover, then the late model tank and cover. 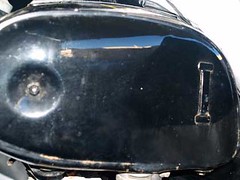 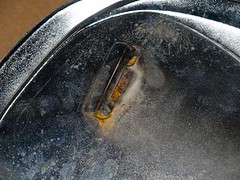 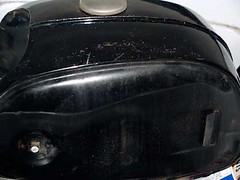 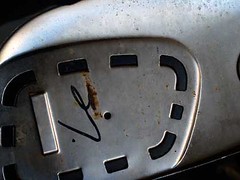 As you can see, the covers switched jobs with the tanks with the later model. The tank does also seem to be slightly different in shape. Last edited by Greggo325; 12-17-2010 at 05:53 PM.
|
|
#4
12-17-2010, 05:54 PM
|
|||
|
|||
|
My quest for a tank has ended with what some might consider a piece of the unobtanium...a NOS late model tank
It's from a guy on ebay who's selling off the remains of his parts shop in the midwest. I got a smokin' deal on it compared to his asking price. He wanted $475 OBO. I offered $200 thinking no way will he accept it, but this morning I looked, and he did! He had one up for auction a few weeks ago that went for over $300, so I'm pretty pleased with myself. It just needs some paint, and my nice chrome covers and I'll be set! I've ordered the snowmobile plug wire so I can redo my coil. The throttle cable has been replaced with a fresh, lubed one, and I lubed the throttle slider as well. The clutch cable requires one to remove the left side exhaust, which will require a blowtorch to remove one of my bolts...luckily the clutch cable isn't too crusty, so I may put that job off till she's fully functional. Last edited by Greggo325; 12-17-2010 at 05:56 PM.
|
|
#6
12-17-2010, 06:31 PM
|
||||
|
||||
|
Welcome to the forum here btw... there is a ton of info on the troubleshooting process for a CA95 engine that won't start. You have to make sure you have spark #1 of course. There is a LOT of info on carb setup around here. I'm sure you're reading some currently. Those petcocks are pesky! That's why I took good care to post detailed pictures and how I restored mine.
|
|
#7
12-17-2010, 07:09 PM
|
|||
|
|||
|
Quote:
I eventually got the petcock to stop leaking. It seems I was over tightening the screws. I also felt that the cork gasket fit better. Ryan - You have a spare tank? Very nice! This one will be my third, as I have the original trashed tank, and an early model as well. Do all years share the same wiring harness? OH!, and I'd really like to hear others' sprocket setups. I have a 36 tooth on the back, and I need a blowtorch to get the clutch cover off, so I don't know what my front tooth count is yet. Thanks Guys! Last edited by Greggo325; 12-18-2010 at 05:42 PM.
|
|
#8
12-19-2010, 12:25 AM
|
||||
|
||||
|
Those petcocks are a science. They are one of the most difficult parts of getting an old Honda back on the road. As the years pass tanks are becoming more and more rare just like everything else on these bikes. I wonder what it will be like in 10 years in regards to trying to find good parts. I have another tank in great shape that I don't even know what model it was from. I'll have to post the picture up and take suggestions.
Sprockets - I've always run the sprockets that came on whatever Honda I've come into possession of. I've thought about changing sprockets on my blue 150 but just never got motivated enough to order some. We should start a sprocket and chain thread discussing the subject of size and chain size etc. It basically comes down to if you have hills around your area that you ride or not. I'm a fan of being able to cruise 55mph but shoot with that kind of gearing you can't scoot up any decent size hills without slowing way down. I'm not sure on what wiring harness works on what bike or which are similar. Is yours in bad shape?
|
|
#9
12-19-2010, 11:30 AM
|
|||
|
|||
|
The rear sprockets on the CA95 & 160 are mostly 36 tooth. You probably have a 16 tooth on the engine. You can go down to a 12 tooth on the engine to gain more low end torque, but you sacrifice high end speed. You can go with a bigger rear sprocket if you don't use the chain guard. I replace chain and sprockets for my restore projects as a matter of habit and use standard sizes.
|
|
#10
12-19-2010, 08:27 PM
|
||||
|
||||
|
Quote:
Quote:
Quote:
Quote:
 I will drop a tooth or two on the front, and stay stock on the back. It's best not to divert too far from stock. I will drop a tooth or two on the front, and stay stock on the back. It's best not to divert too far from stock.Also, I will be replacing the brake shoes front and back when I change the sprocket. I'd also like to change all the bearings, and possibly the dampers in the rear hub. Oh, tires are on the list too. Do you have any suggestions, comments, or sources for parts I should attain before doing this. I only want to take the wheels off once as I hear it can be a pain. The bike has five thousand miles, and I don't know it's history, so I'm assuming nothing's ever been replaced. I really need a source for bearings. I found a set online, but I'm not sure about the quality. Are there really five bearings for the wheels?? Thanks for the help guys! Last edited by Greggo325; 12-19-2010 at 08:42 PM.
|
|
#11
12-19-2010, 09:23 PM
|
|||
|
|||
|
Yes there are 5 bearings total for the CA95. Two in the front hub and Three in the rear(Two in the wheel hub and one in the sprocket drive hub)
I listed procedures to remove the bearings here in the forum. Bearings are an easy find. Read the side of the bearing for make and size. They still can be found from a bearing supply house. You have a choice when replacing wheel bearings. Open face and back (need to keep greased) OR (what I use) is new sealed bearings, good for 10K miles without the need to lube. I reuse the wheel bearing seals with the new sealed bearings just to keep the assembly complete.
|
|
#13
12-19-2010, 11:13 PM
|
||||
|
||||
|
Yeah we moved the forum location and lost some picture links because of a bug in the software. There was no way to fix it. I posted my apologies and what our forum members could do about it if they wanted to help those older posts with missing pictures. Here is the info: http://www.fourwheelforum.com/forum/showpost.php?p=5344&postcount=7
|
|
#14
12-20-2010, 04:50 AM
|
|||
|
|||
|
I will be doing some new pics soon. Basically use a 3/8 concrete anchor and expand it inside the inner race. Use a drift pin or a sutable size rod to drive against the secured anchor base from the opposite side, to drive out the bearing. You have to remove the odometer drive plate to get at the right side, front wheel bearing.
I tap the new bearings in using a socket that fits the outer race. Make sure all surfaces are pristine clean with a very thin coating of lube (WD40 or the like) You can use a socket to drive out the drive hub bearing (holding the sprocket) and seal together.
|
|
#15
12-21-2010, 04:55 PM
|
|||
|
|||
|
Cleared a major hurdle today, and started the registration process. The DMV now has at least something with my name on it linked to that bike. I set up an appointment with a CHP officer to come to my house to do the VIN verification, and then I'm set! I've been saving the majority of the laborious work until this process is done, so it wouldn't be a wasted effort. She'll be back on the road soon!
I do need to replace the headlight. I think I'll do the replaceable bulb if it's not too complicated. I've been scouring ebay for a C95 (replaceable type) assembly, but no luck yet.
|


