FourWheelForum  

Go Back   FourWheelForum > Motorcycles & Streetbikes! > The Honda CA95 / Benly 150 Restoration

The Honda CA95 / Benly 150 Restoration The little brother to the CA160 in our family of Hondas

Reply
Thread Tools
  #1  
Unread 05-22-2012, 06:07 PM
Buckets81's Avatar
Buckets81 Buckets81 is offline
Member
 
Join Date: May 2012
Location: Tucson, AZ
Posts: 79
Default My new project

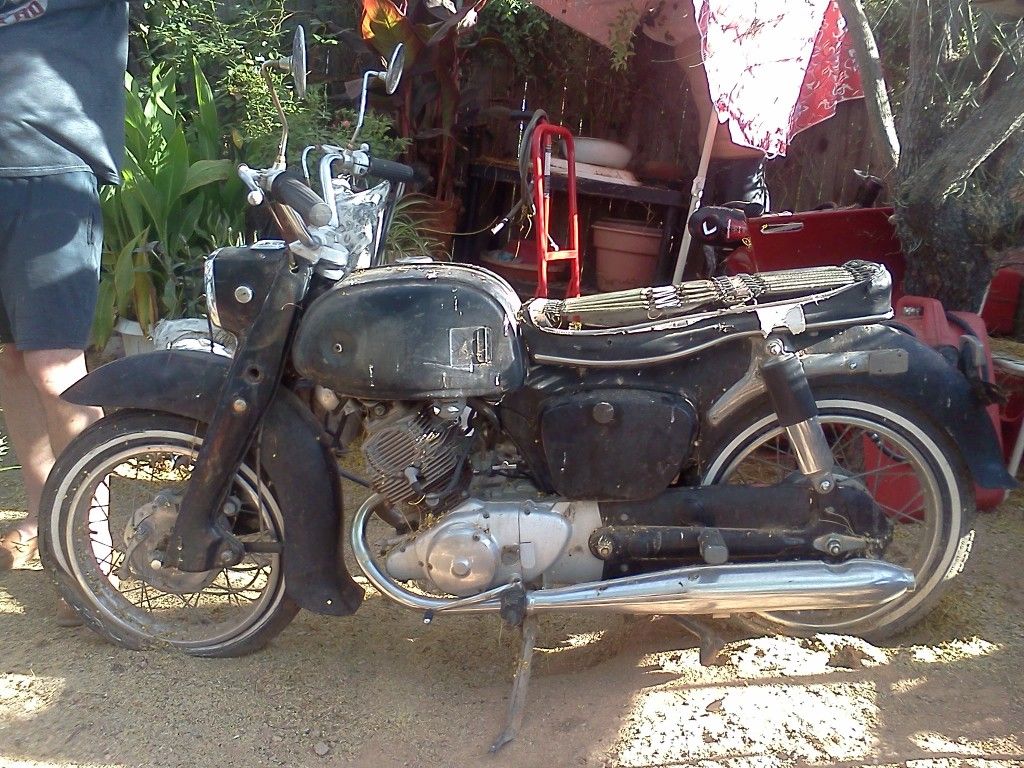
I recently came across a low mileage CA95 which appears to be a '65 according to the chart posted on this forum. I paid $150 for it and hauled it off. Overall, the thing appears to be in pretty good shape and I'm working to get it on the road. The bike is almost complete but is missing the gas tank covers and the lower fork covers, which I'll track down after I have the thing on the road. Mechanically, it appears to be perfect. The oil in the crankcase even looked brand new when I drained it. The lower chainguard has a little bit of rust, the tank has some minor rust and is sitting in a molasses bath as I type and I'm hoping the speedometer can be freed and used.

I'm really excited about the bike, although it is getting to be a bit more expensive than I originally though. The carb and petcock were both filled with varnish and in terrible need of a rebuild. I soaked them in carb dip for a week to clean them out and ordered rebuild kits from e-bay. Plugs, plug boots, cables, an air filter and a seat cover have all been ordered from e-bay. I need a new chain (would a local motorcycle shop carry the right size?) and I've decided to do the 12 volt "conversion" I've read about on here. I ordered some funky looking enduro tires for $25 apiece from JC Whitney that should do for now.

My brother recently bought an '85 GL1200 and I started looking for a bike to ride with him. The Benly probably wasn't the best choice (I'm probably being optimistic in thinking that it will take me up a local mountain at 35 MPH) but I fell in love with the thing as soon as I saw it.

Anyhow, here is a picture of the bike as I found it. I'll update the thread as the bike progresses. Any tips or tricks would be more than welcome.

Last edited by Buckets81; 05-31-2012 at 05:29 PM.
Reply With Quote
  #2  
Unread 05-22-2012, 09:36 PM
Smithers's Avatar
Smithers Smithers is offline
Admin
 
Join Date: Feb 2004
Location: San Luis Obispo, CA
Posts: 3,238
Send a message via AIM to Smithers Send a message via Skype™ to Smithers
Default

Good to see you here! You really have a great start on that bike actually. Chain guard - check. Fuel Tank/ Petcock - Check. Good front fender - CHECK! Looks like a good one for sure.

I think you can make that bike haul up that road at a decent speed too. Especially if you buy a knock off carb on Ebay and play with it a little bit. You scored that bike for $150.
Reply With Quote
  #3  
Unread 05-23-2012, 05:02 AM
Buckets81's Avatar
Buckets81 Buckets81 is offline
Member
 
Join Date: May 2012
Location: Tucson, AZ
Posts: 79
Default

The front fender has a ding on the other side but I think I can knock it out without too much trouble. This weekend ought to be busy for me! Parts for the bike are trickling in and the locker I ordered for my Jeep is supposed to be here on Thursday. Fun times! I'm going to try to get the motorcycle going without opening the engine. Everything else will be disassembled, cleaned and lubed. Am I setting myself up for disaster if I don't go through the engine and transmission as well?

Last edited by Buckets81; 05-23-2012 at 05:17 AM.
Reply With Quote
  #4  
Unread 05-23-2012, 06:03 AM
Jetblackchemist Jetblackchemist is offline
Senior Member
 
Join Date: Apr 2011
Posts: 463
Default

Done.

Last edited by Jetblackchemist; 11-09-2012 at 10:29 PM.
Reply With Quote
  #5  
Unread 05-23-2012, 08:26 AM
Buckets81's Avatar
Buckets81 Buckets81 is offline
Member
 
Join Date: May 2012
Location: Tucson, AZ
Posts: 79
Default

Quote:
Originally Posted by Jetblackchemist View Post
Welcome to the forum, it sounds like things are off to a good start. Interesting choice on the knobs, I think you can get away with not opening it up...based on the fact that these little motors are built like tank and your oil was pristine. It's always a good idea to get a bike fired up before getting into the motor; that way if you do go in there, you can diagnose any problem areas first by how she runs.
Thanks for the welcome! The tires are a bit funky but they were cheap and will get me on the road. I'll spring for some whitewalls when they are available and I have everything else on the bike sorted out. Good to know about the engine. I got a bit spooked reading some posts on here about crankshaft problems and the like given the limited availability of parts.

Quote:
After you get the carburetor, and pet sewed up, clean and check the point gap, put in new plugs, check for spark add some gas...flip the choke, kick it over and see what happens.
That's the plan! I hope it fires up. I can't wait to hear it run!

Quote:
A lot of people swear by seafoam, to clean out everything it touches...I myself haven't ever used it, but if it can save going in and cleaning out all the carbon, as they say...then I am all for it.
I run a can through my Jeep every few months and I swear by it as well. I'm not sure how much carbon buildup there will be after 2335 miles but it can't hurt.

Quote:
If you have any questions when you get on the 12V feel free to PM me; if you have an issue, I've walked a couple of people through it that needed extra help; mainly it's been wire color issues...the rest is pretty straight forward.
I read your tutorial and it looks pretty straightforward. I don't anticipate any problems. My wiring harness is in great shape and I already picked up the rectifier at Radio Shack. How does your headlight conversion work at night? I'll probably avoid riding at night but I'm sure there will be times when I'm caught out after dark and it would be nice to be able to see.

Quote:
Edit: Oh yeah, congrats on the choice; when it's all said and done, your brother is going to want want one
I think he already does. He's already trying to talk me into switching bikes for a Mt. Lemmon run after we get mine going. I can't wait to get it put back together and take a picture of it with his and my uncle's Goldwings.
Reply With Quote
  #6  
Unread 05-23-2012, 10:27 AM
Jetblackchemist Jetblackchemist is offline
Senior Member
 
Join Date: Apr 2011
Posts: 463
Default

Done.

Last edited by Jetblackchemist; 11-09-2012 at 10:30 PM.
Reply With Quote
  #7  
Unread 05-23-2012, 04:39 PM
Buckets81's Avatar
Buckets81 Buckets81 is offline
Member
 
Join Date: May 2012
Location: Tucson, AZ
Posts: 79
Default

It was like Christmas in my mailbox when I got home today! My petcock kit, seat cover (missing the Honda silkscreen on the back but I can live with that) and tubes were all in the mail to go along with the tires, rim strips and carb kit I already had. To top it all off, my locker showed up a day early too! I'm going to try to get the seat re-covered over the weekend (need to make a trip to the fabric store to pick out some foam) and hopefully install the locker.

*EDIT* the cover did include a Honda logo but it's iron on. Good lord, I need idiot proof!

Last edited by Buckets81; 05-23-2012 at 08:35 PM.
Reply With Quote
  #8  
Unread 05-24-2012, 04:55 AM
Coty_Jim Coty_Jim is offline
Junior Member
 
Join Date: Dec 2011
Location: N. Illinois
Posts: 4
Default

Quote:
Originally Posted by Smithers View Post
Good to see you here! You really have a great start on that bike actually. Chain guard - check. Fuel Tank/ Petcock - Check. Good front fender - CHECK! Looks like a good one for sure.

I think you can make that bike haul up that road at a decent speed too. Especially if you buy a knock off carb on Ebay and play with it a little bit. You scored that bike for $150.
After spending a couple days of cleaning and rebuild of the carb for my CA150 I would have rather bought a new "generic" carb that would fit, but I couldn't find one with the correct bolt center to center dimension. Do you have a link to one that fits, changing jets is not a problem.
Thanks,
Reply With Quote
  #9  
Unread 05-24-2012, 01:48 PM
Jetblackchemist Jetblackchemist is offline
Senior Member
 
Join Date: Apr 2011
Posts: 463
Default

Done.

Last edited by Jetblackchemist; 11-09-2012 at 10:30 PM.
Reply With Quote
  #10  
Unread 05-25-2012, 04:09 AM
Larzfromarz's Avatar
Larzfromarz Larzfromarz is offline
Senior Member
 
Join Date: Dec 2011
Posts: 620
Thumbs up

Welcome Bucket!
You are going to have a bunch of fun. looks like a decent start at a great price!
Love it when the postman comes too! Can't wait to see more-
Larz
Reply With Quote
  #11  
Unread 05-25-2012, 08:25 AM
Buckets81's Avatar
Buckets81 Buckets81 is offline
Member
 
Join Date: May 2012
Location: Tucson, AZ
Posts: 79
Default

My plan for this weekend is to re-cover my seat. I have the cover and I'll be picking up the high density foam, some spray adhesive and some quilting batting after work. Has anybody else done this on a seat that is completely missing the original foam? I was thinking that a 2" thick pad of foam for the base would be about right. Is that too thick? I'm a little worried about cutting the pad to the right size and shape but I think I can get close if I trace the seat frame and make my cuts based on that.

Please let me know if I'm way off base on anything. Wish me luck!
Reply With Quote
  #12  
Unread 05-25-2012, 11:53 AM
ByTheLake's Avatar
ByTheLake ByTheLake is offline
Senior Member
 
Join Date: Oct 2011
Location: Alden, MI USA
Posts: 730
Send a message via AIM to ByTheLake
Default

Quote:
Originally Posted by Buckets81 View Post
My plan for this weekend is to re-cover my seat. I have the cover and I'll be picking up the high density foam, some spray adhesive and some quilting batting after work. Has anybody else done this on a seat that is completely missing the original foam? I was thinking that a 2" thick pad of foam for the base would be about right. Is that too thick? I'm a little worried about cutting the pad to the right size and shape but I think I can get close if I trace the seat frame and make my cuts based on that.

Please let me know if I'm way off base on anything. Wish me luck!
I cheated and took the easy path and bought a replacement seat. I didn't trust my upholstery 'skills', although I saved my old rusty seat frame in the parts archive.

This guy wrote a piece about his CA95 project, which included a seat job similar to what you're doing. Might want to check his article, which is in PDF format. He includes some pictures of the seat foam.

Good luck with the seat.
Reply With Quote
  #13  
Unread 05-25-2012, 01:29 PM
Puzzleparadise's Avatar
Puzzleparadise Puzzleparadise is offline
Member
 
Join Date: Mar 2012
Posts: 75
Default

Quote:
Originally Posted by ByTheLake View Post
That's a hilarious piece...thanks for sharing
Reply With Quote
  #14  
Unread 05-31-2012, 05:25 PM
Buckets81's Avatar
Buckets81 Buckets81 is offline
Member
 
Join Date: May 2012
Location: Tucson, AZ
Posts: 79
Default

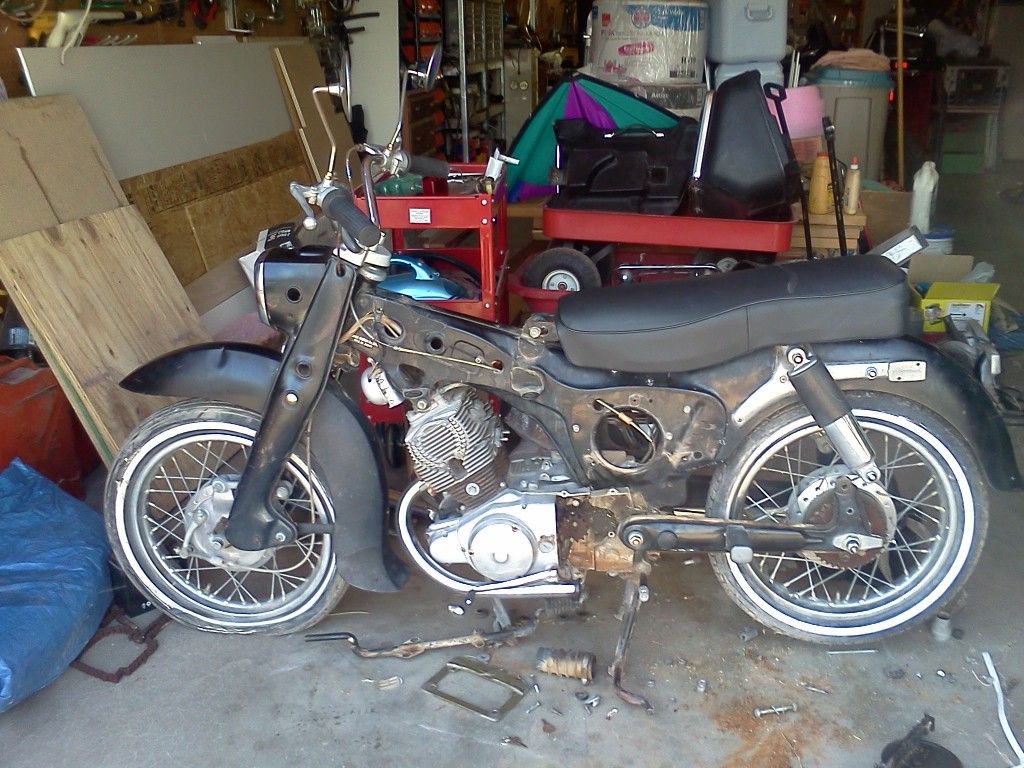
I went over to my aunt and uncles' house (where I'm keeping the bike until I can get it running, registered and on the road) to find that my brother re-covered the seat! The 2" foam I bought was a little thick but I think the extra cushion will be nice. Note the dent in the front fender. I think I'll be able to pound it out.


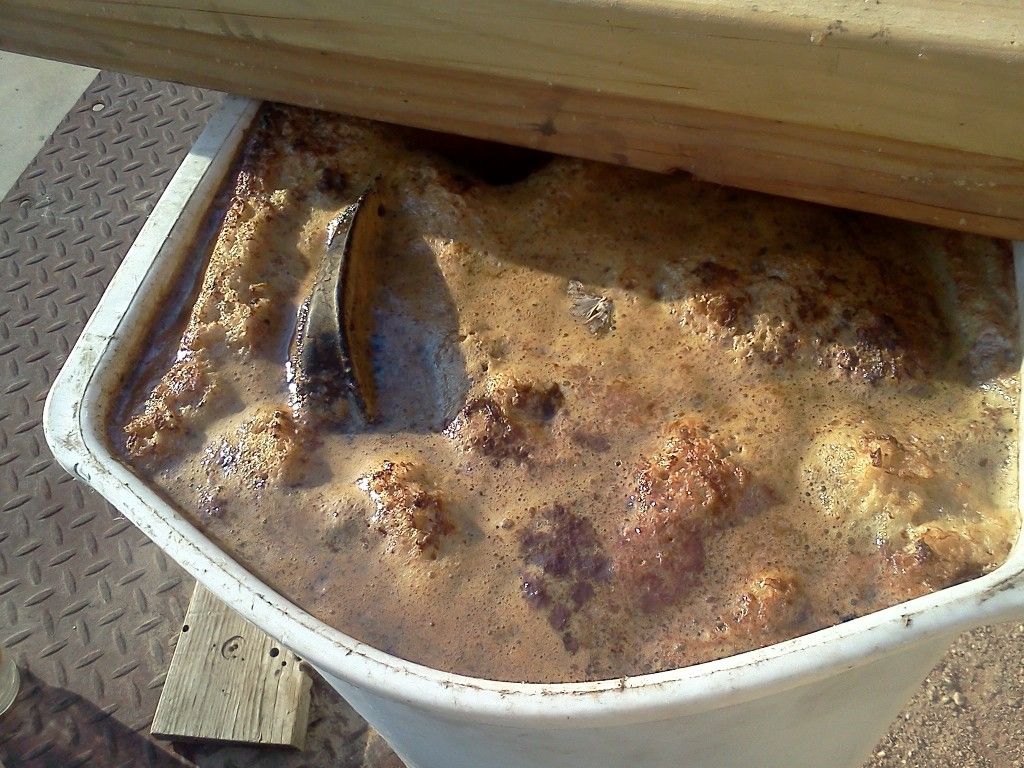
My tank has been sitting in a molasses bath for a few weeks and this is what the water looks like right now. I'm not even going to try to describe the smell. I have a Kream kit to line the inside of the tank (and probably remove more rust) which I'll probably use this weekend.


Things are progressing nicely. I'm in the process of getting a bonded title and by the time it comes through, I'm hoping to have the bike ready to ride.
Reply With Quote
  #15  
Unread 06-01-2012, 08:12 AM
Larzfromarz's Avatar
Larzfromarz Larzfromarz is offline
Senior Member
 
Join Date: Dec 2011
Posts: 620
Thumbs up

Wow the seat looks great! A weekend with some rubbing compound and wax and you'll be surprised how well the finish comes back too.
I am personally not big fan of Kream. I've had to clean out more Kream (and others) than rust. If I must coat I use the POR products. Just MY opinion tho...

You're making good progress keep it up!
Larz
Reply With Quote
Reply


Posting Rules
You may not post new threads
You may not post replies
You may not post attachments
You may not edit your posts

BB code is On
Smilies are On
[IMG] code is On
HTML code is Off
Forum Jump


All times are GMT -8. The time now is 04:52 AM.


Powered by vBulletin® Version 3.7.4
Copyright ©2000 - 2024, Jelsoft Enterprises Ltd.